
DIY Tutorial: Unicorn Crafts

Learn how to make a felt unicorn, a unicorn bookmark and a unicorn headband!
This DIY tutorial was created by Valerie Davis, our Newport Branch’s adult/teen services librarian. If you have any questions about the tutorial, please email her at VDavis@cc-pl.org.
All of these crafts use this Downloadable Felt Template. Please see the photos for each craft below to see which parts of the template are needed.
Felt Unicorn
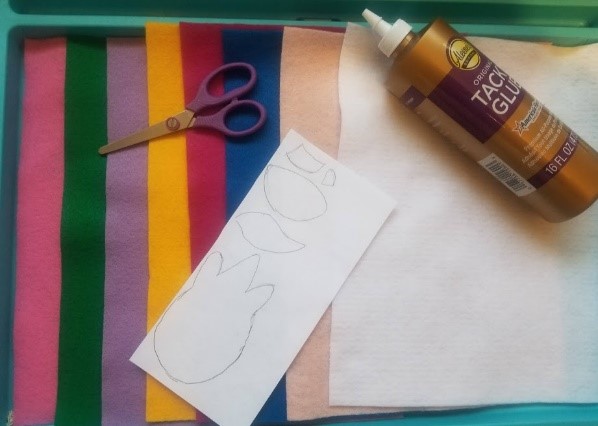
Supplies Needed:
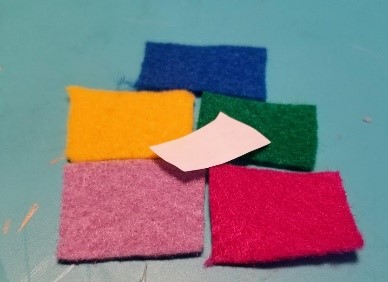
- Felt
- Glue
- Scissors
- Marker
- Downloadable Felt Template
Step 1
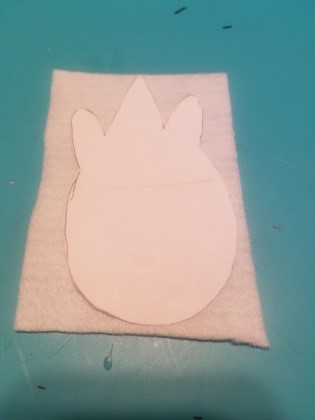
Cut out the unicorn face. You can use the downloadable template above to help.
Step 2
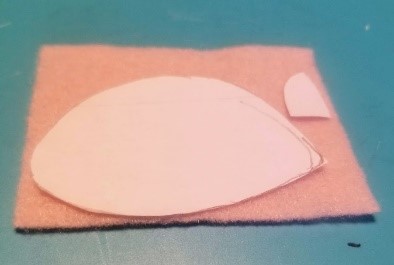
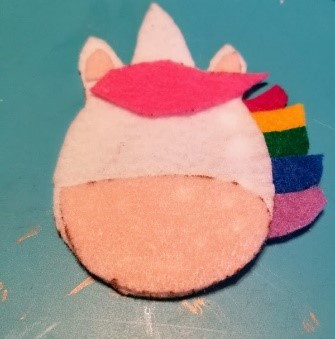
Cut out the ears and muzzle.
Step 3
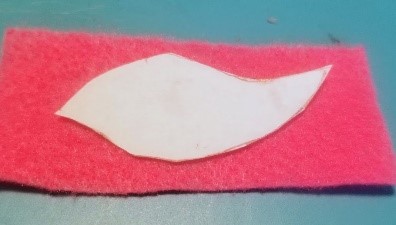
Cut out the front mane.
Step 4
Cut out five pieces for the side mane.
Step 5
Glue the ears and muzzle to the face. Glue the front mane to the top of the face below the horn. Lastly, glue the side mane pieces to the back of the face.
Step 6
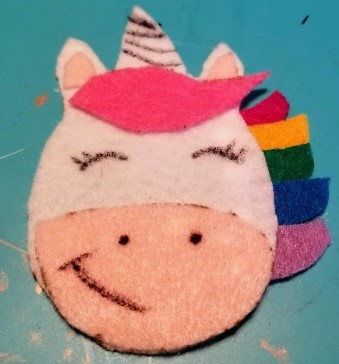
Draw eyes, a smile and a horn.
Step 7 (Optional)
Glue a piece of ribbon for hanging or a pin back.
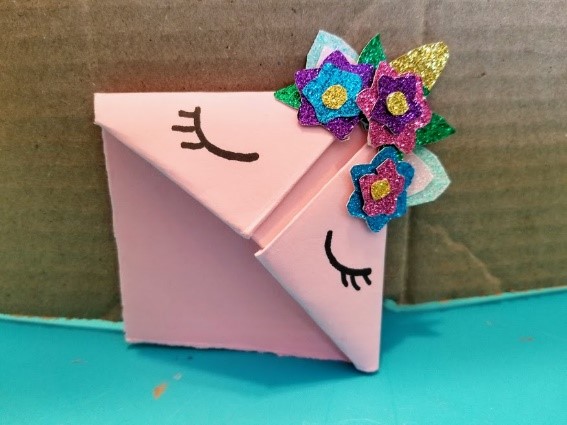
Unicorn Bookmark
Supplies Needed:
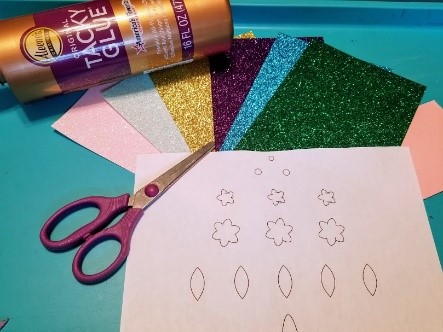
- Paper
- Glitter Paper optional
- Glue
- Scissors
- Marker
- Downloadable Felt Template
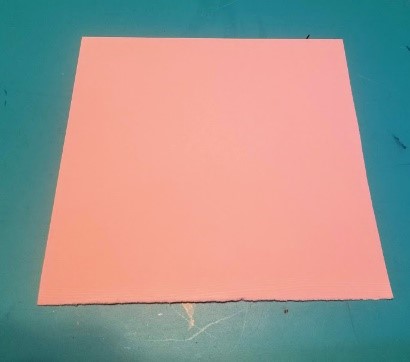
Step 1
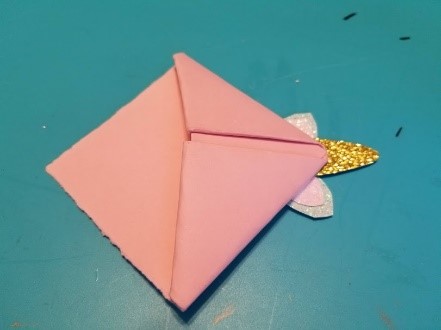
Get a square of paper.
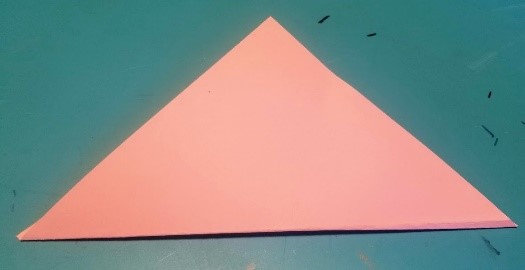
Step 2
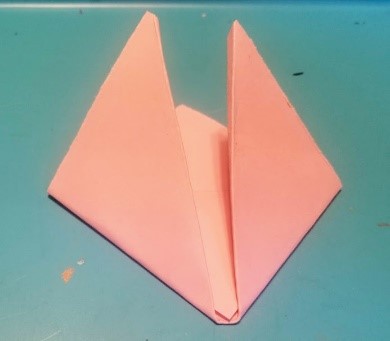
Fold point to point making a triangle. Crease the paper well.
Step 3
Fold the tip of one side of the triangle down.
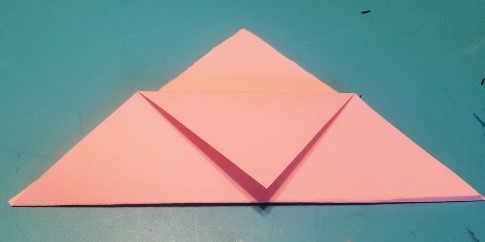
Step 4
Fold the bottom right edge of the triangle up to the top of the triangle.
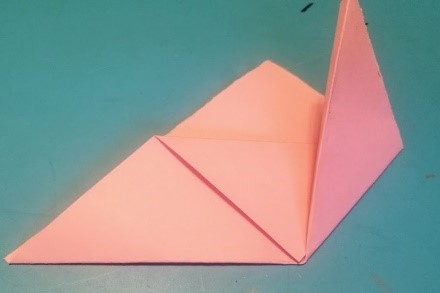
Step 5
Fold the bottom left edge of the triangle up to the top of the triangle.
Step 6
Tuck in the right edge.
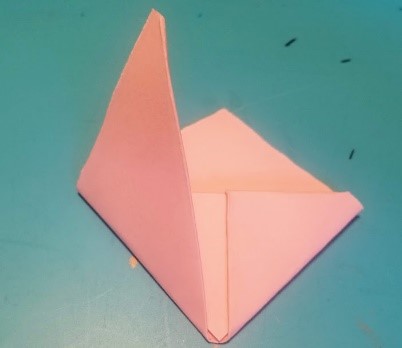
Step 7
Tuck in the left edge.
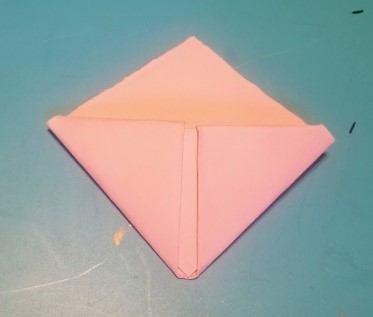
Step 8
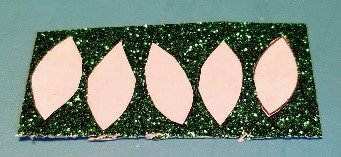
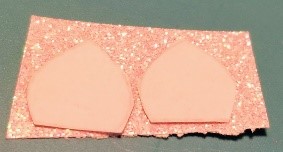
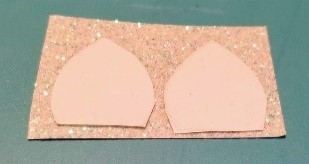
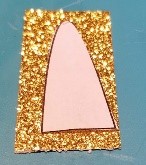
Use the downloadable template in the supplies section above to cut out the decorative pieces to create your unicorn face. We used glitter paper but you can also use regular paper.

Step 9
Glue the horn and ears.
Step 10
Glue the leaves and then the flowers.
Step 11
Draw the eyes and enjoy your bookmark!
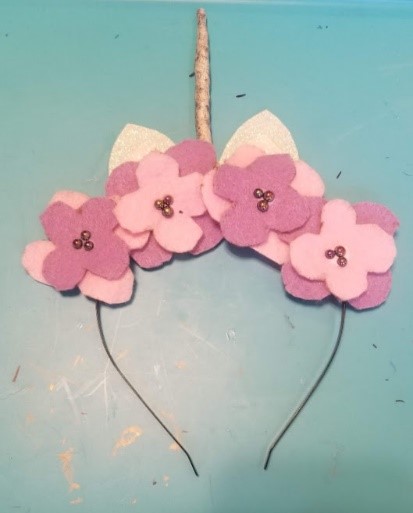
Unicorn Felt Headband
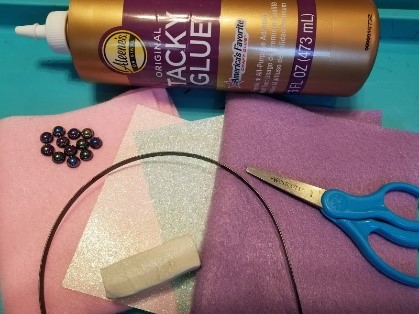
Supplies Needed:
- Polymer Clay
- Headband
- Scissors
- Glue
- Felt
- Paper
- Beads
- Downloadable Felt Template
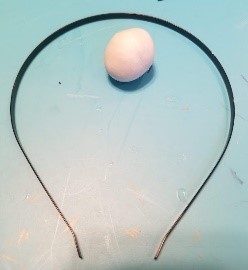
Step 1
Work with your clay until it’s a ball.
Step 2
Roll the clay on a table or between your hands until it is a long tube.
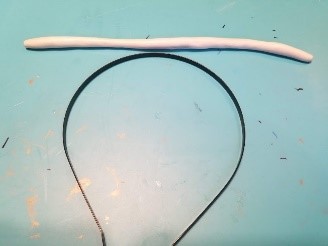
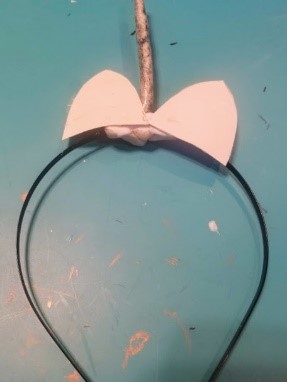
Step 3
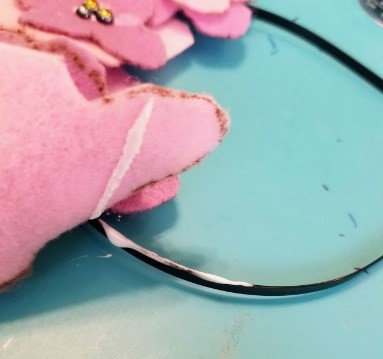
Wrap the bottom end of the clay tube around the headband.
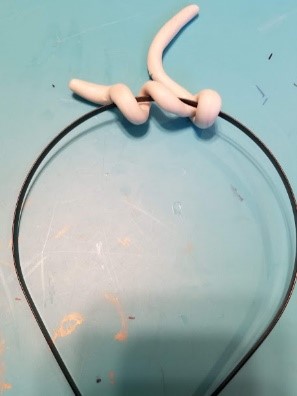
Step 4
Squeeze the clay until it forms around the headband and twist the top of the clay to resemble a horn.
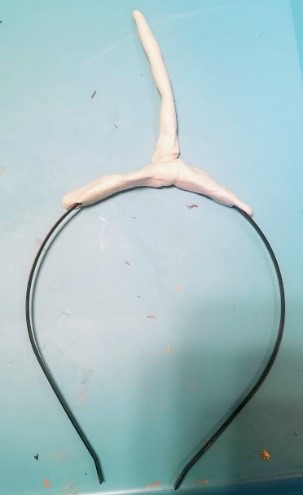
Step 5
Preheat you oven to 275 degrees. Clay needs to bake 15 minutes for each ¼ inch. After baking, let horn cool for 20 minutes.
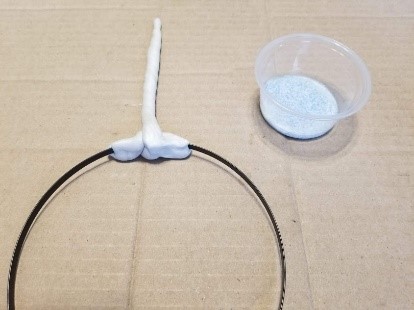
Step 6
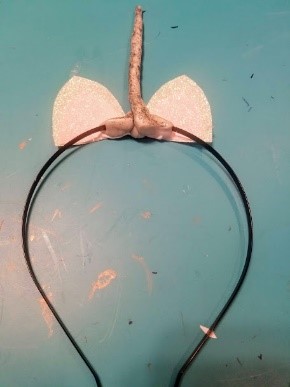
Cut out felt ears using the downloadable template in the supplies list above.
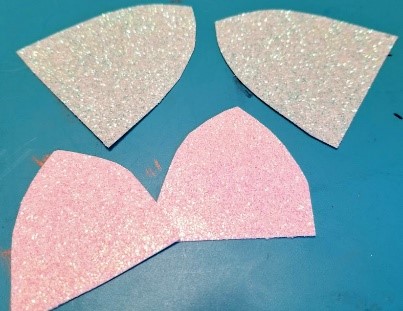
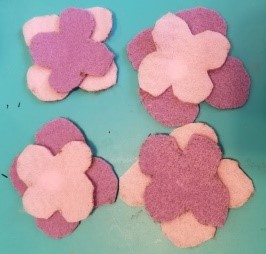
Step 7
Cut out felt flowers using the downloadable template.
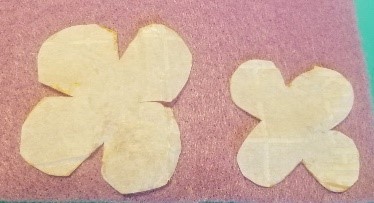
Step 8
Glue the ears to the headband. Hold ears in place for 2 minutes to give glue time to stick.
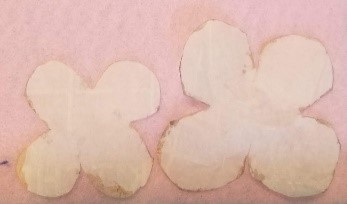
Step 9
Glue the small flowers to the larger flowers
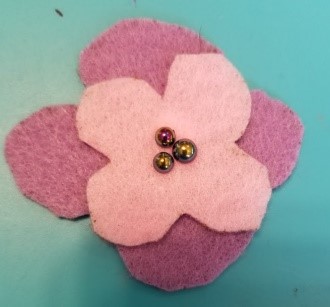
Step 10
Glue beads to the center of the flowers.
Step 11
Glue the first two flowers to the clay wrapped around the headband.
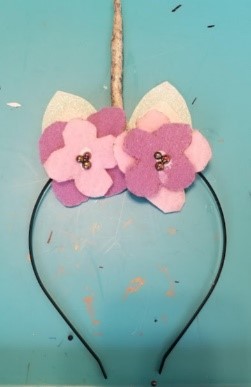
Step 12
Glue the second flower on each side to the previous flower.
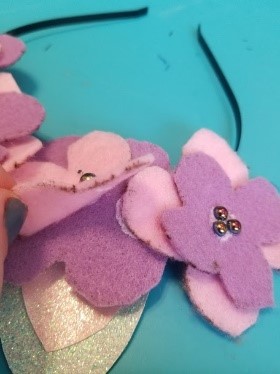
Step 13
Glue the felt flowers on the end to the headband.
Step 14
Enjoy your headband!
More News