
DIY Tutorial: Paper Quilting

Paper quilting is an easy craft with endless possibilities that are only limited by your own imagination.
It can be done as a craft by itself or a way to map out your quilting without using fabric. No matter if you are a beginner or an expert quilter, this can still be an enjoyable project. This tutorial shows a simple design that you can follow. Of course, it is up to you if you choose to follow this pattern or create your own.
This DIY tutorial was created by Cody Elliott, our Newport Branch’s adult/teen services programmer. If you have any questions about the tutorial, please email him at CElliott@cc-pl.org.
Supplies Needed
- White Paper
- Colorful or Patterned Paper
- Scissors
- Glue Stick
- Pencil
Step 1
Start with a blank sheet of paper. This is essentially your canvas that you will decorate.
Step 2
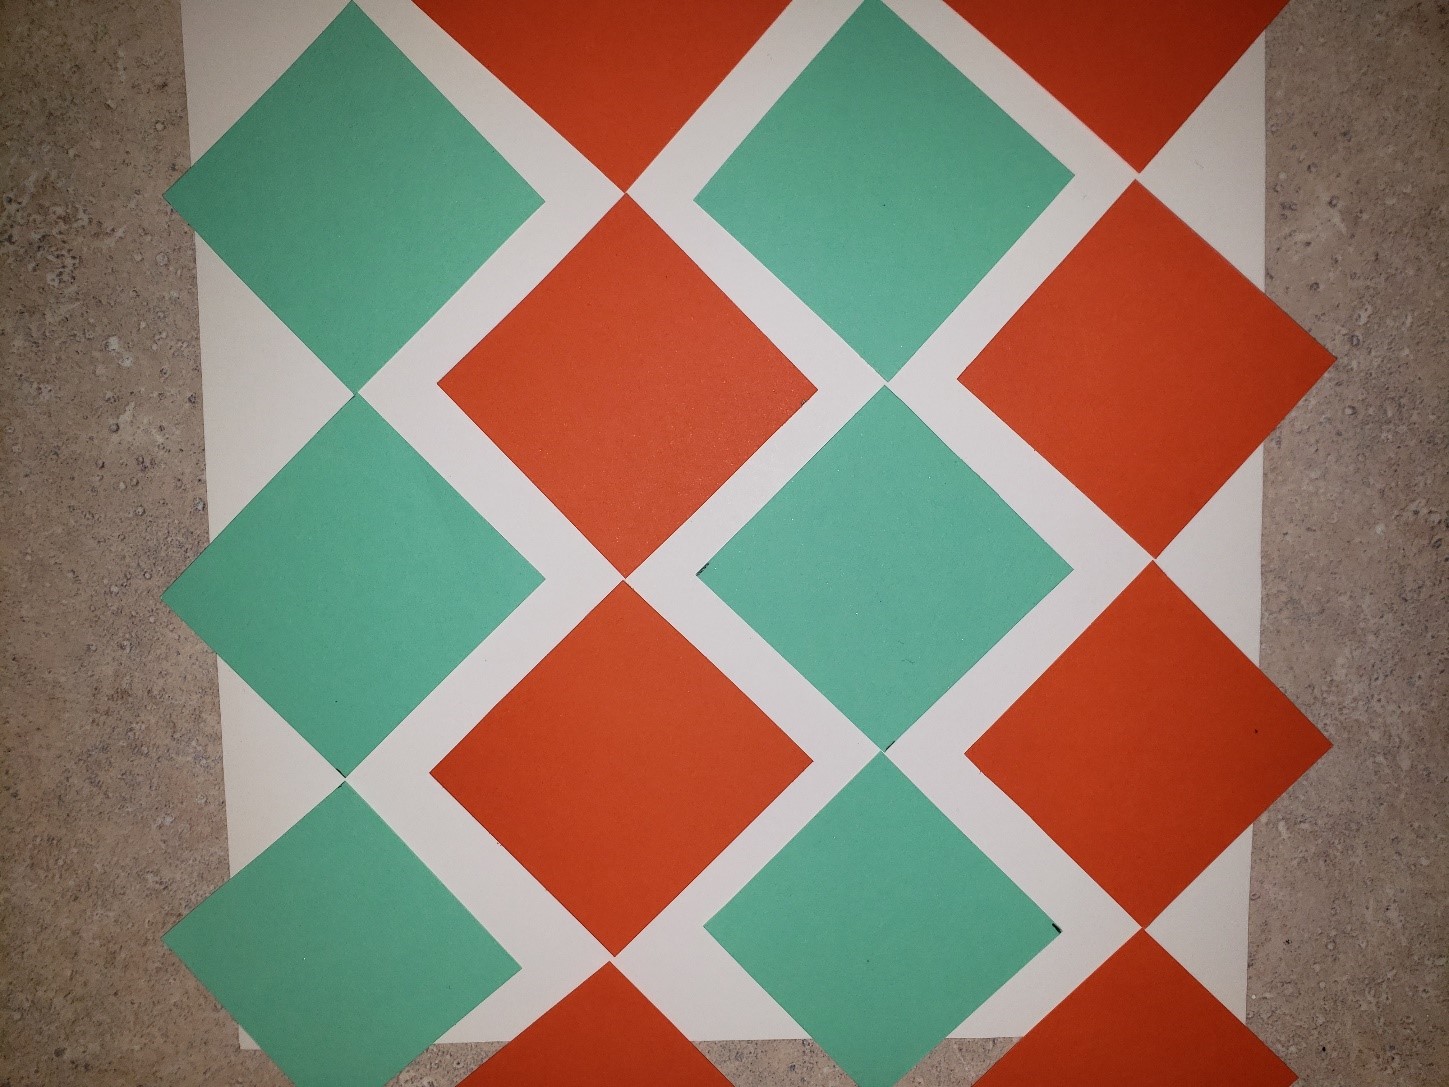
Next, cut your colorful or patterned paper into 2 in x 2 in squares. I used two different colors and laid them on the white paper in a descending diagonal pattern.
Step 3
Align them as you see fit and then use the glue stick to glue down the squares as you go along.
Step 4
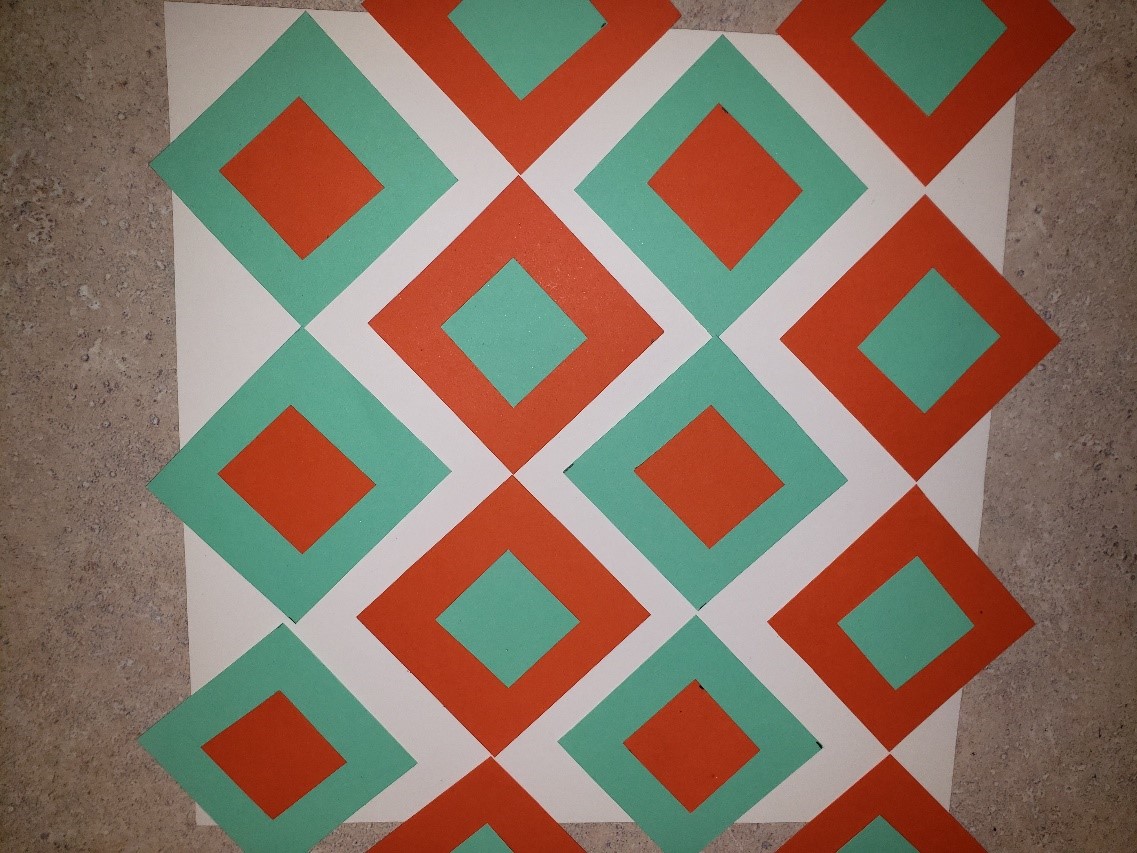
Next thing I did was cut a 1 in x 1 in square. I placed it inside the 2 in x 2 in square and glued them down.

Step 5
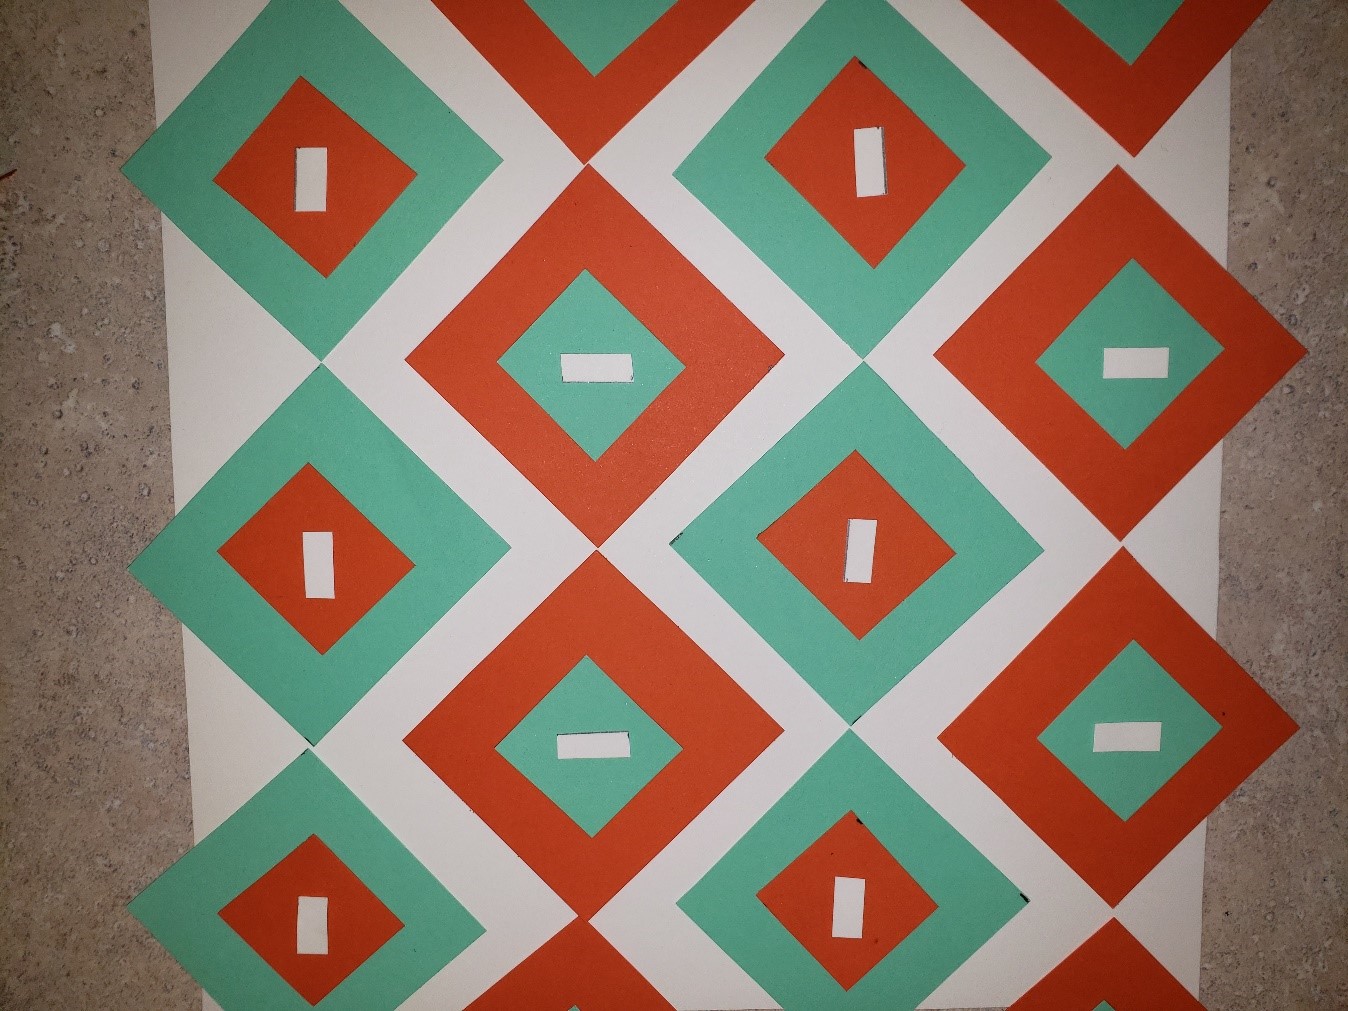
I added small white rectangles, both horizontally and vertically, to the center of the 1 in x 1 in squares and glued them down.
Step 6
Once everything was glued down, I trimmed off the excess that was hanging off the edges. Then we are finished with this simple design.
More News