
DIY Tutorial: Dragon Egg

Create a decorative dragon’s egg that shows off your creativity!
The tutorial was created by Jessi Holloway, the children’s programmer at our Newport Branch. If you have any questions about the tutorial, please email her at jholloway@cc-pl.org.
Supplies Needed
- Styrofoam egg
- Thumbtacks (roughly 200 per egg)
- Acrylic paint
Step 1
Decide on a pattern you will use to create the scale look. In our Take & Make bags, the thumbtacks are painted in various metallic colors. You can use these colors to help highlight your pattern.
If you have gathered your materials on your own, we recommend painting your thumbtacks and letting them dry completely before you start placing them in the egg.
Step 2
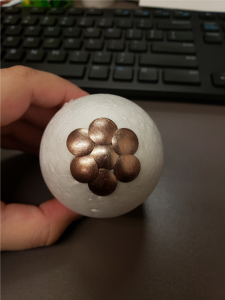
Find the bottom of your egg (this is the less pointy side of the egg) and push in a thumbtack. This is where you can start to give your design the look of scales moving down the egg. In this example, we use a flower pattern on the bottom and created “rows” as we moved up the egg.
Step 3
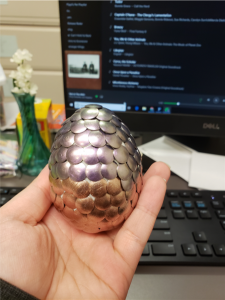
Continue your pattern however you decide. The part that will give your egg that “finished” look is to make sure your thumbtacks overlap to get rid of the blank space between each one.

Step 4
Your egg is compete once all of the styrofoam is covered!
More News