
DIY Tutorial: Chainmail Bracelet
Chainmail was originally created by linking rings together to make armor. Using recycled pop tabs, we’ll do something similar to make your own chainmail bracelet!
The tutorial was created by Tori Story, the adult/teen services programmer at our Cold Spring Branch. If you have any questions about the tutorial, please email her at tstory@cc-pl.org.
Supplies Needed
- Pop tabs
- Fake leather or thick cloth
- String or cord
- Wire cutters
- Glue (optional)
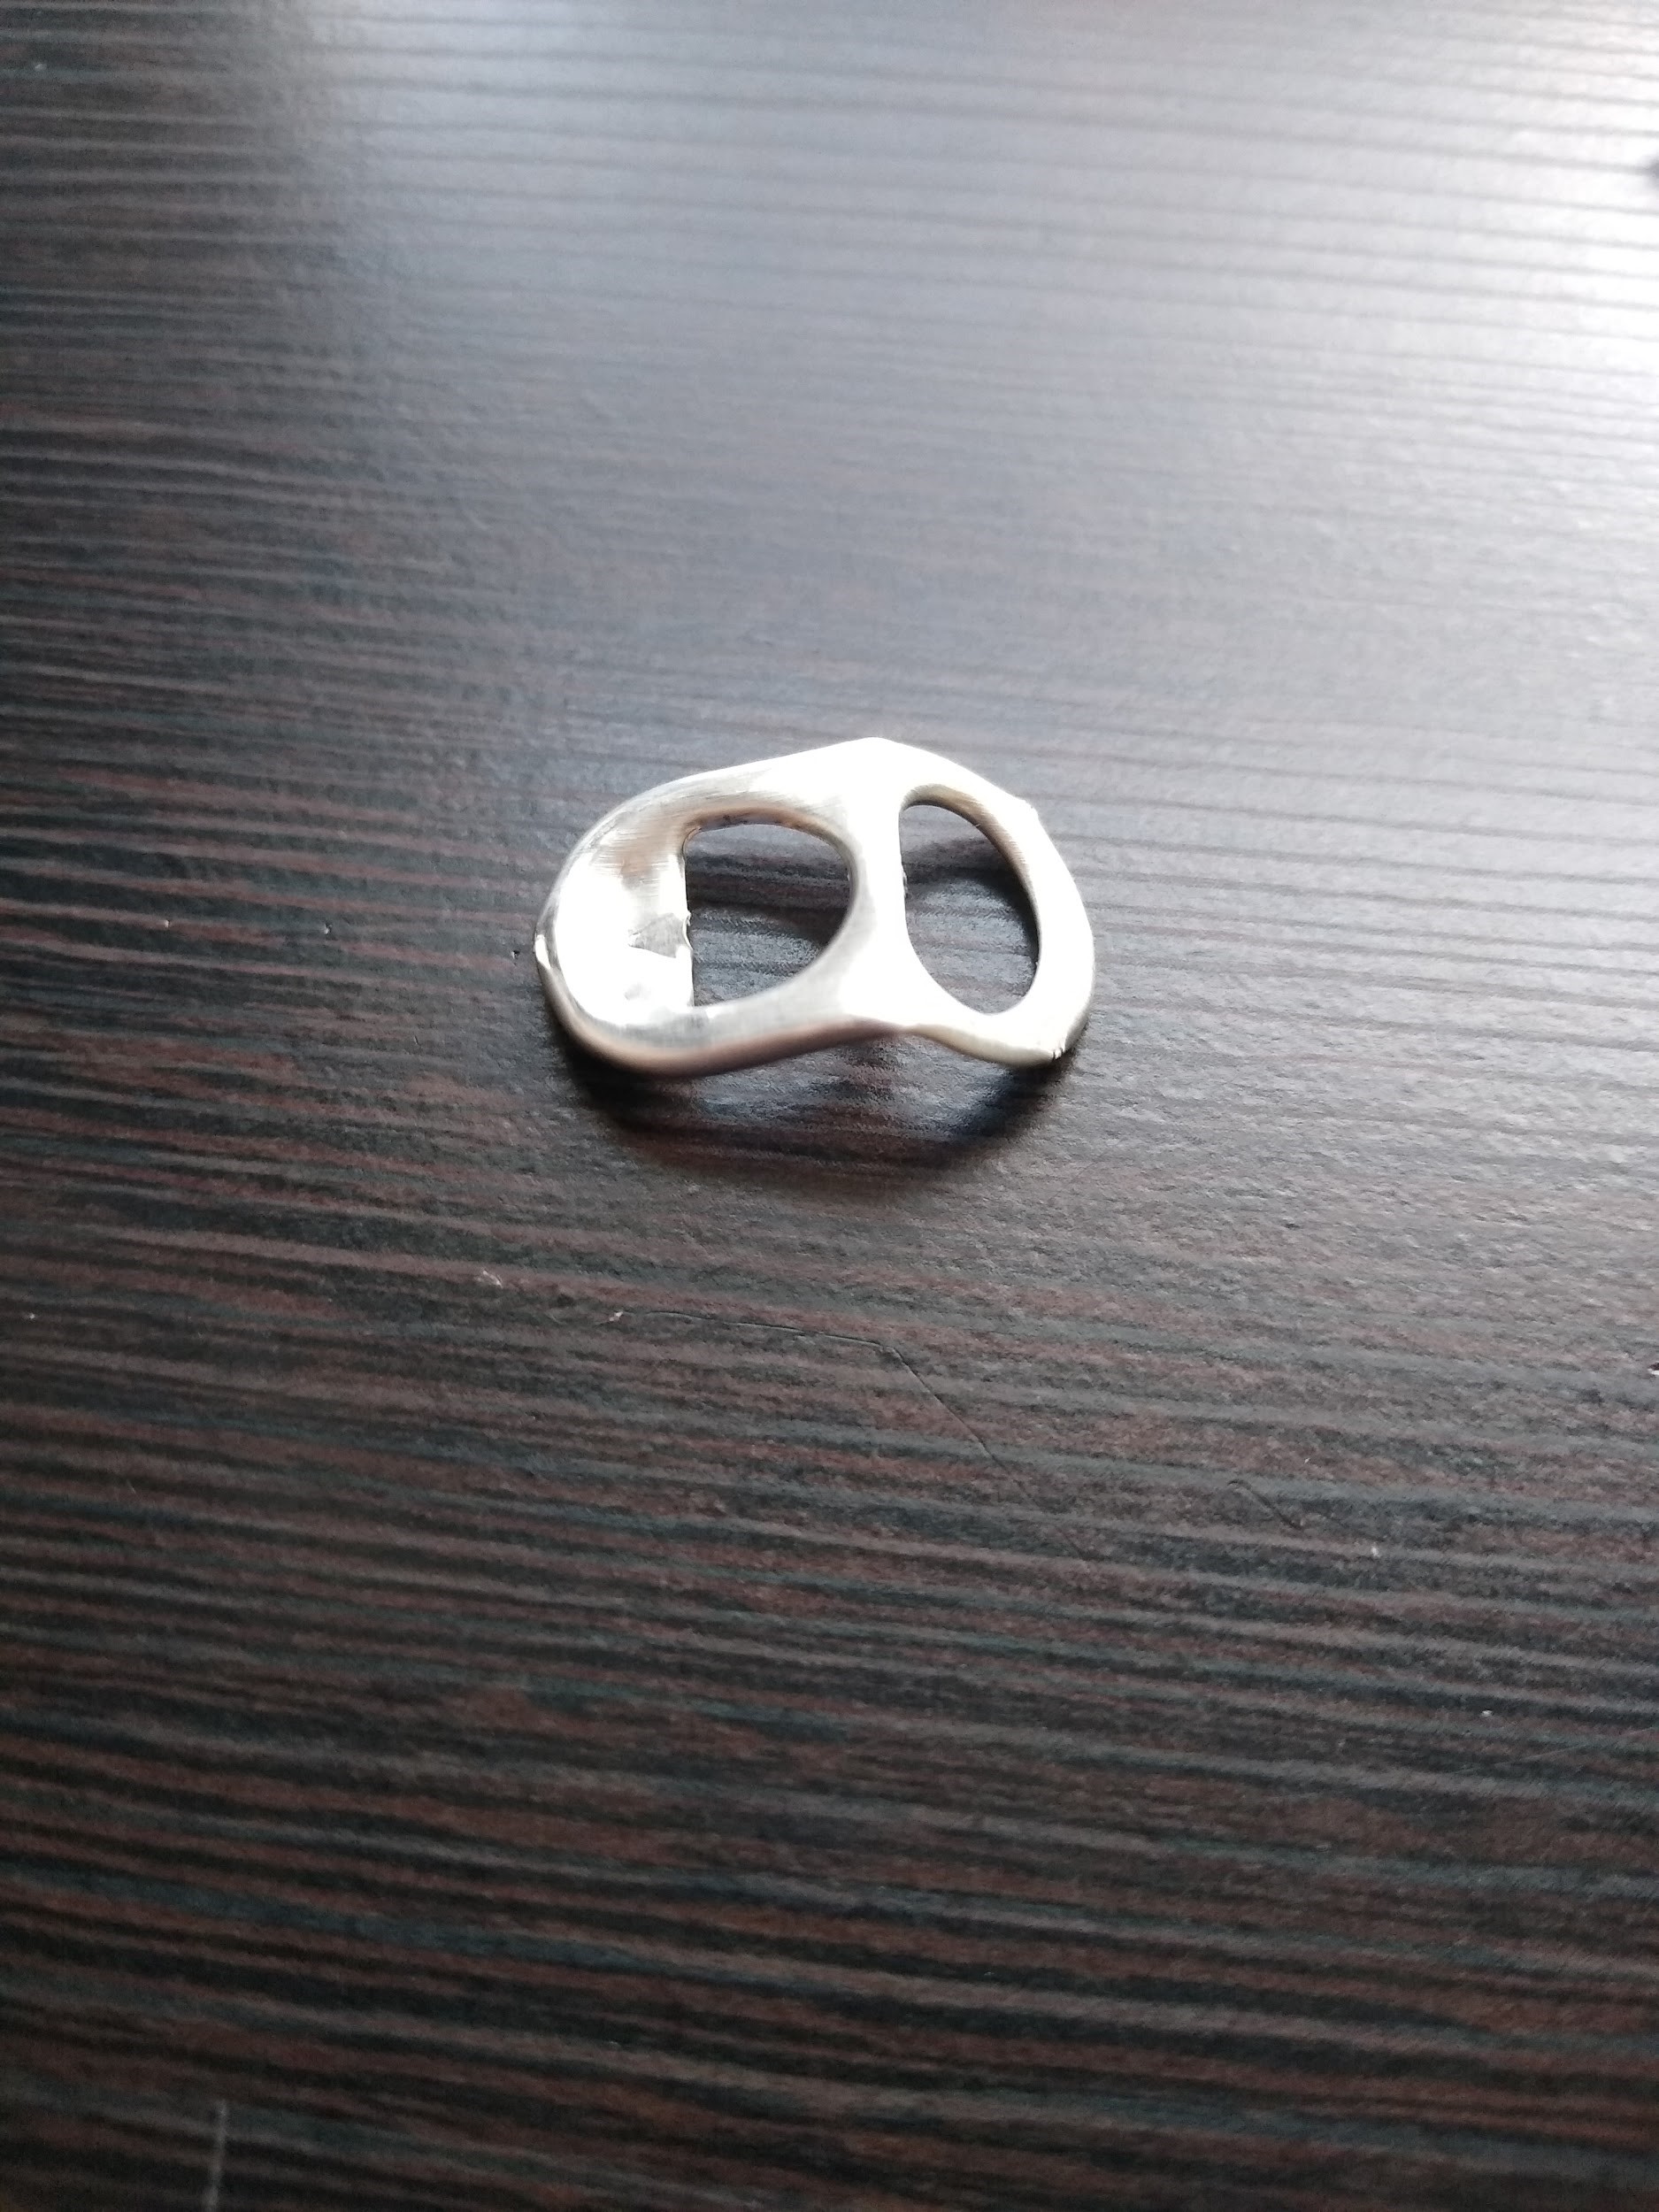
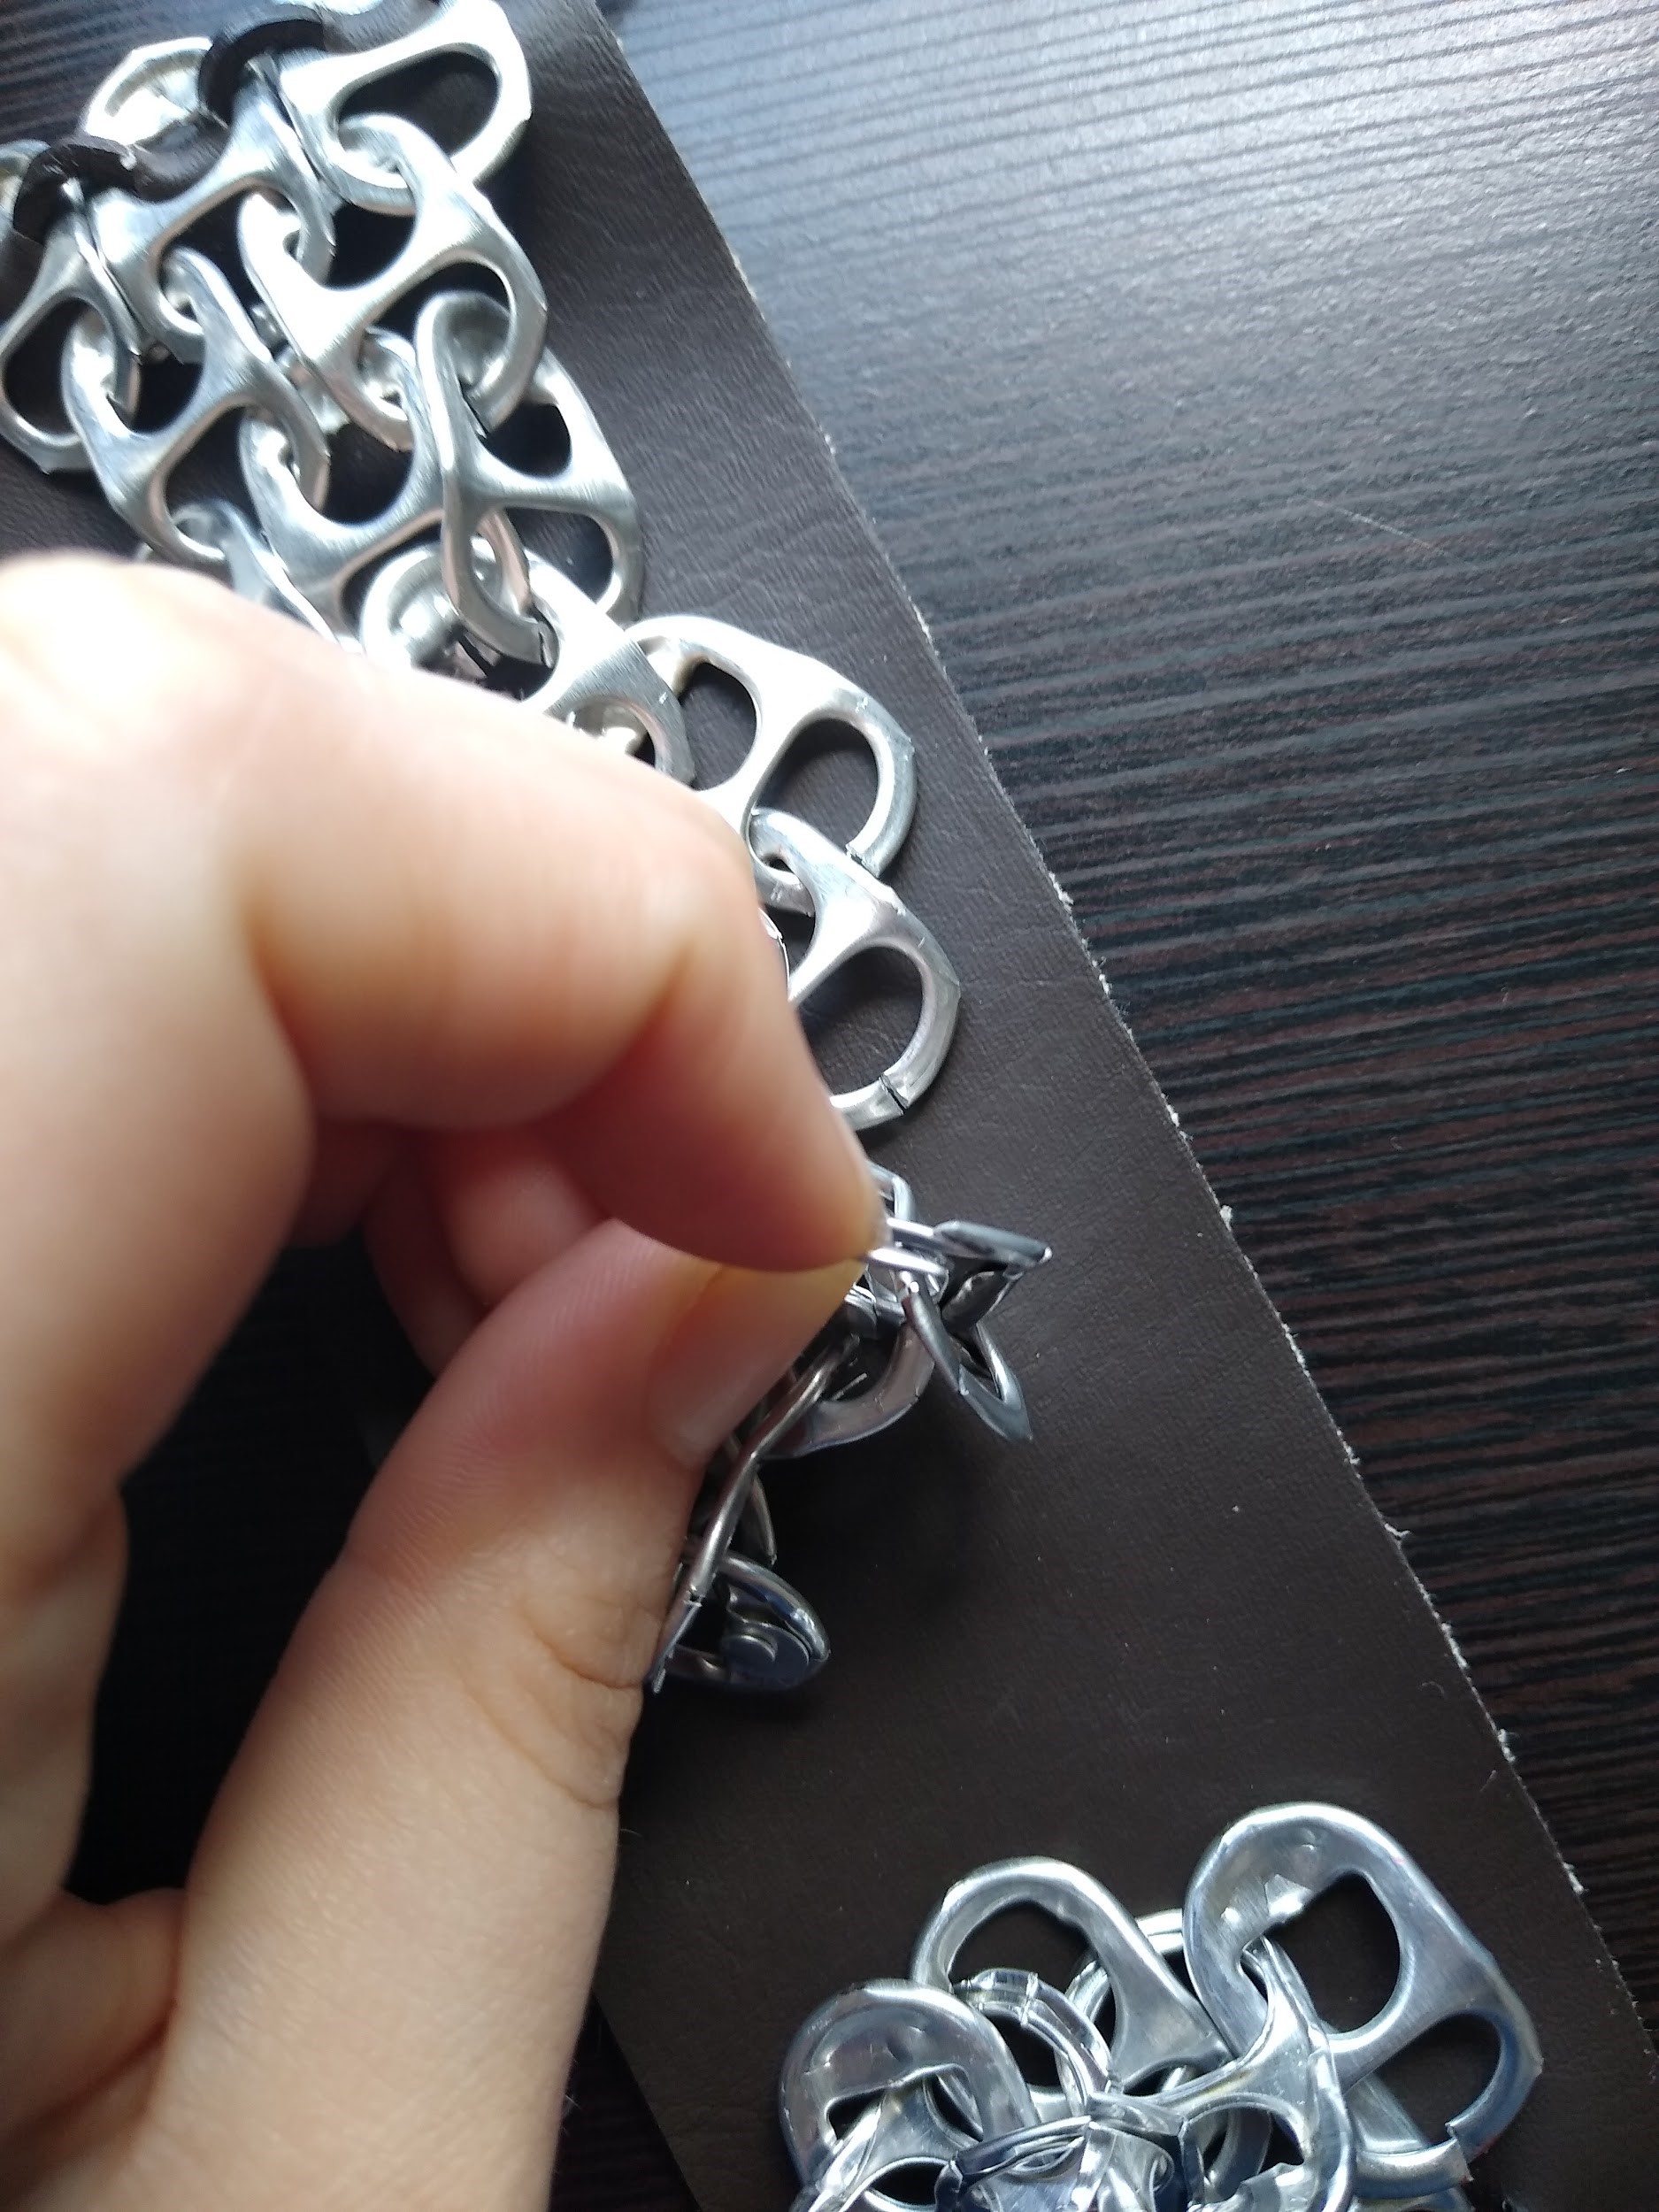
Step 1
Bend the pop tabs in the middle using something like pliers.
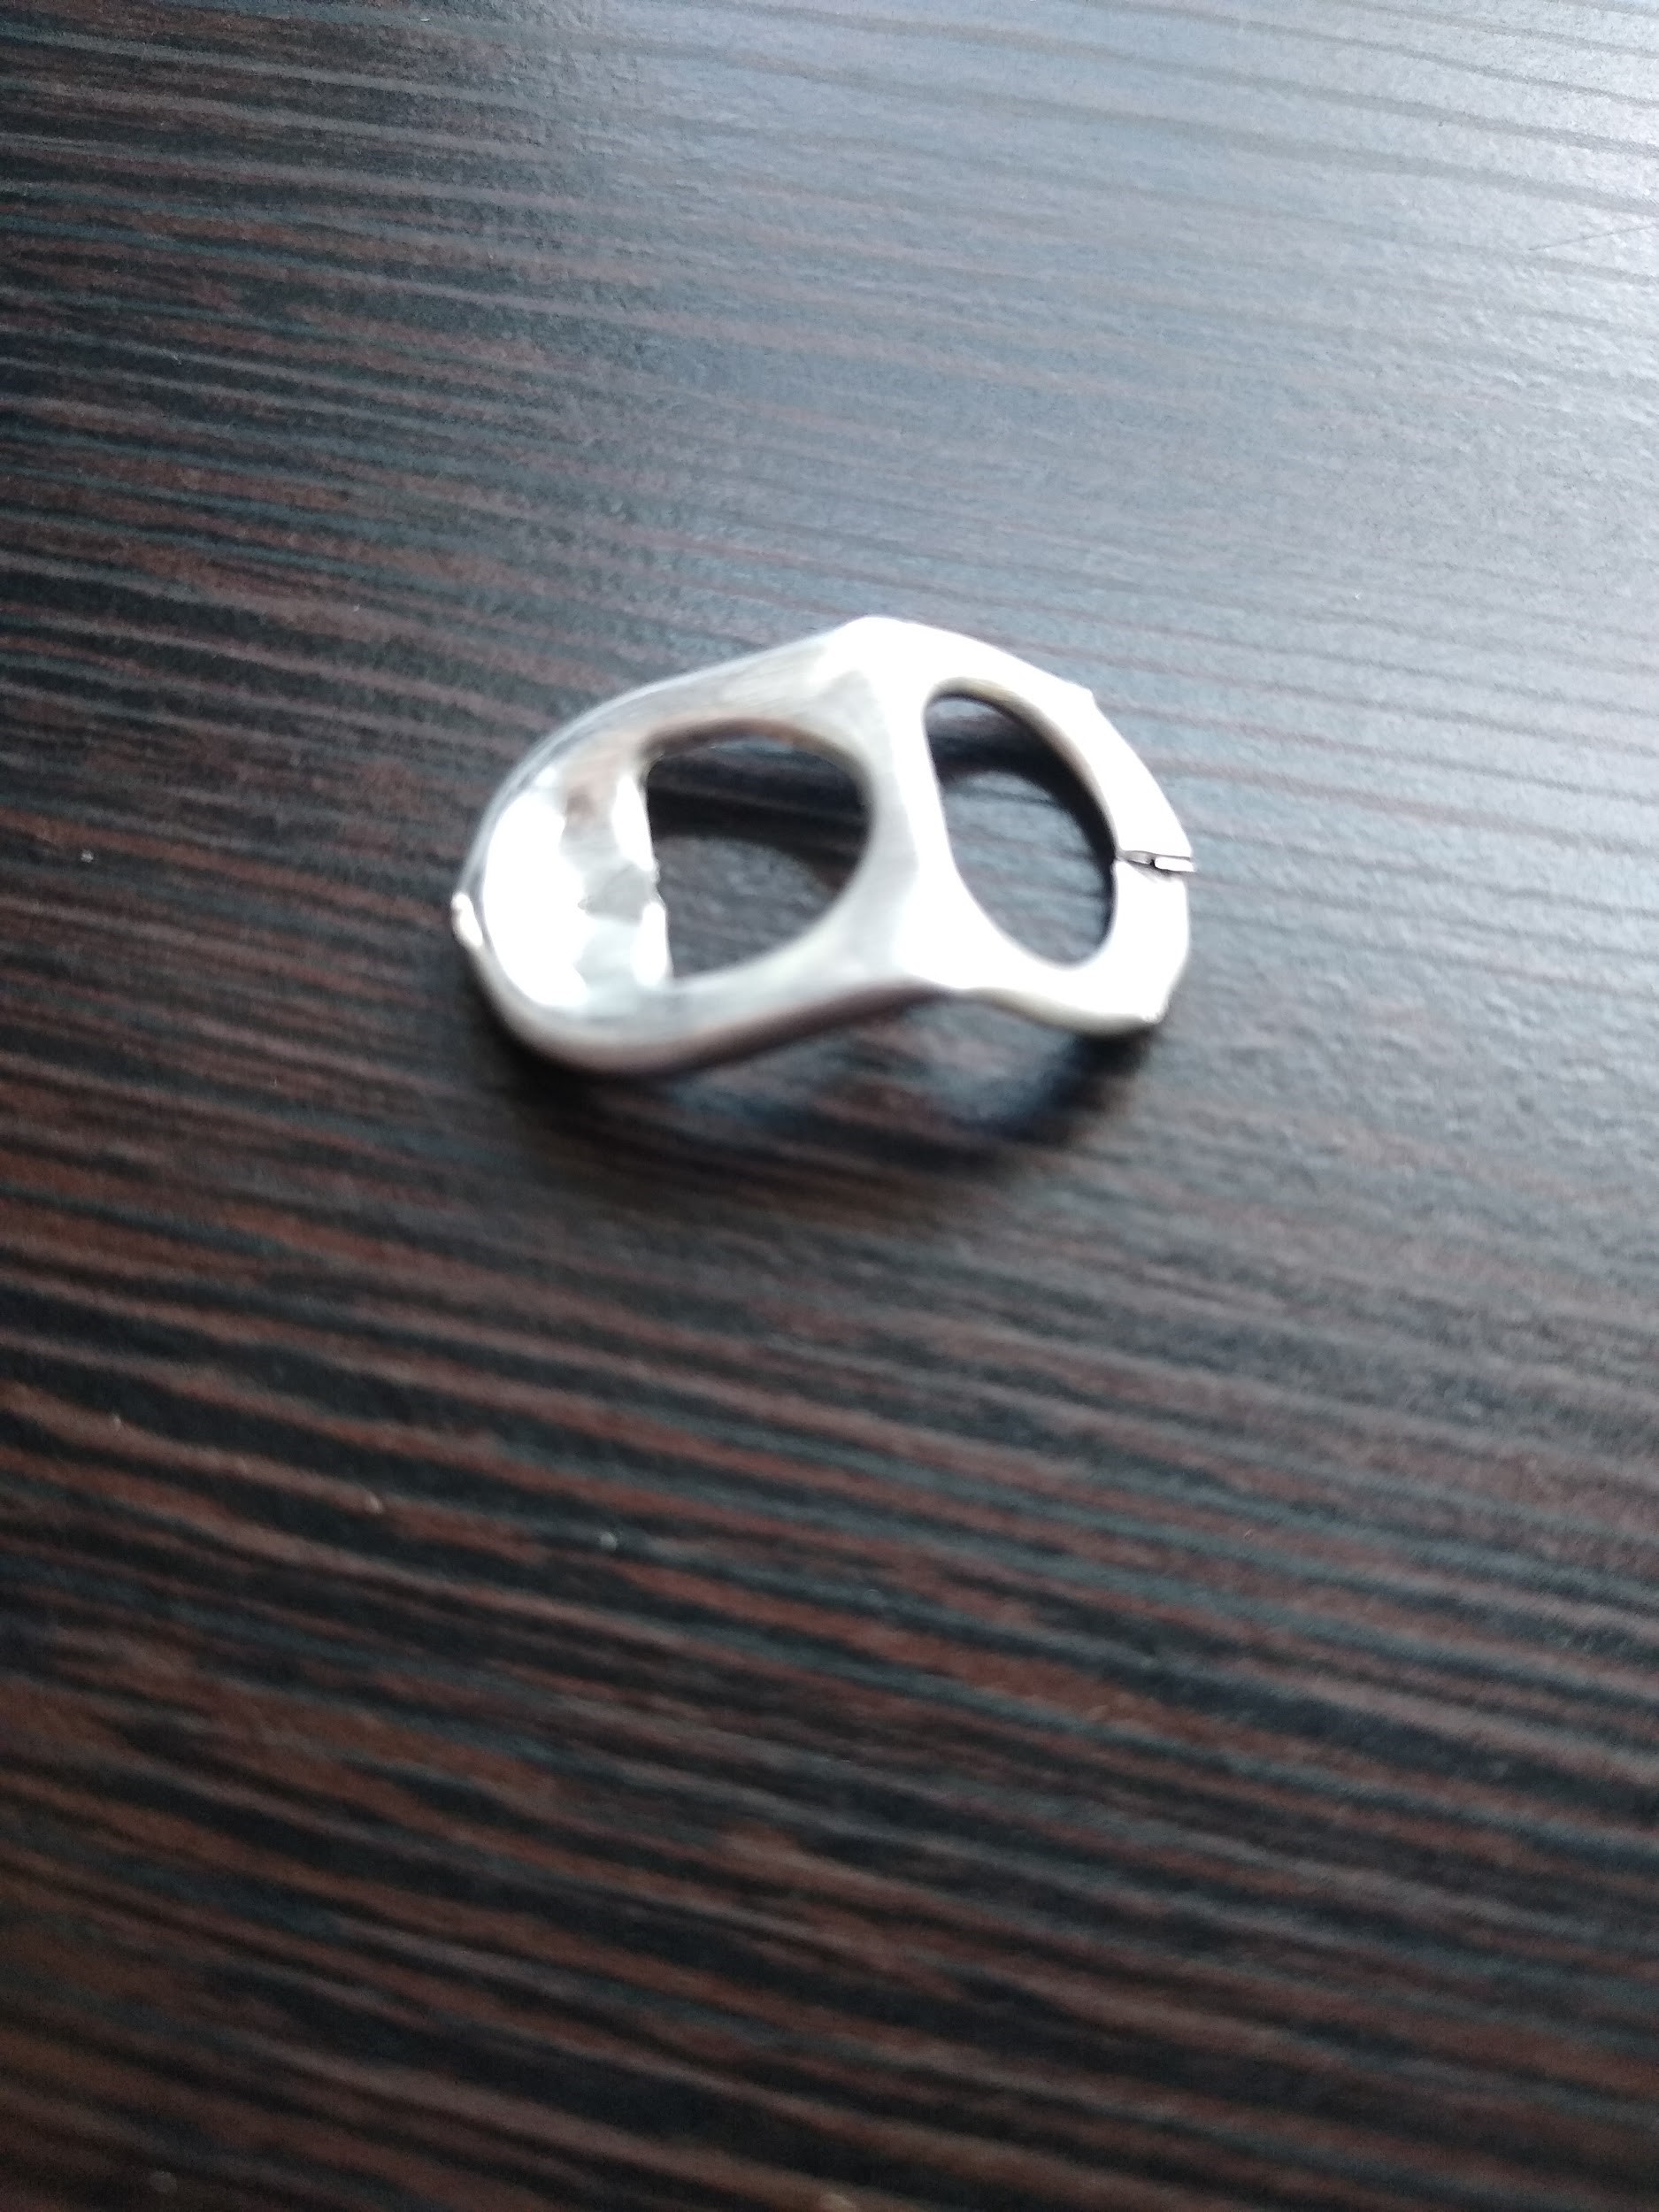
Step 2
Use the wire cutters to cut a slit in the smaller end.
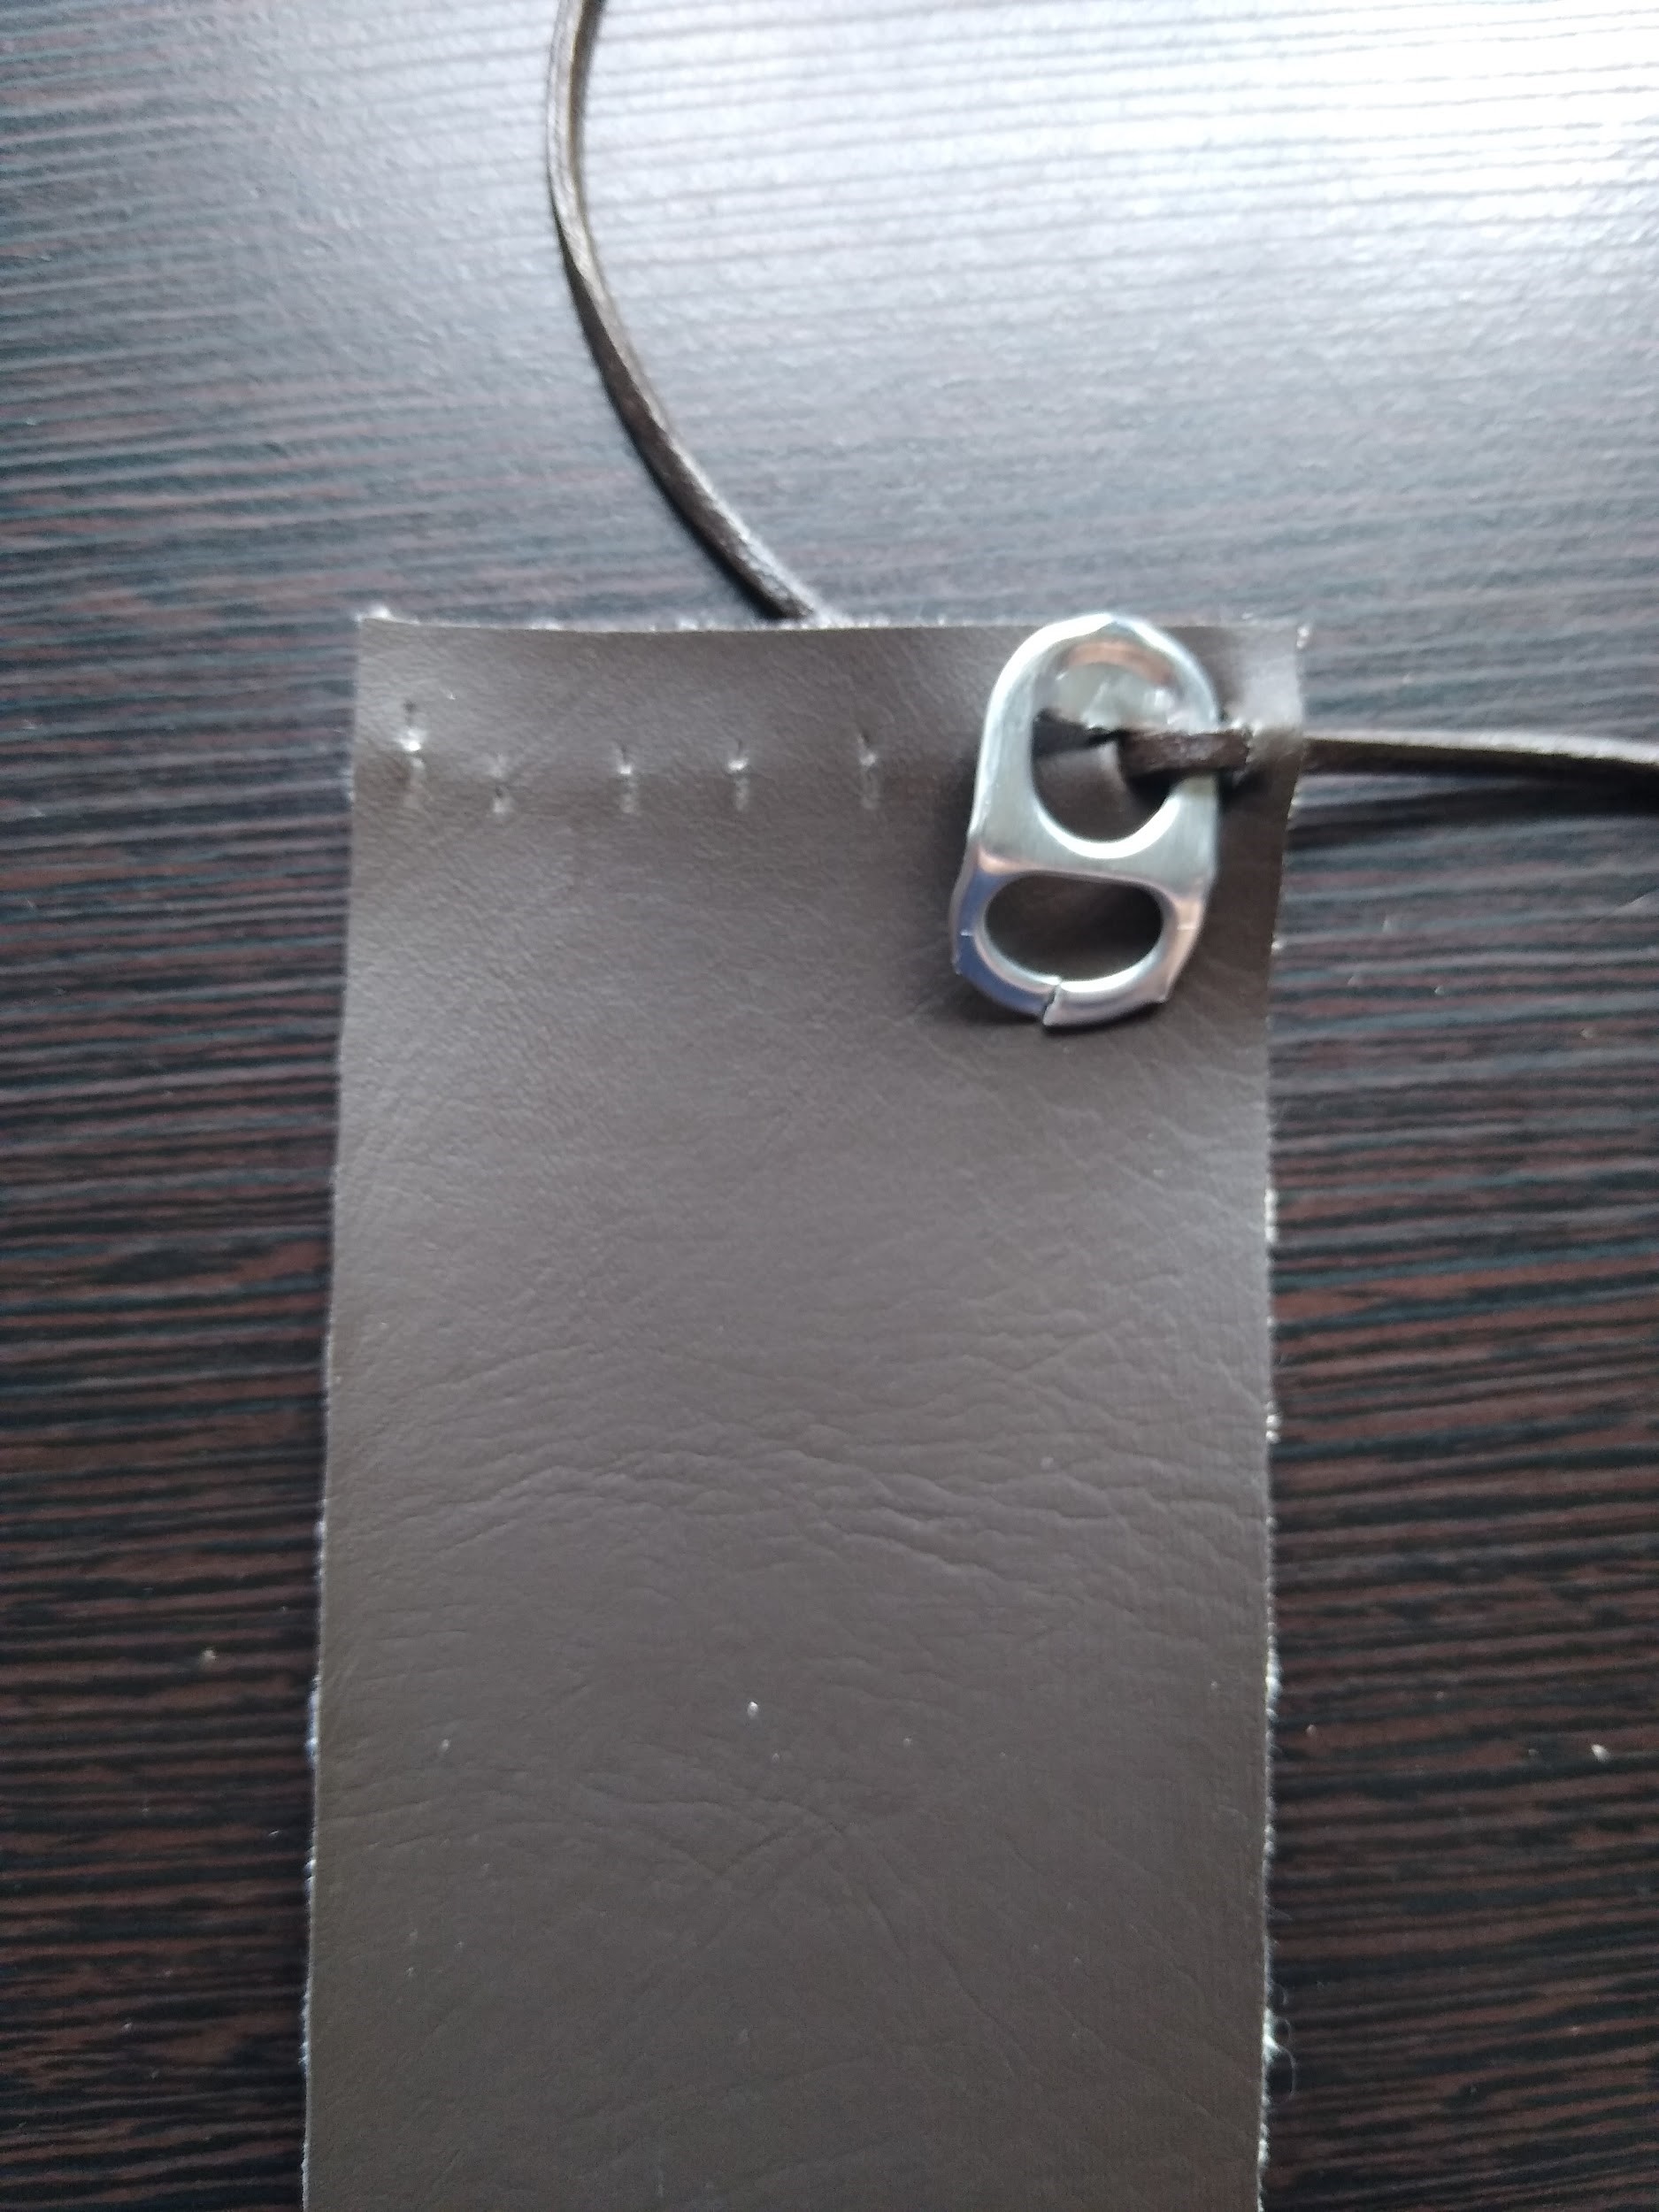
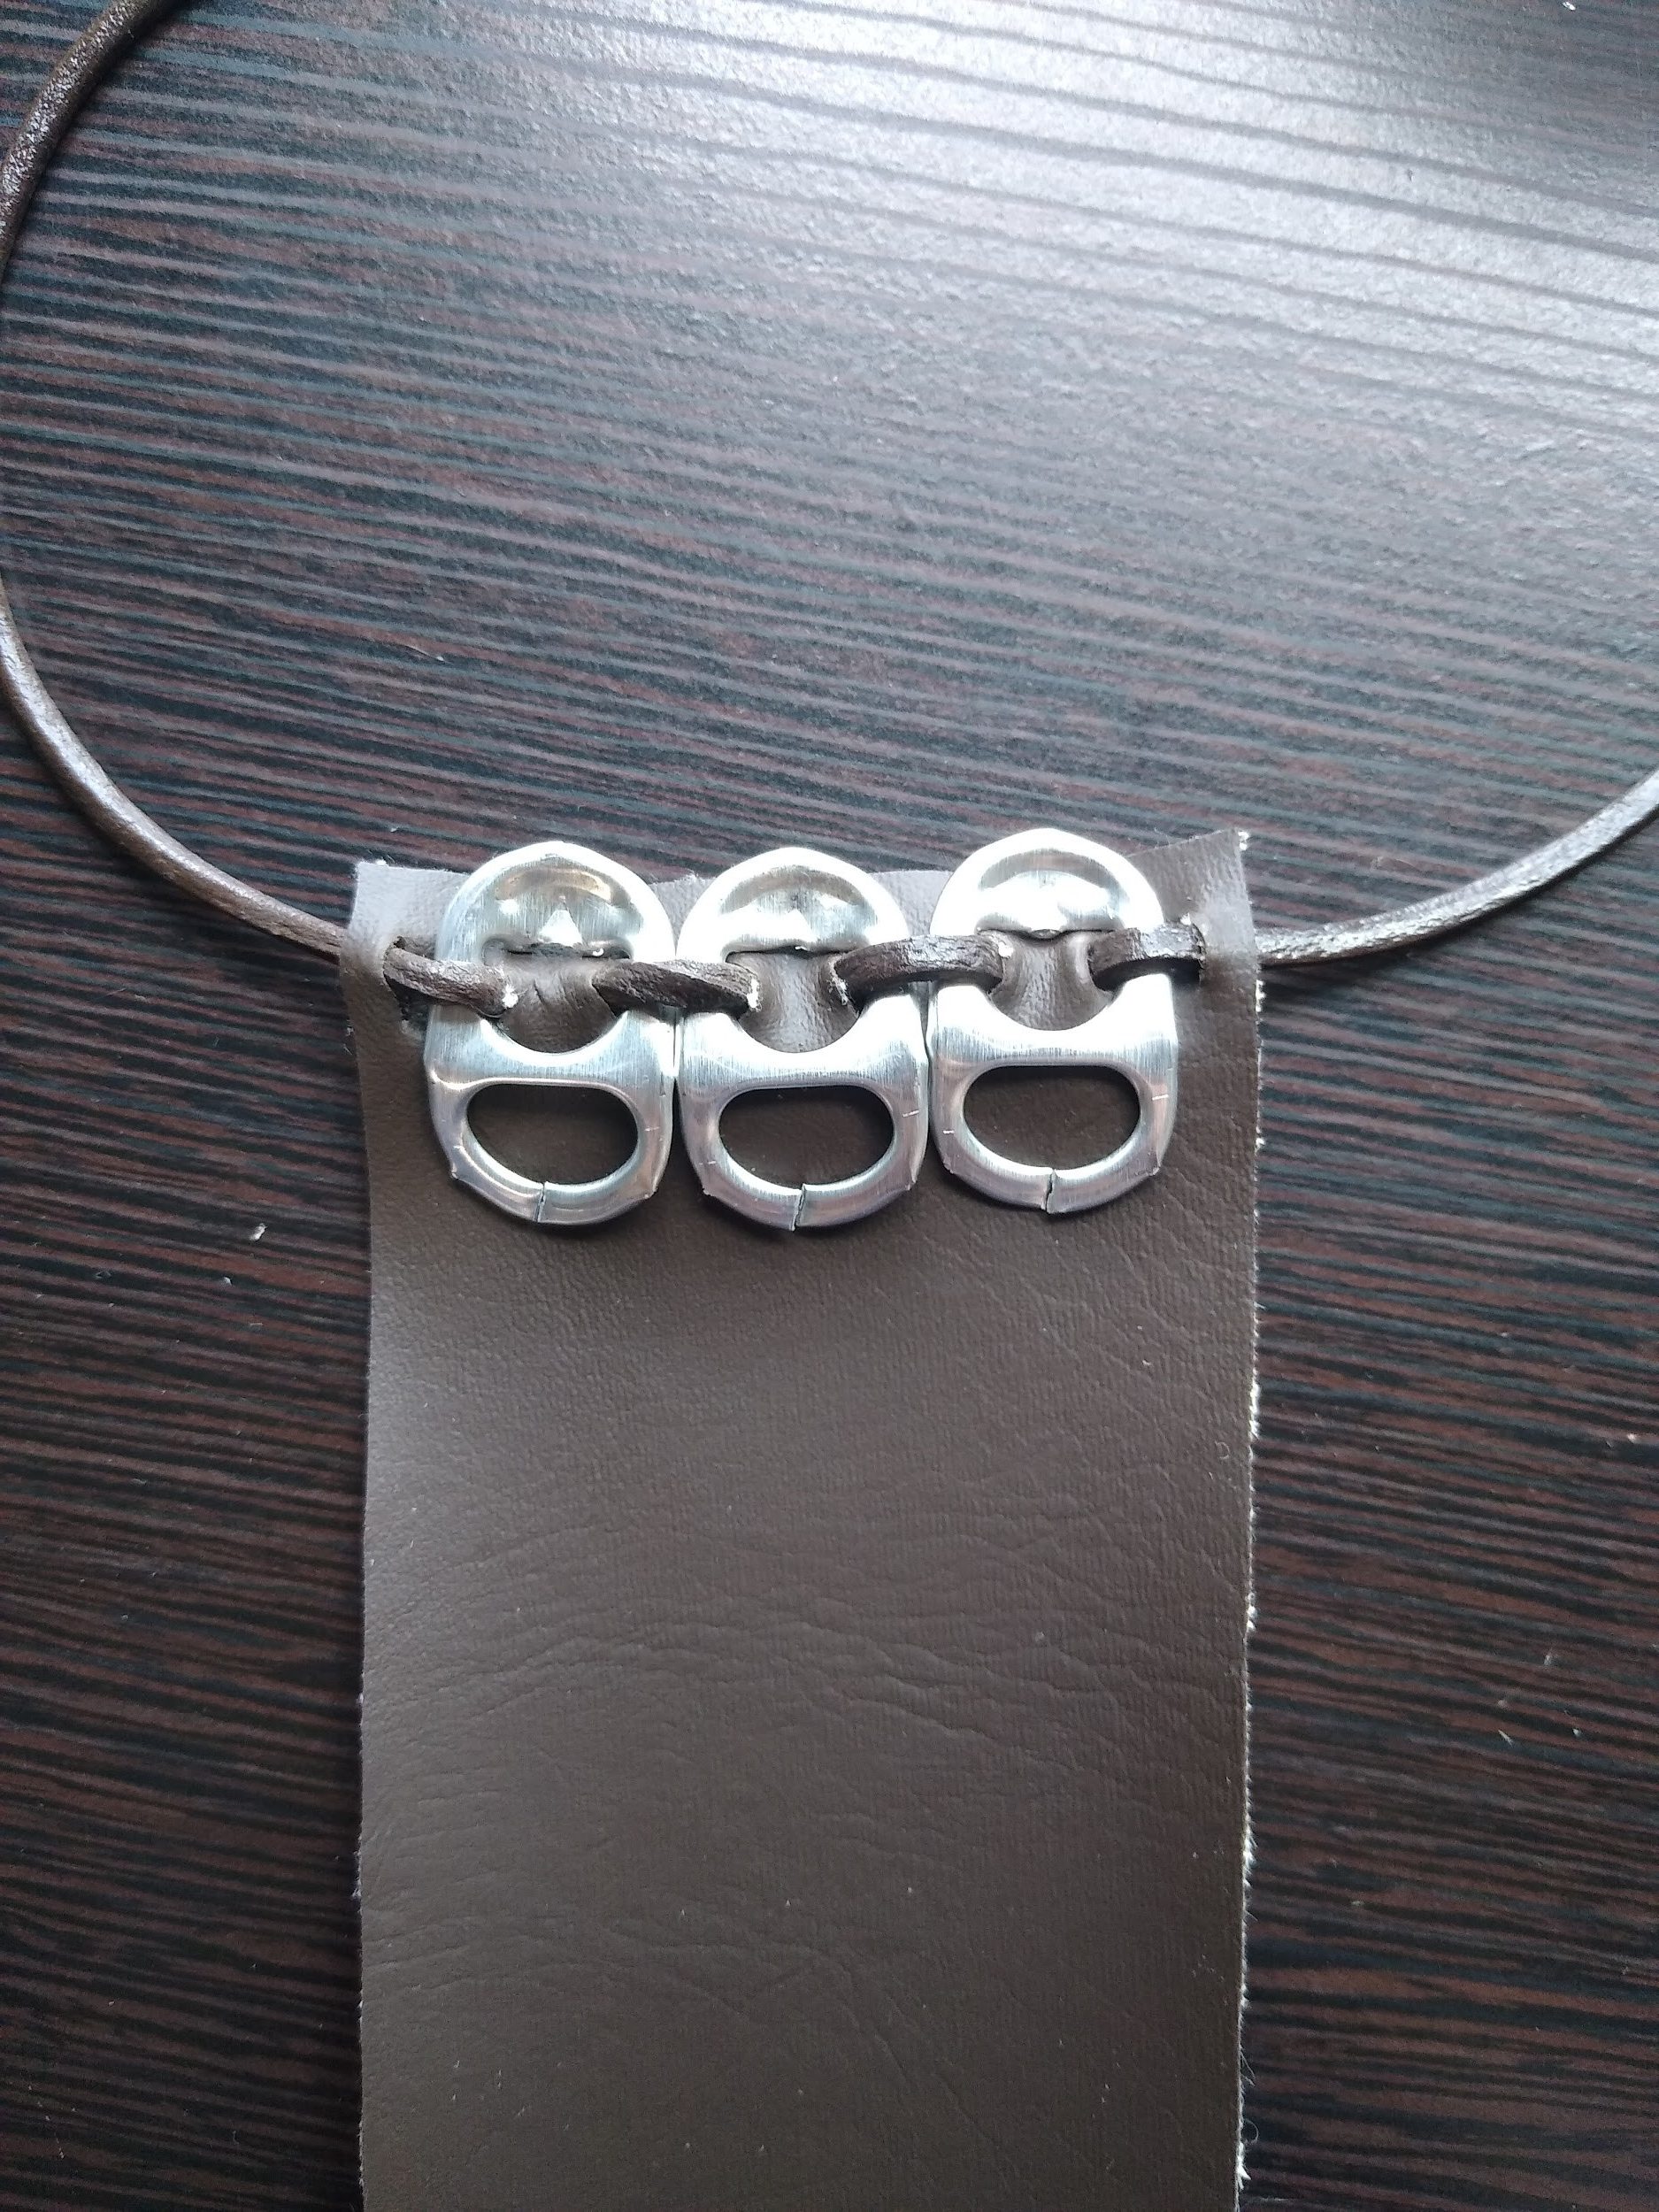
Step 3
Cut eight little slits in one end of the fake leather/fabric. Make sure the slits are equally spaced apart so that each pop tab can be tied to the cloth by weaving the cord or string in and out of the slits. Do this so three pop tabs are attached to the fabric side-by-side.
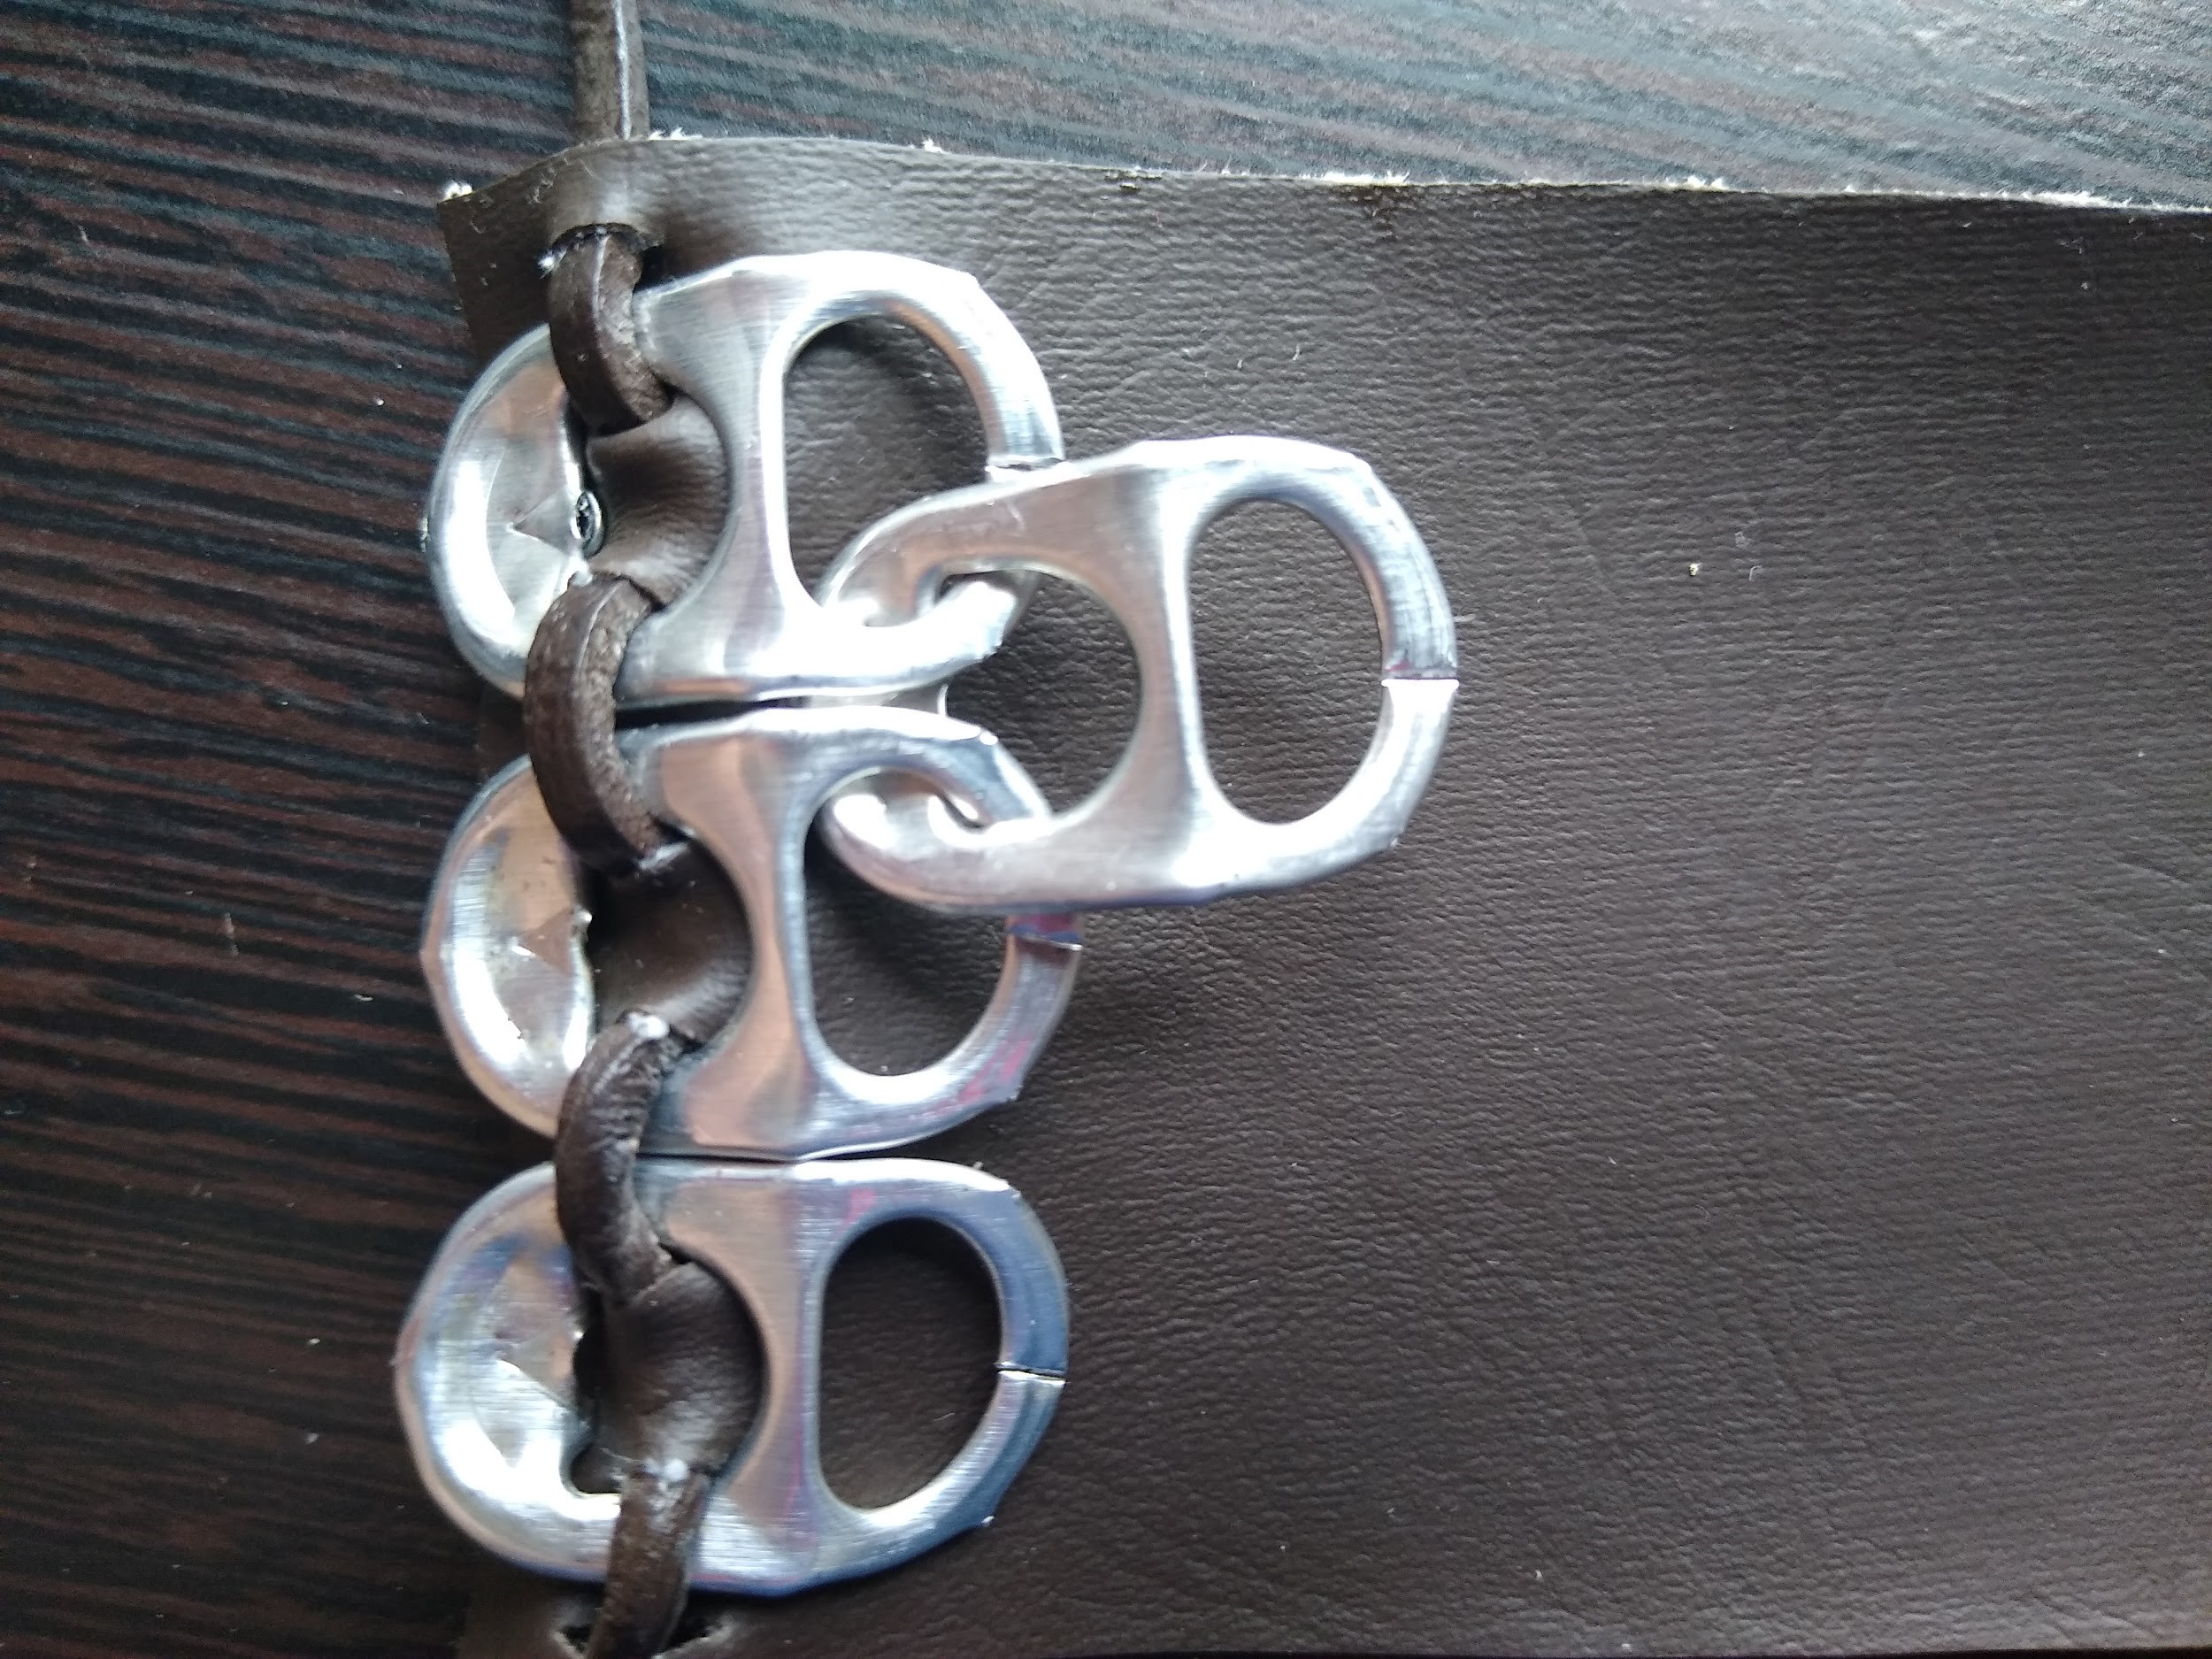
Step 4
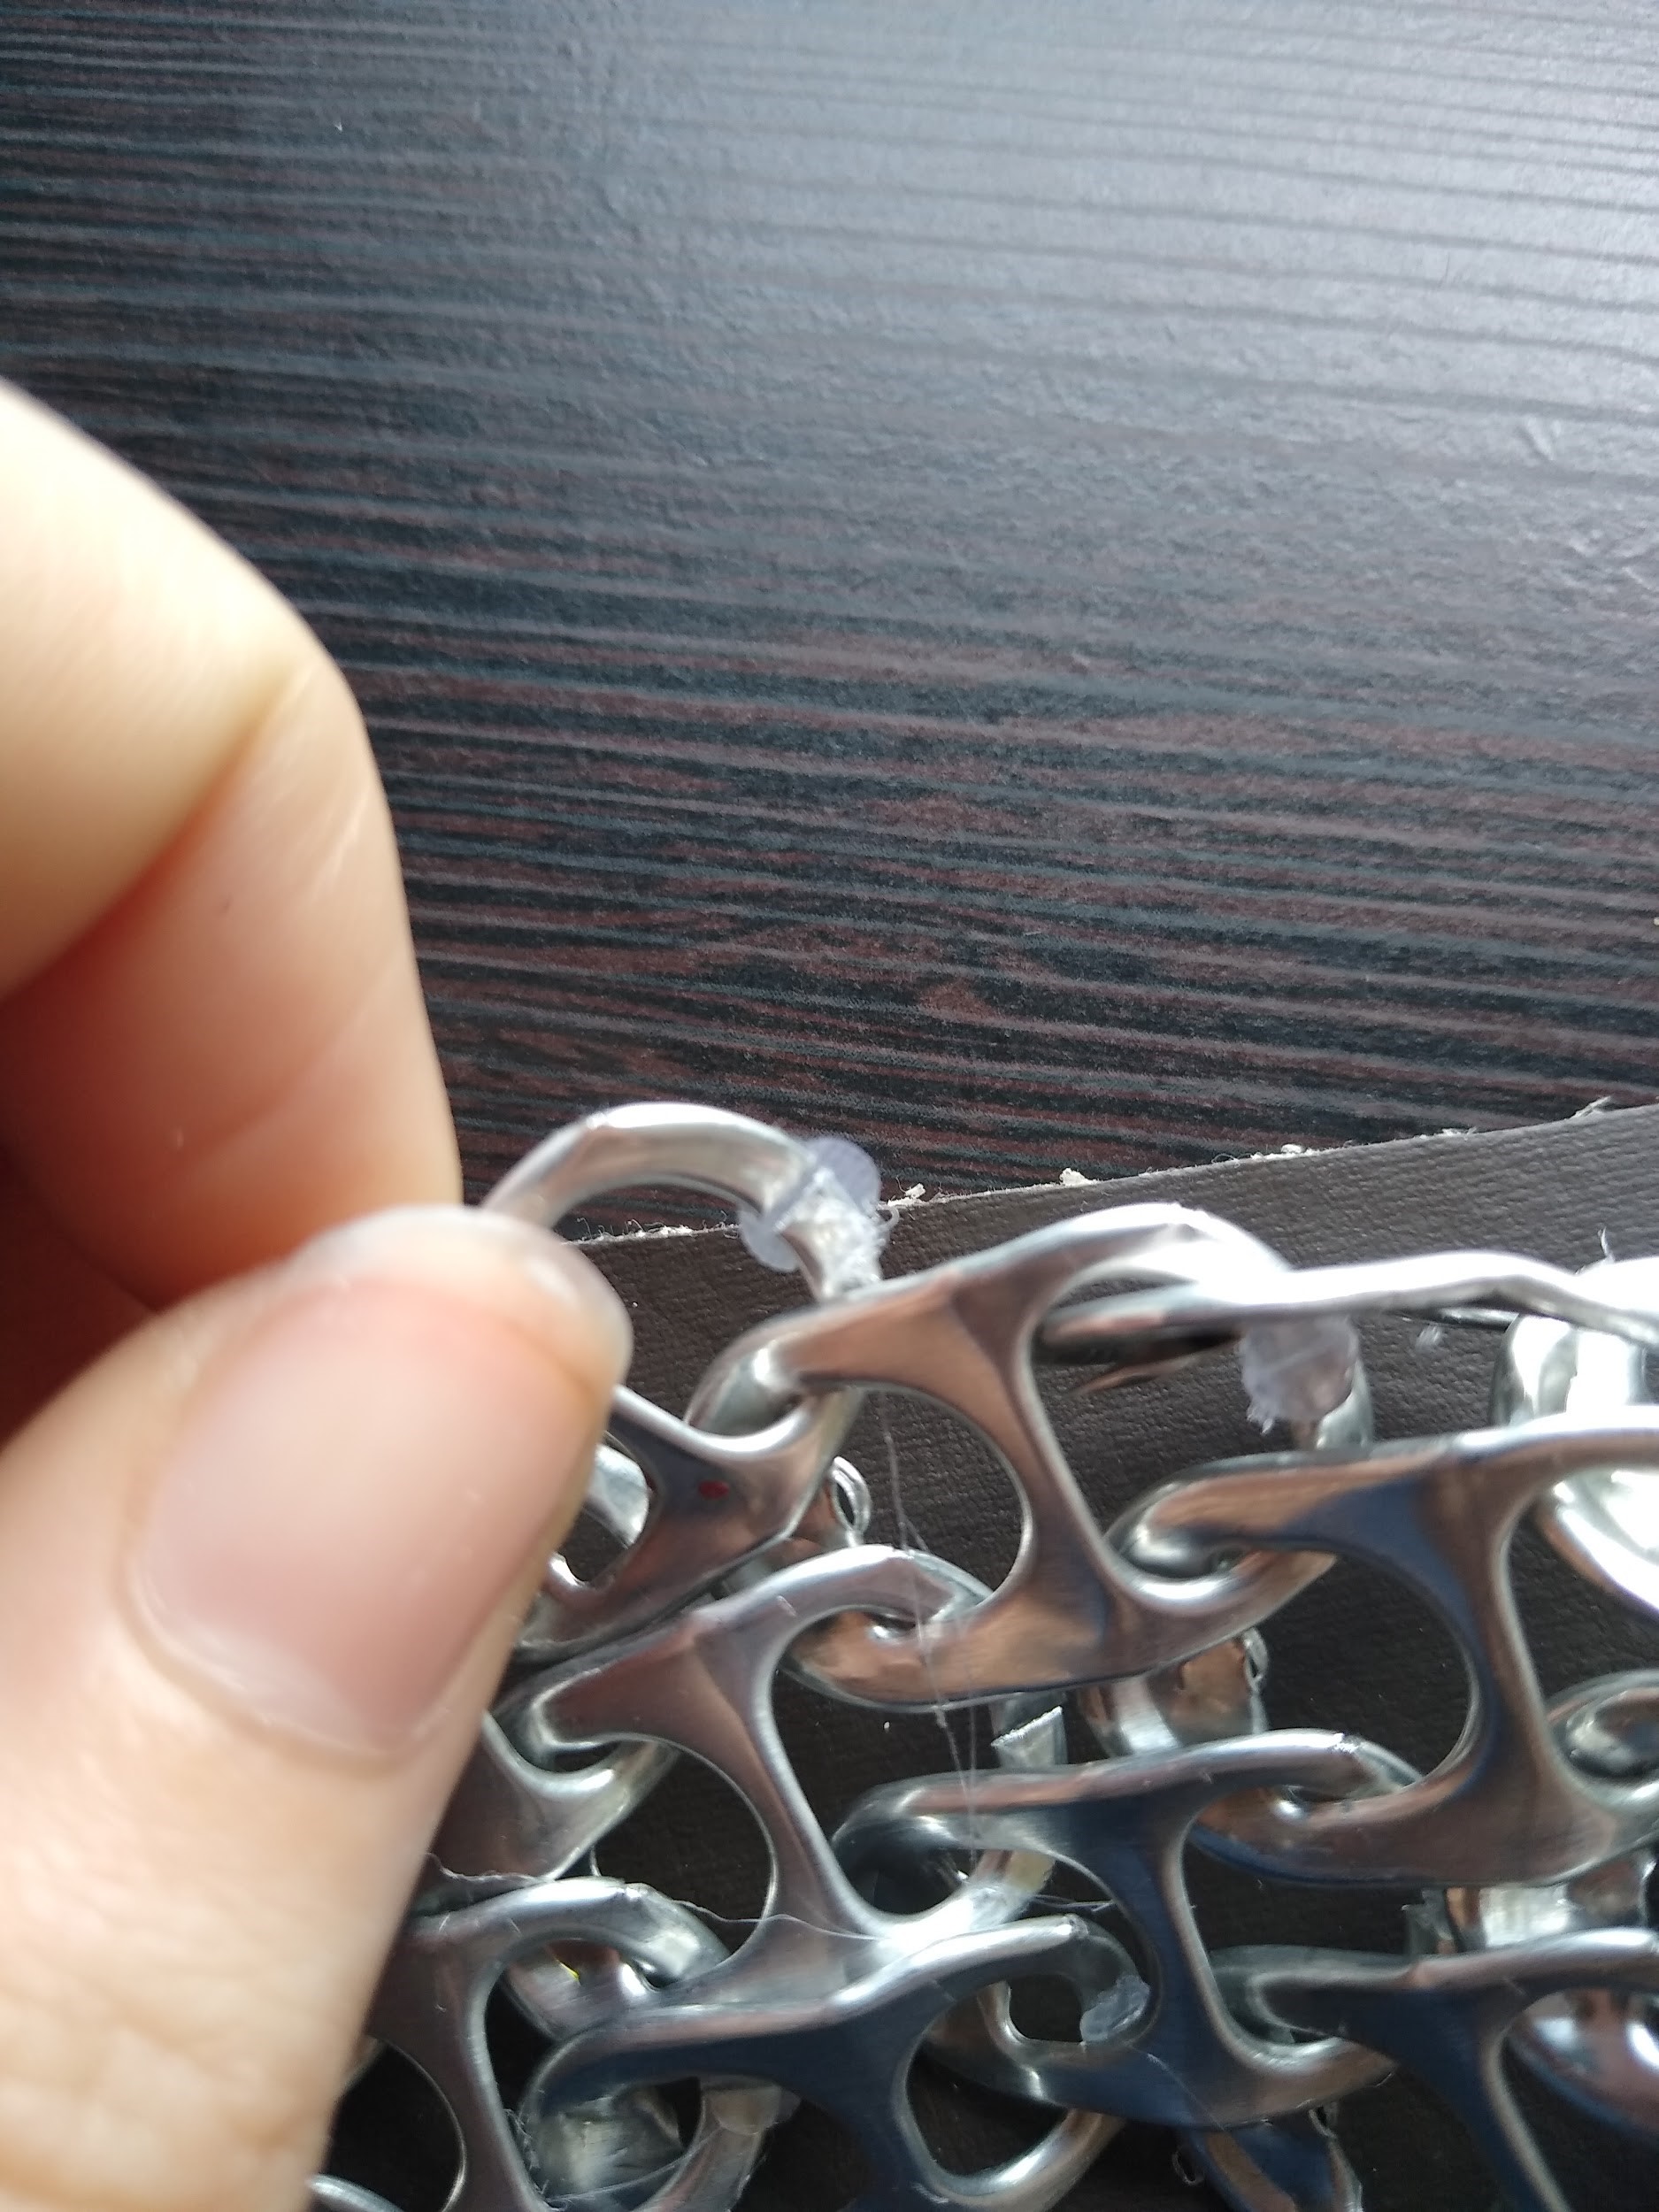
Take another pop tab and slip it under and through the cut end of the pop tabs. Attach one tab to the two in the previous row.
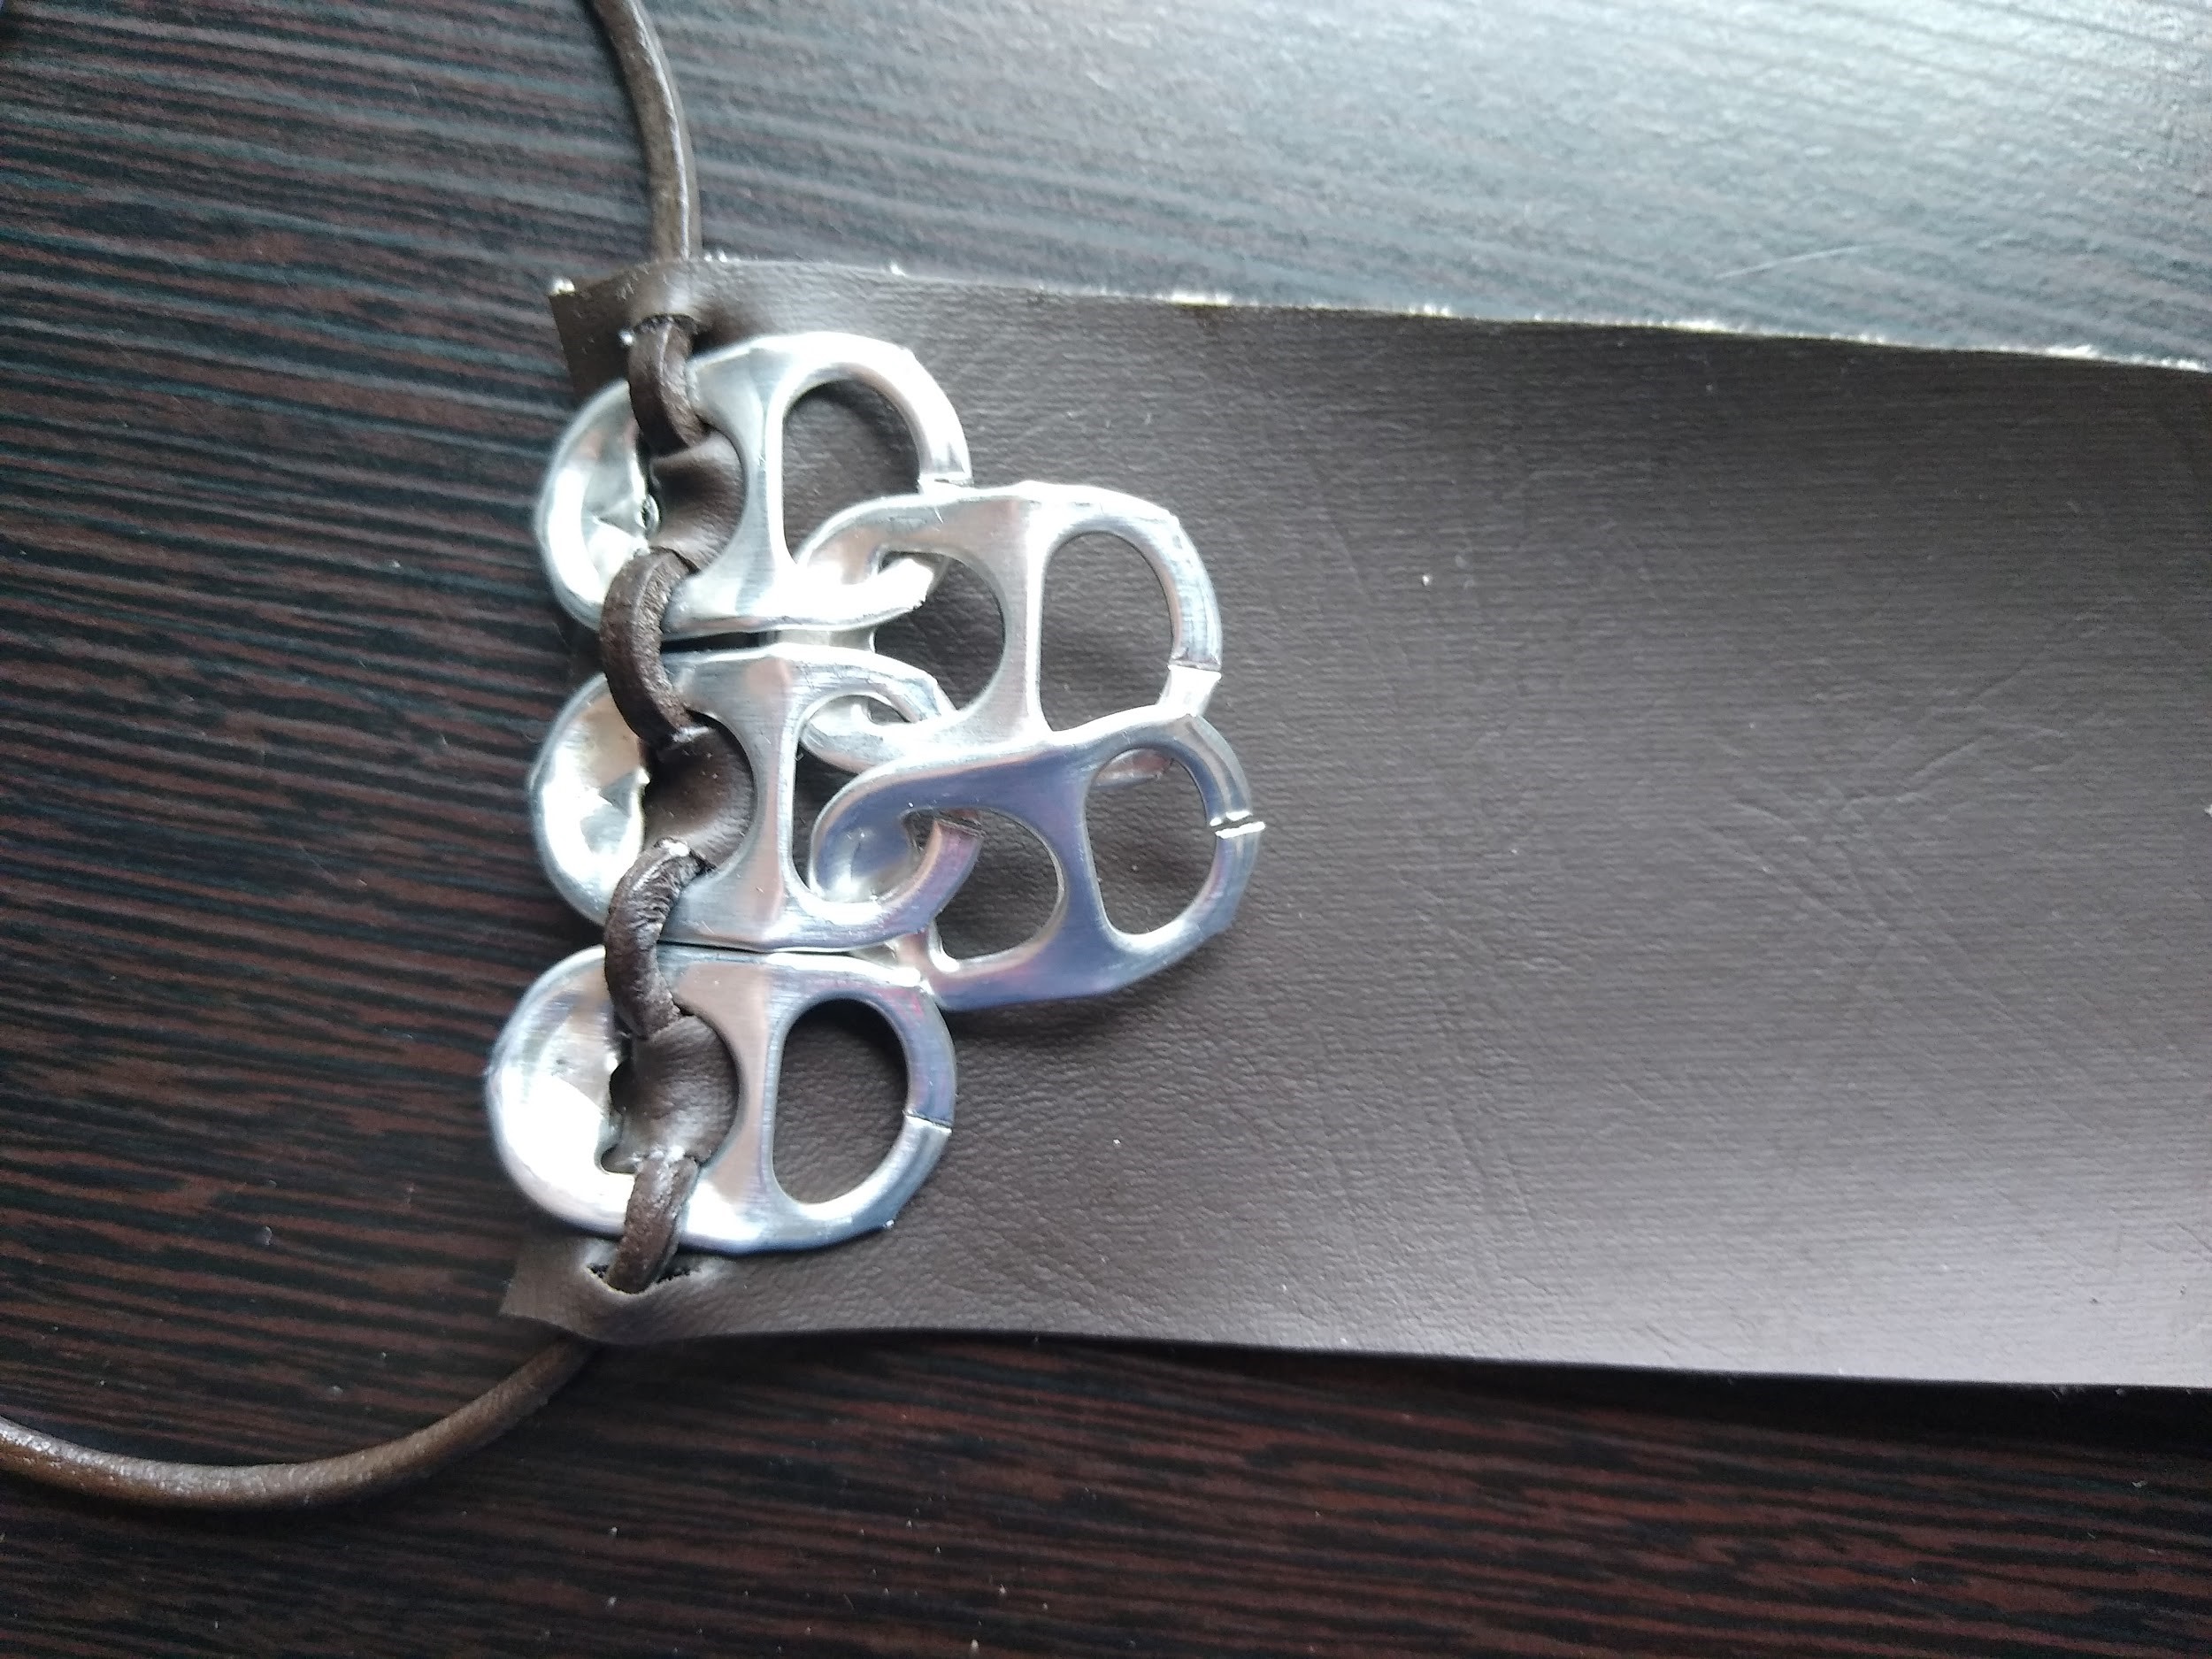

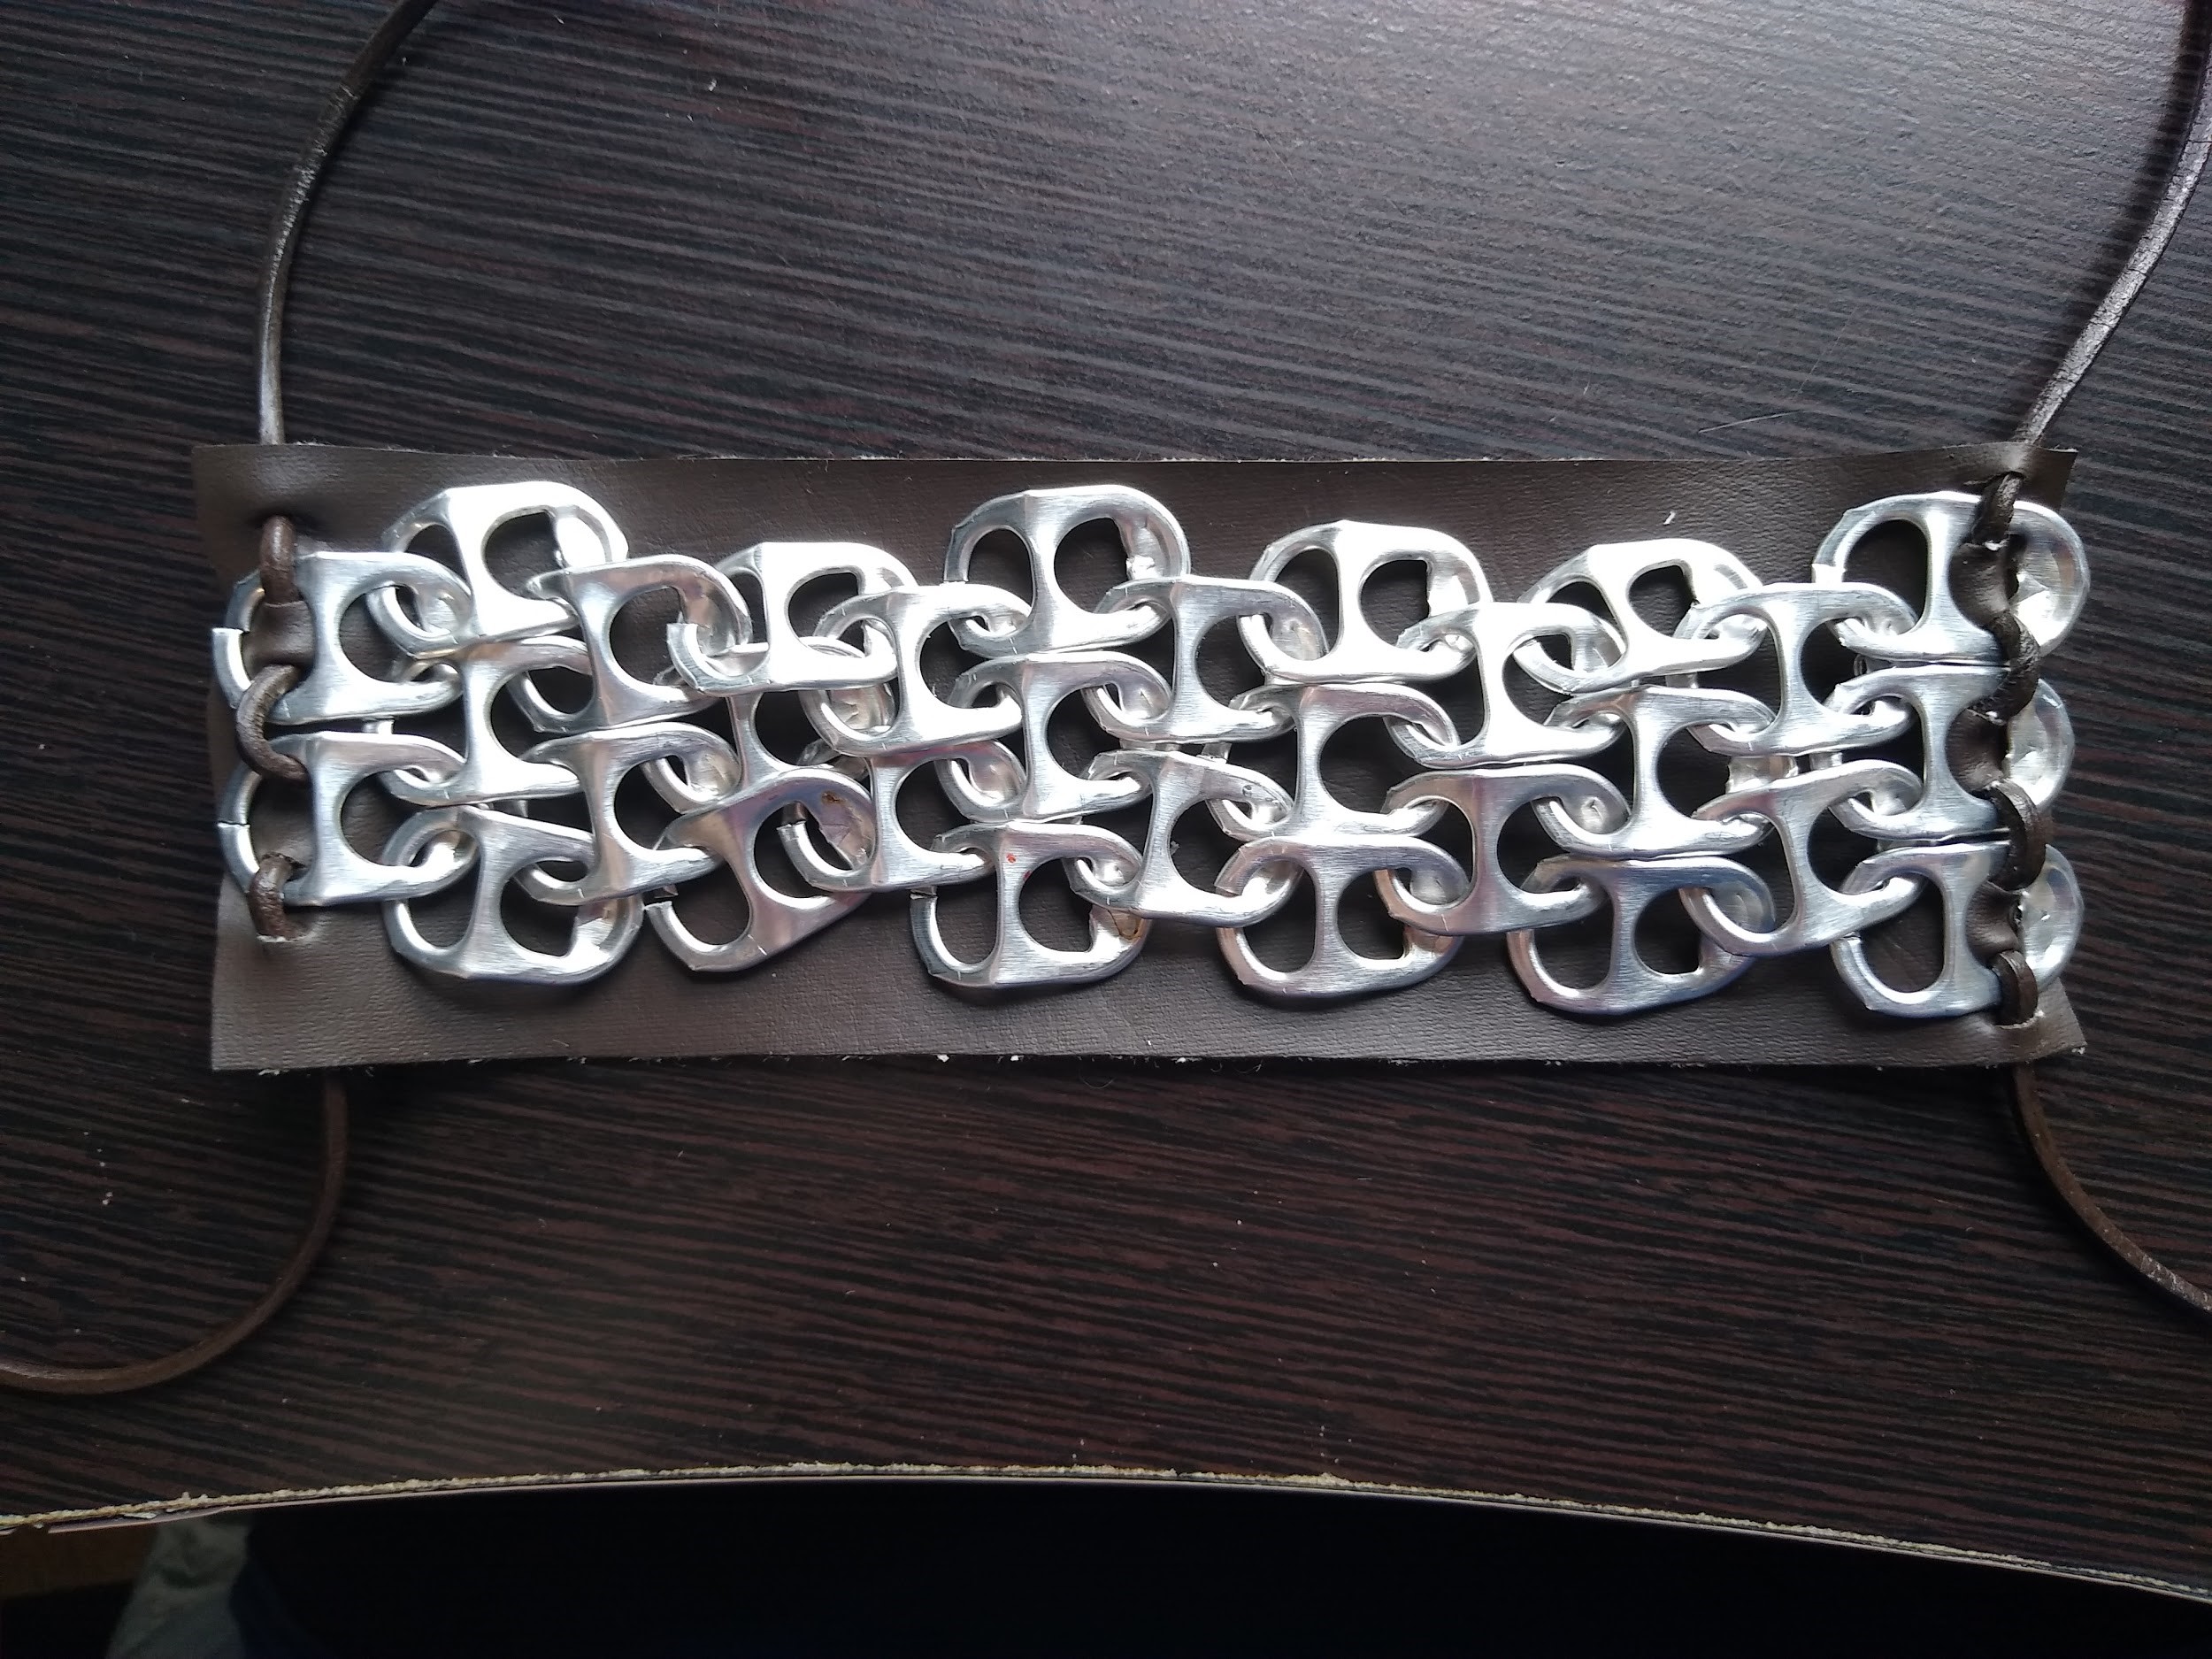
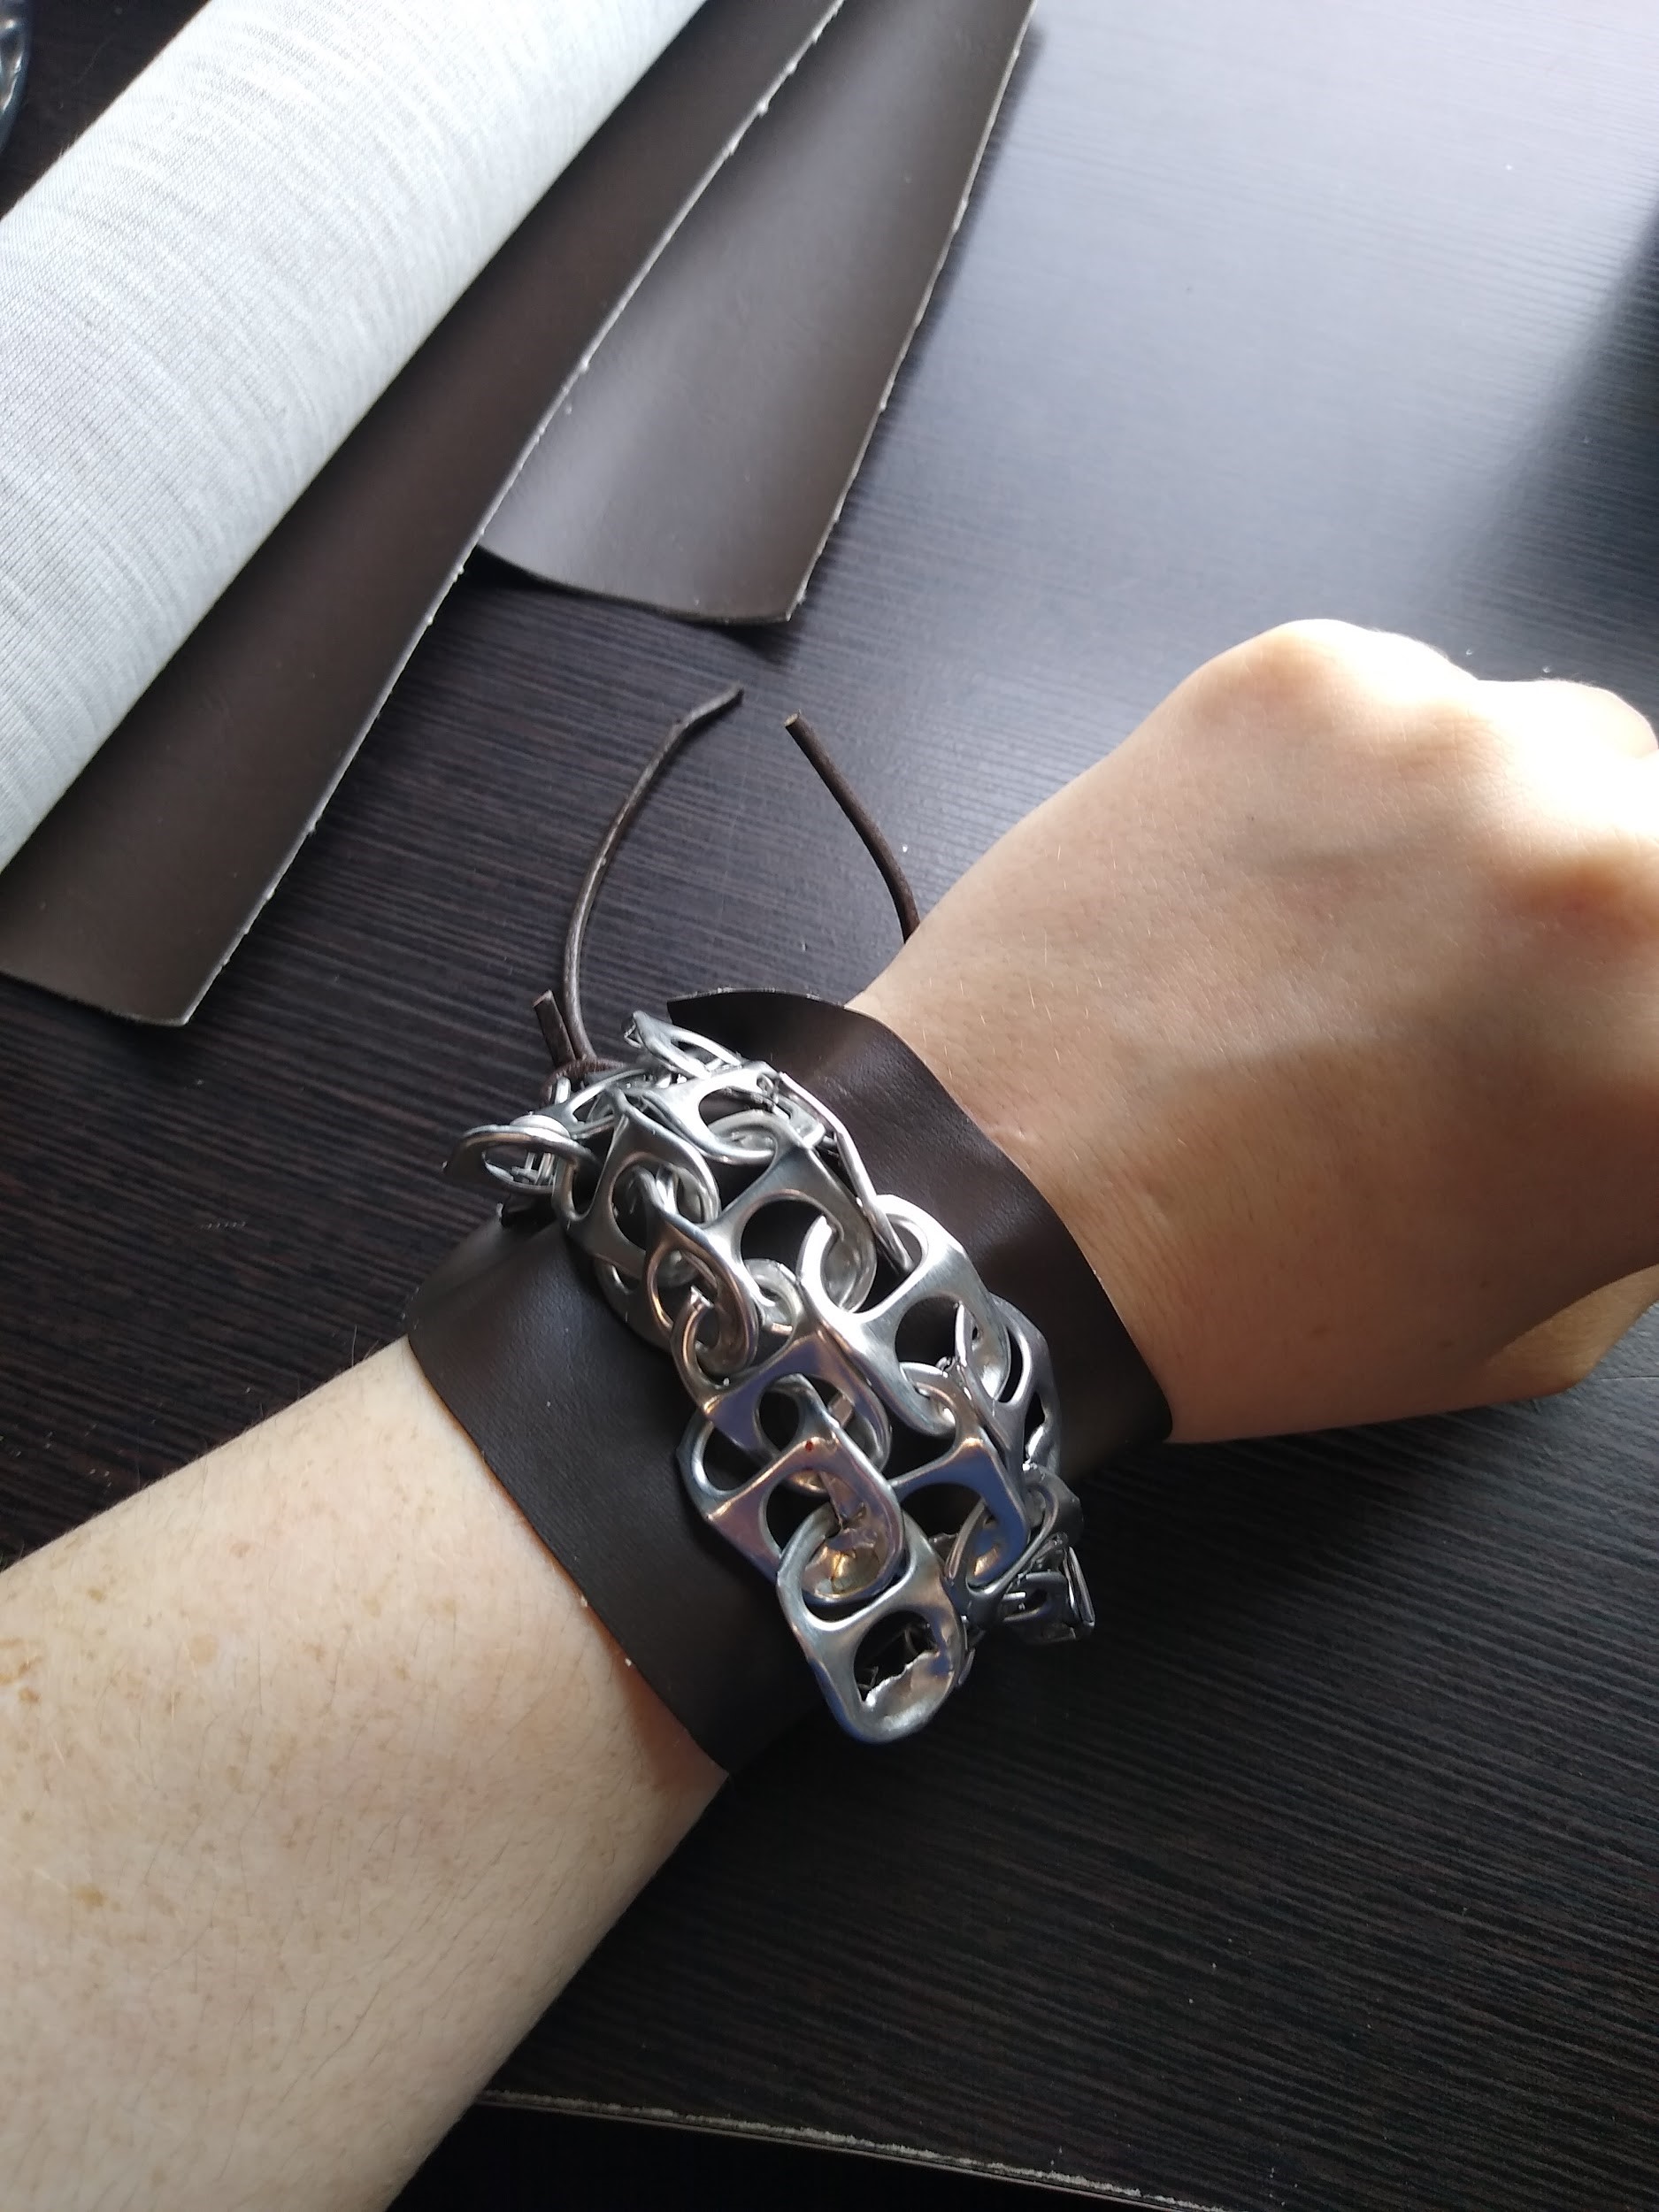
Step 5
Continue attaching the pop tabs across the fabric. When you get to the end, cut slits into the fabric and attach the tabs with another piece of cord or string.
Step 6
Tie the cords/strings together to close the bracelet.
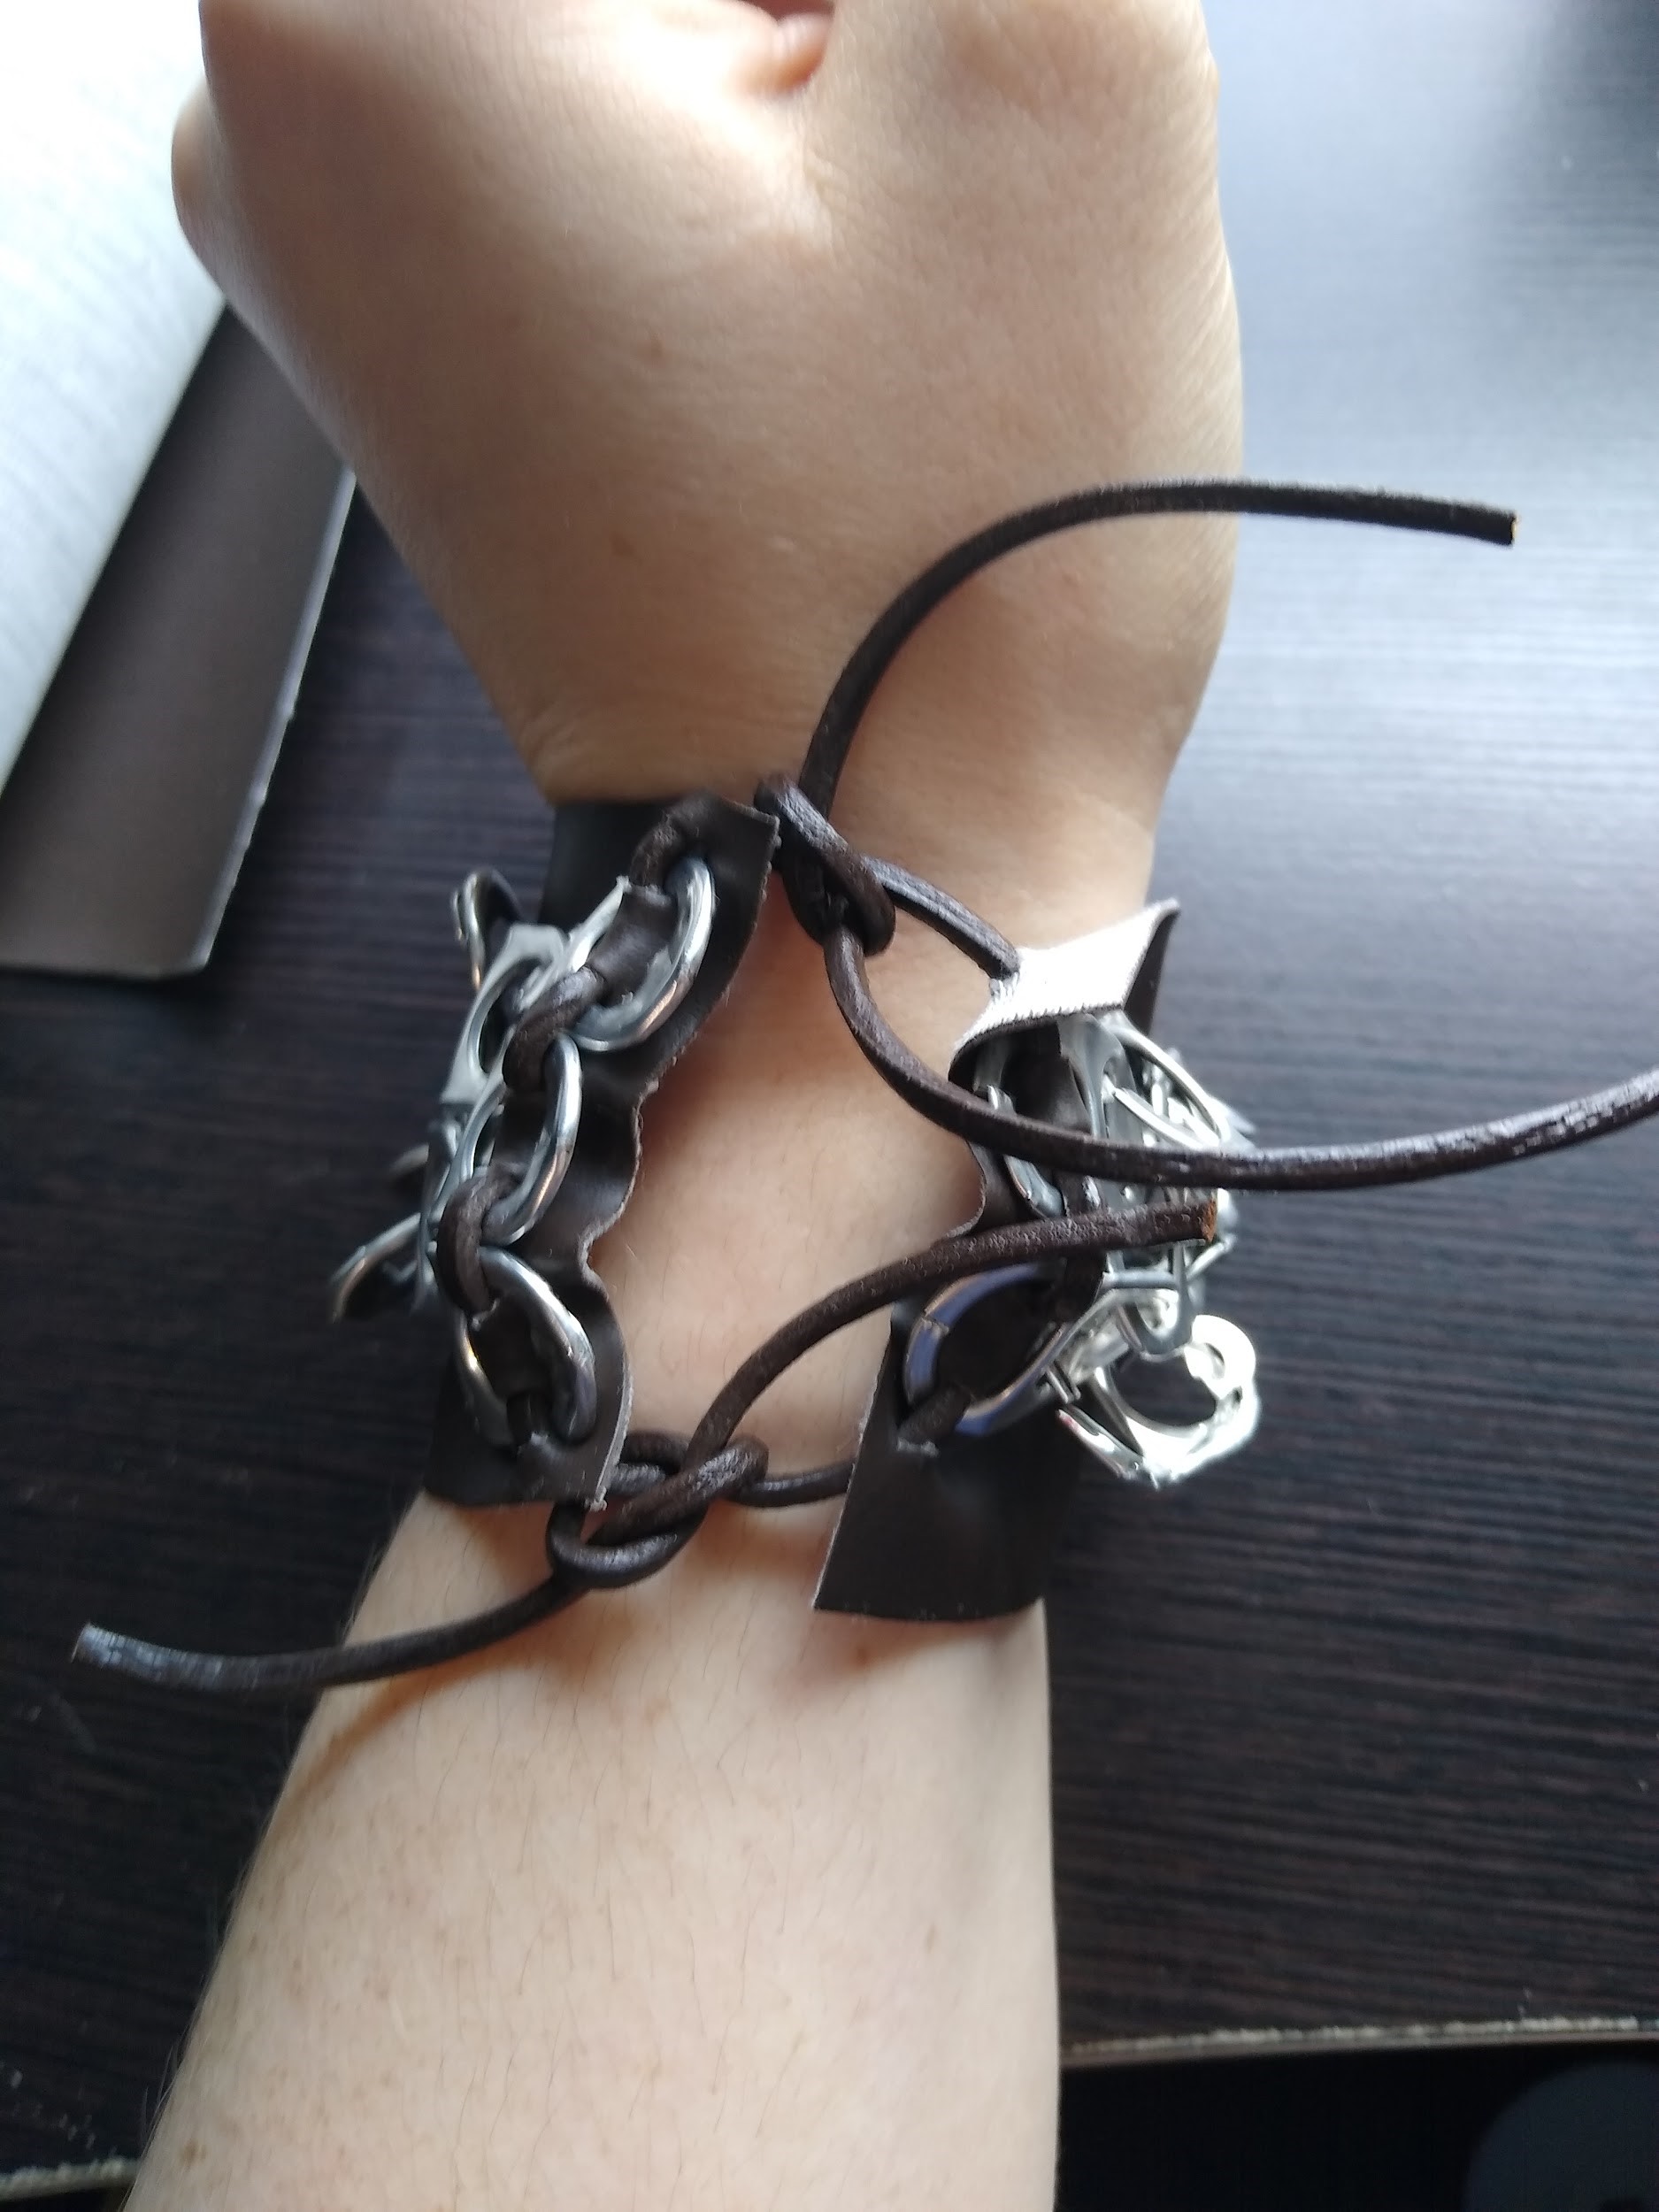
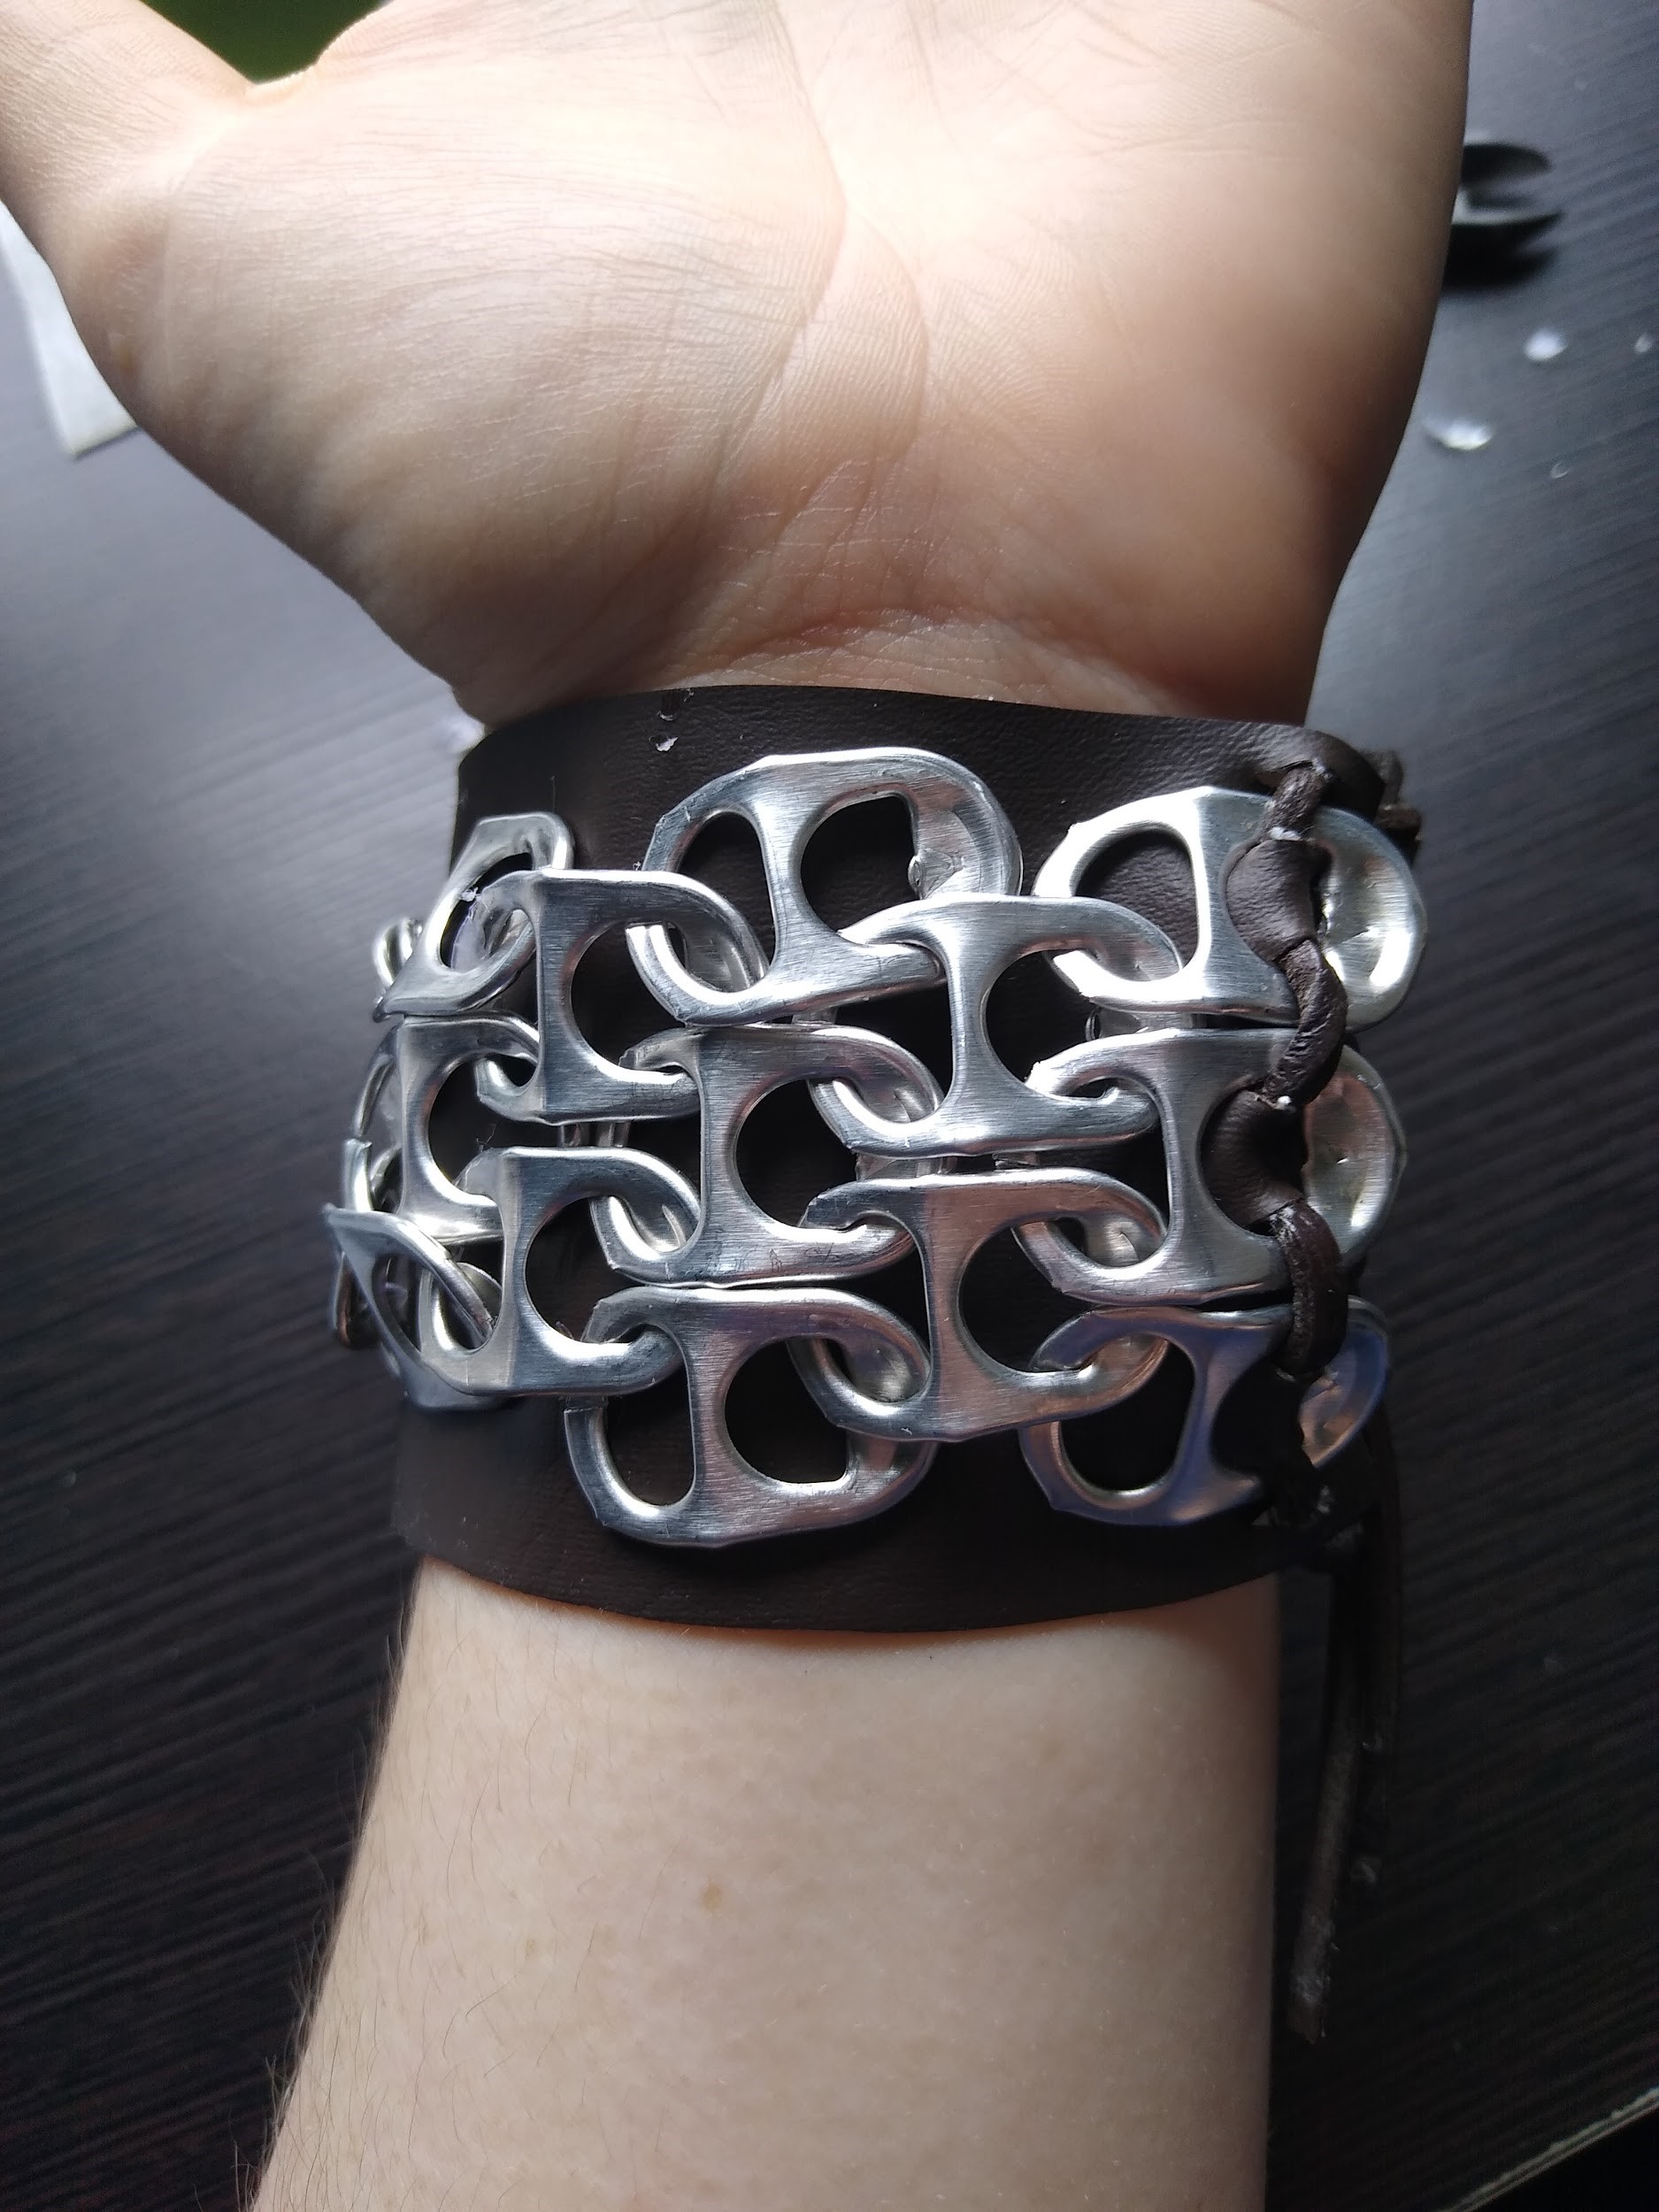
Step 7
The pop tabs may get tangled when the bracelet gets tied. Carefully flip them over and flatten the tabs again. Enjoy your new chainmail bracelet!
Troubleshooting
If your pop tabs keep coming apart, check for pop tabs that are bent open at the cut and bend them closed again. A dab of glue may help keep things together.
More News