
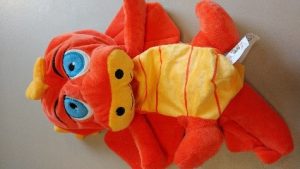
DIY Tutorial: Stuffed Animal Workshop
Create your own magical creature to spend time with while being Healthy at Home.
The tutorial was created by Joyce Emery, the children’s programmer at our Carrico/ Fort Thomas Branch. If you have any questions about the tutorial, please email her at jemery@cc-pl.org.
Supplies Needed
- Dragon or Unicorn Take & Make kit
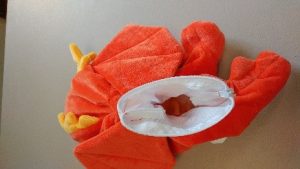
Step 1
Find the velcro opening on the center back of your magical creature. Open the velcro and reach into the opening to find a small white pouch. Pull the pouch all the way out of your plush animal. Unzip the pouch.
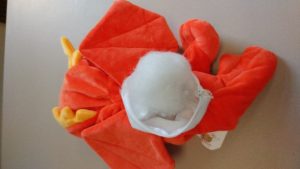
Step 2
You can begin stuffing your animal friend with fiber-fill by putting your hands through the small white pouch. Please make sure that the pouch is pulled all the way out as you are stuffing. Otherwise, the fiber-fill does not go into your stuffed animal, and it can get a little messy. Fill the arms and legs first, and then the head and belly.
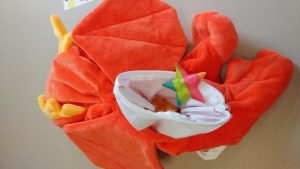
Step 3
Make your special creature even more magical by making a wish on the rainbow star and placing this inside your unicorn or dragon.
Step 4
Close up your new animal friend by zipping up the pouch and sealing the velcro closure.
Step 5
Now you can give your magical creature a name on the birth certificate! You can also list the date of birth, and fur and eye color.

Step 6
Congratulations on bringing your cuddly friend to life! Always give it lots of hugs and love!
More News