
DIY Tutorial: Printmaking for Kids

Learn a fun and simple printmaking activity to do at home with kids.
The tutorial was created by Nina Frondorf, the Children’s Services Librarian at our Newport Branch. If you have any questions about the tutorial, please email her at Nfrondorf@cc-pl.org.
Supplies Needed
- Craft foam
- Toothpicks
- Markers
- Paper

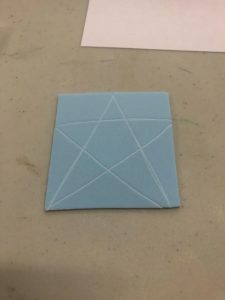
Step 1
Using a toothpick, draw a design on the craft foam. Feel free to use scissors to cut the foam to different sizes.
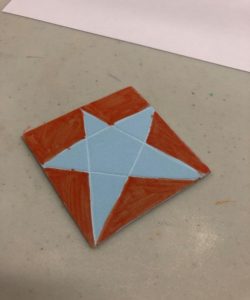
Step 2
Once your design is drawn, use markers to color it in. Any space in your image that you want to be white should stay unmarked.
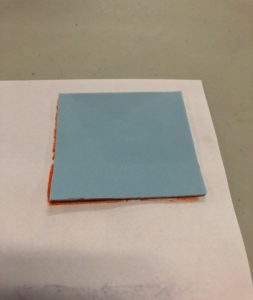
Step 3
After you’ve added the marker ink, turn over your foam piece and press it down on the paper. Make sure to add some pressure to be sure that the ink gets on the paper.
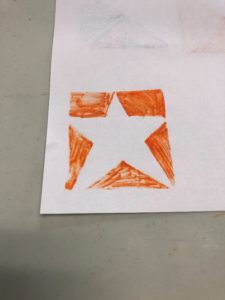
Step 4
Carefully pull up the foam to reveal your design! Now that you have this stamp, you can make a pattern by stamping this on your paper multiple times, or you can make more stamps to add to your image.
Tips
- Be sure to move quickly, while the ink is still wet, for the best transfer.
- Colors can blend together easily. The fewer colors used, the better the results may be.
- Wipe your stamp down with a wet rag or paper towel to remove leftover ink before switching to a new color.
More News