
DIY Tutorial: Clothespin Flower Fairies
Create your own flower fairy friend!
The tutorial was created by Cody Elliott, the Adult/Teen Services Programmer at our Newport Branch. If you have any questions about the tutorial, please email him at Celliott@cc-pl.org.
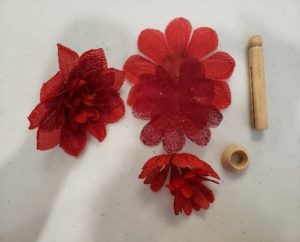
Supplies Needed
- Faux flowers and leaves
- Rounded clothespin
- Clothespin base
- Glue
- Scissors
Step 1
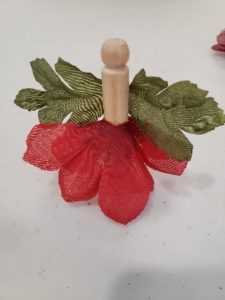
Begin by taking apart your layers of flower and leaves. This is done by removing the plastic stem pieces that are holding the flowers together. You can place your clothespin into your round clothespin base so that it will stand up on its own while you work.
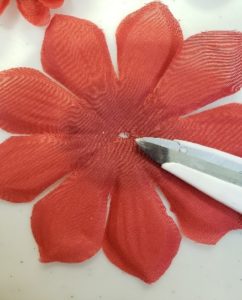
Step 2
Next, decide what pieces you want to use for a dress, normally the biggest layer works best. There will already be a small hole in the center, so use your scissors to enlarge the hole. This will let you slide the flower onto the clothespin like a dress.
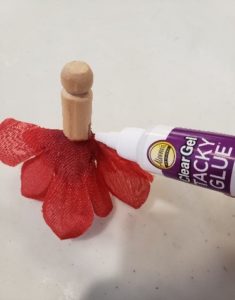
Step 3
Use glue to secure the flower petal to the pin where you want it to sit. You can repeat these steps to add more layers to your dress to make the dress appear more full. Allow the glue to dry for a few minutes before continuing on to the next step.
Step 4
Next, decide how you want your wings to look. Use your leaves to decide if you want your fairy to have two fanned wings, or make them bigger with three or four. Use a dab of glue and attach the leaves to the back of your fairy.
Step 5
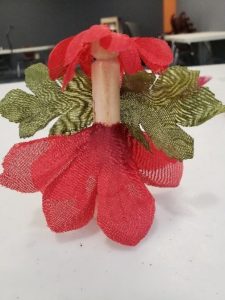
Lastly, use a smaller flower layer and attach it to the top of the fairy’s head as a hat. Feel free to get creative and use a marker to draw eyes on your fairy. Or try using a pink highlighter to add the effect of your fairy blushing.
More News