
DIY Tutorial: Agamographs
Create multiple images within one art piece with just a couple of steps!
The tutorial was created by Cody Elliott, the Adult/Teen Services Programmer at our Newport Branch. If you have any questions about the tutorial, please email him at Celliott@cc-pl.org.
Supplies Needed
- Paper
- Agamograph template
- Colored pencils, markers or crayons
- Scissors
- Glue
Step 1
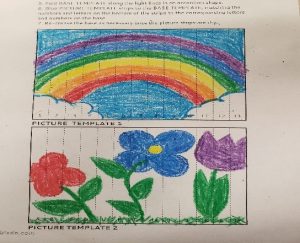
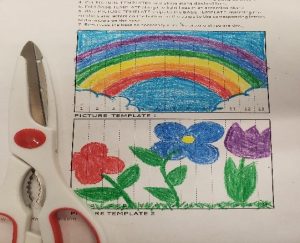
First, use your provided template and find the two empty boxes. These are where you can get creative and draw two separate images of anything you can think of!
Step 2
After you finish your pictures, cut out each of the boxes. Then, use your scissors to cut out each strip (1-13 and A-K).
Step 3
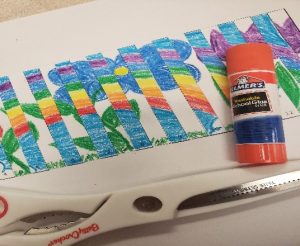
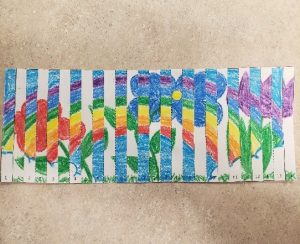
On your blank sheet of paper, glue down the strips in a repeating pattern (1,A,2,B,3,C…) until all of the strips have been laid down. Once they are in place, glue them down to the blank sheet of paper.
Step 4
Once dry, cut the excess paper from around the edges, leaving only the patterned images.
Step 5
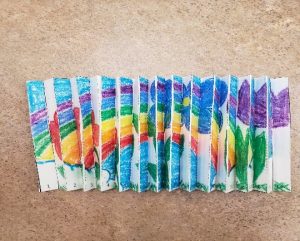
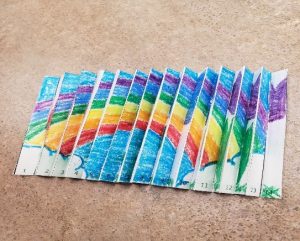
Fold the paper at each strip, alternating directions to make an accordion fold. At this point, you will begin to see your optical illusion.
Step 6
Once folded, your agamograph is complete! Looking at the folded image from the left side, you can see the flower picture, while looking from the right side, you can see the rainbow.

More News