
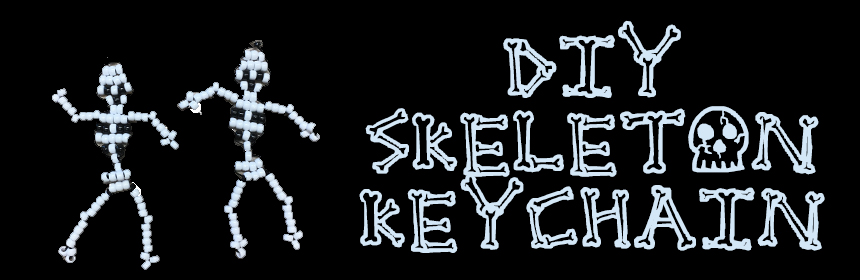
DIY Creepy Keychains
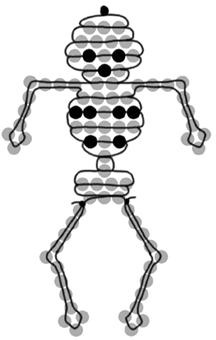
With the help of the pattern guide, follow the steps below to make your own creepy skeleton keychain!
Join us at our Carrico/Fort Thomas Branch at 4 pm on Friday, October 28 to create a unique keychain in the shape of a skeleton, ghost or cat.
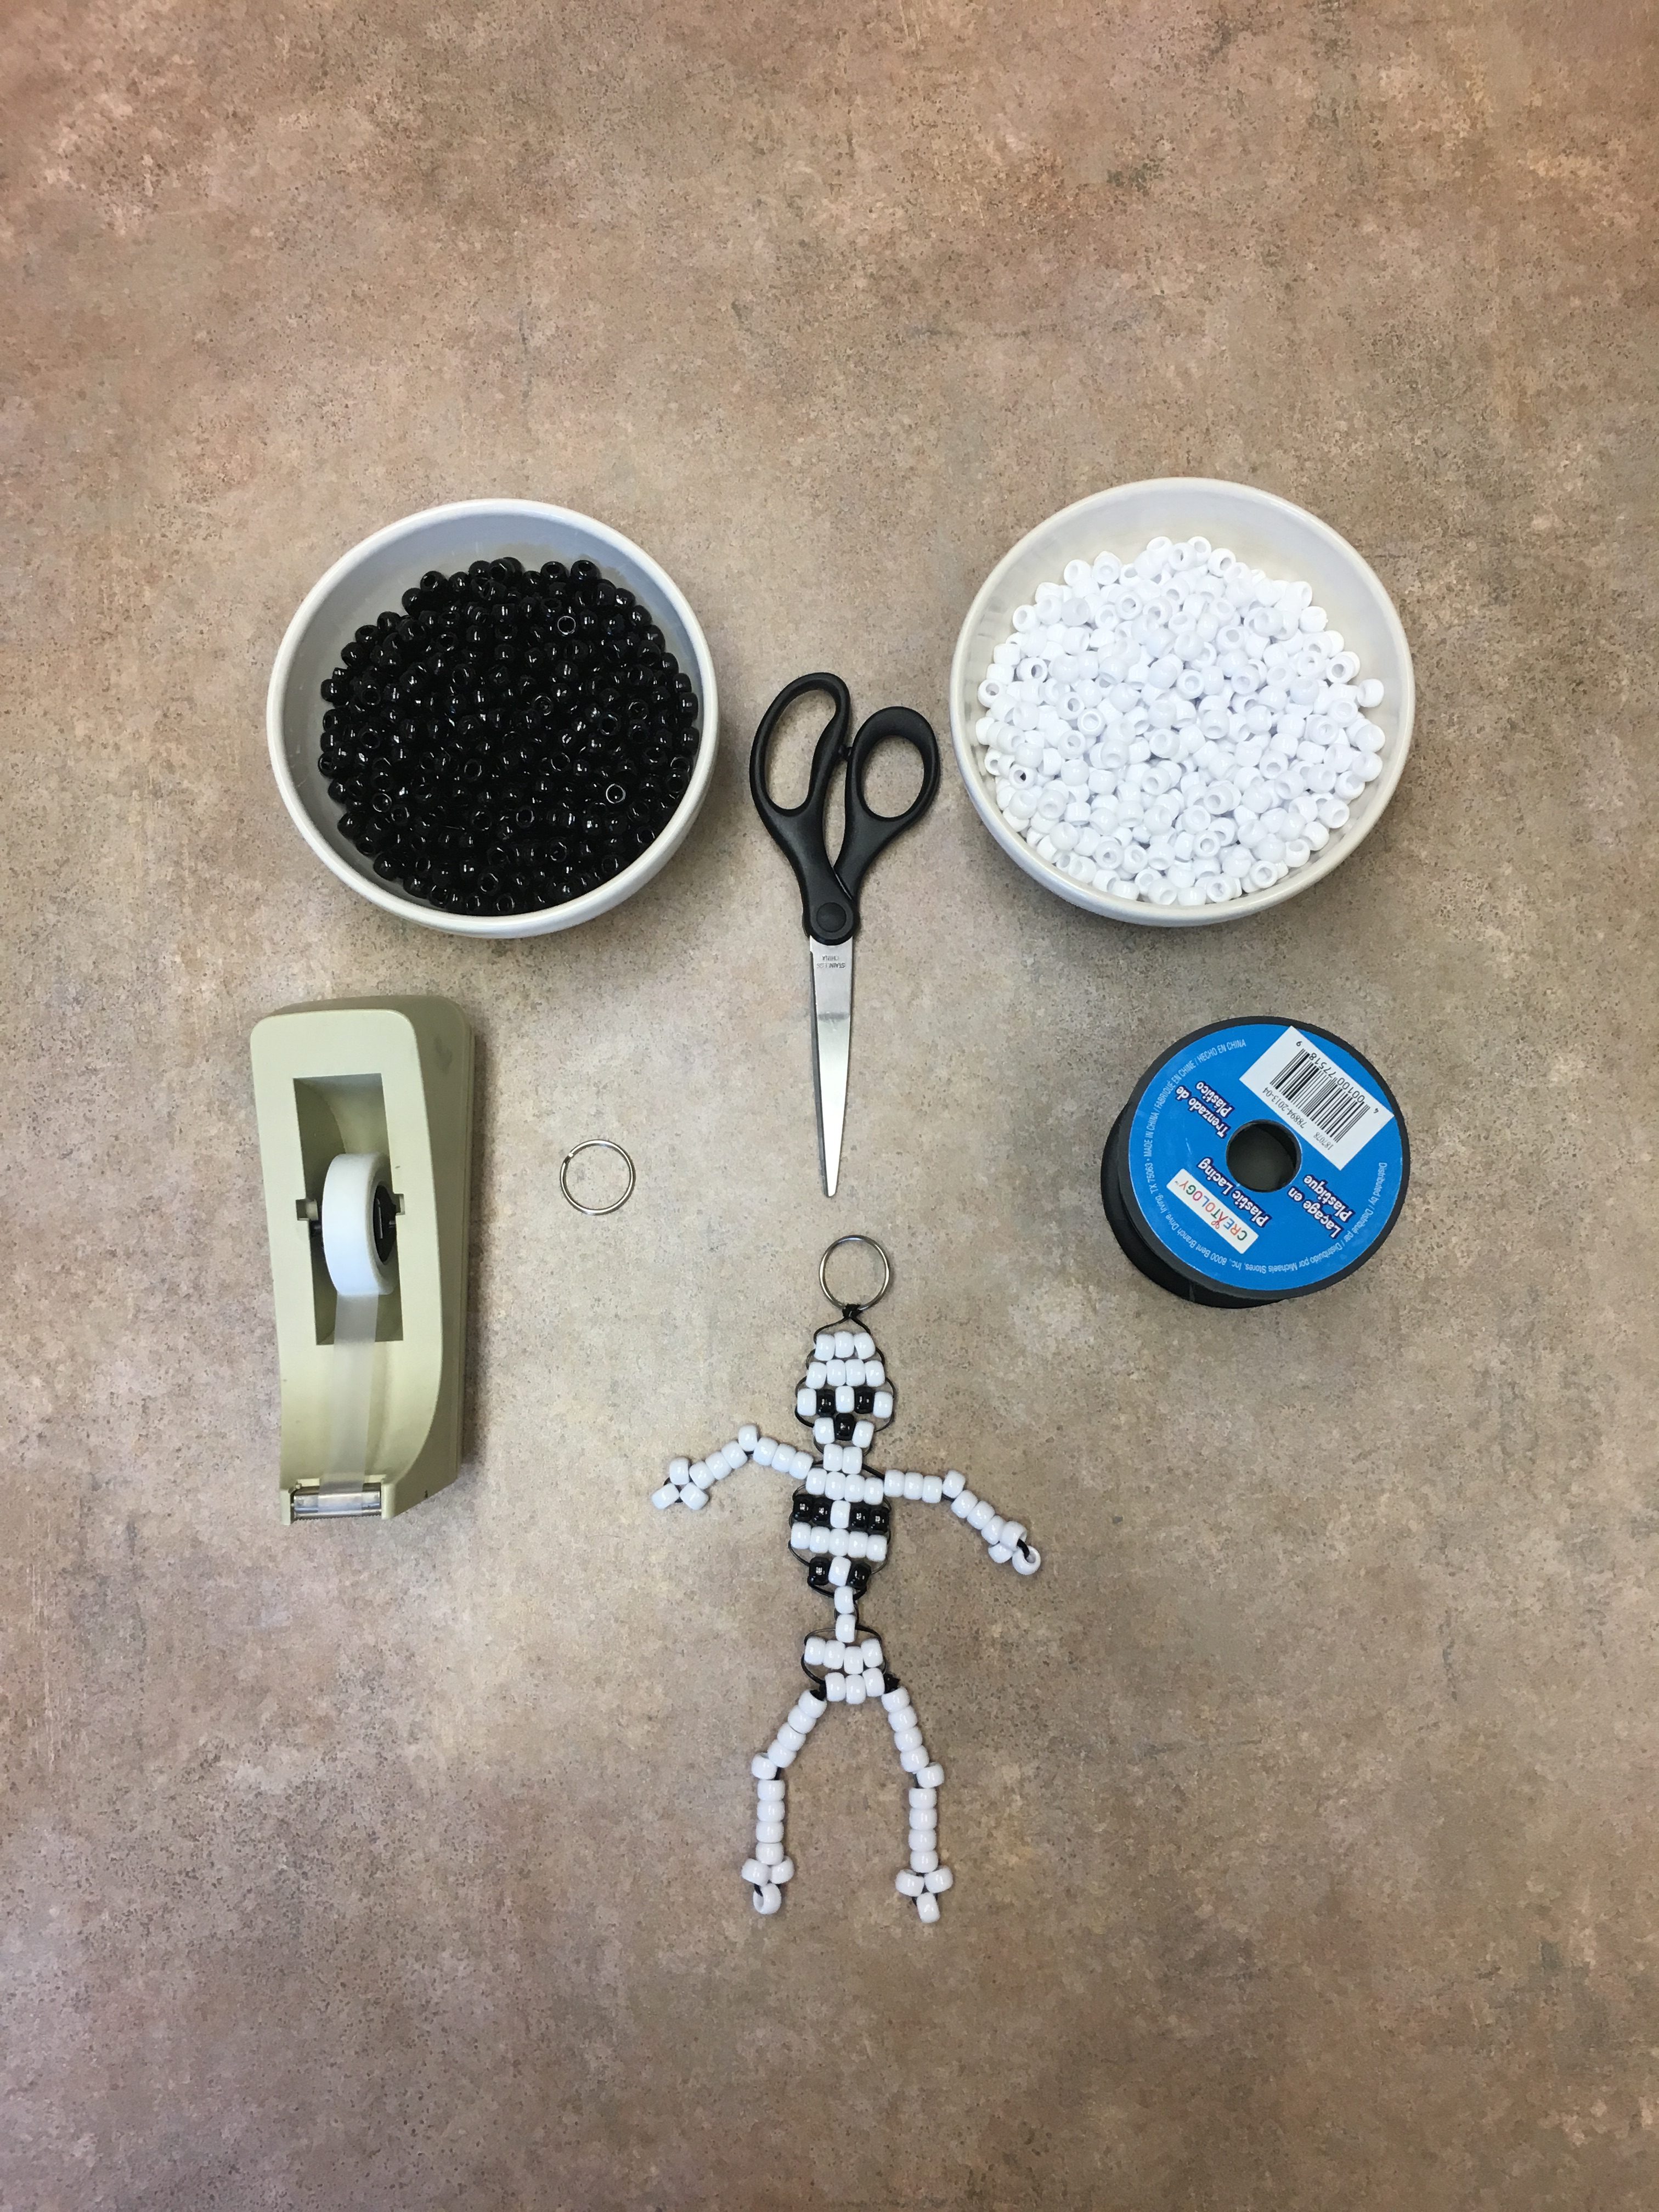
Supplies
- 9 Black Pony Beads
- 78 White Pony Beads
- Black Cord
- Scissors
- Tape
- Key ring (could also use a zipper or lanyard hook)
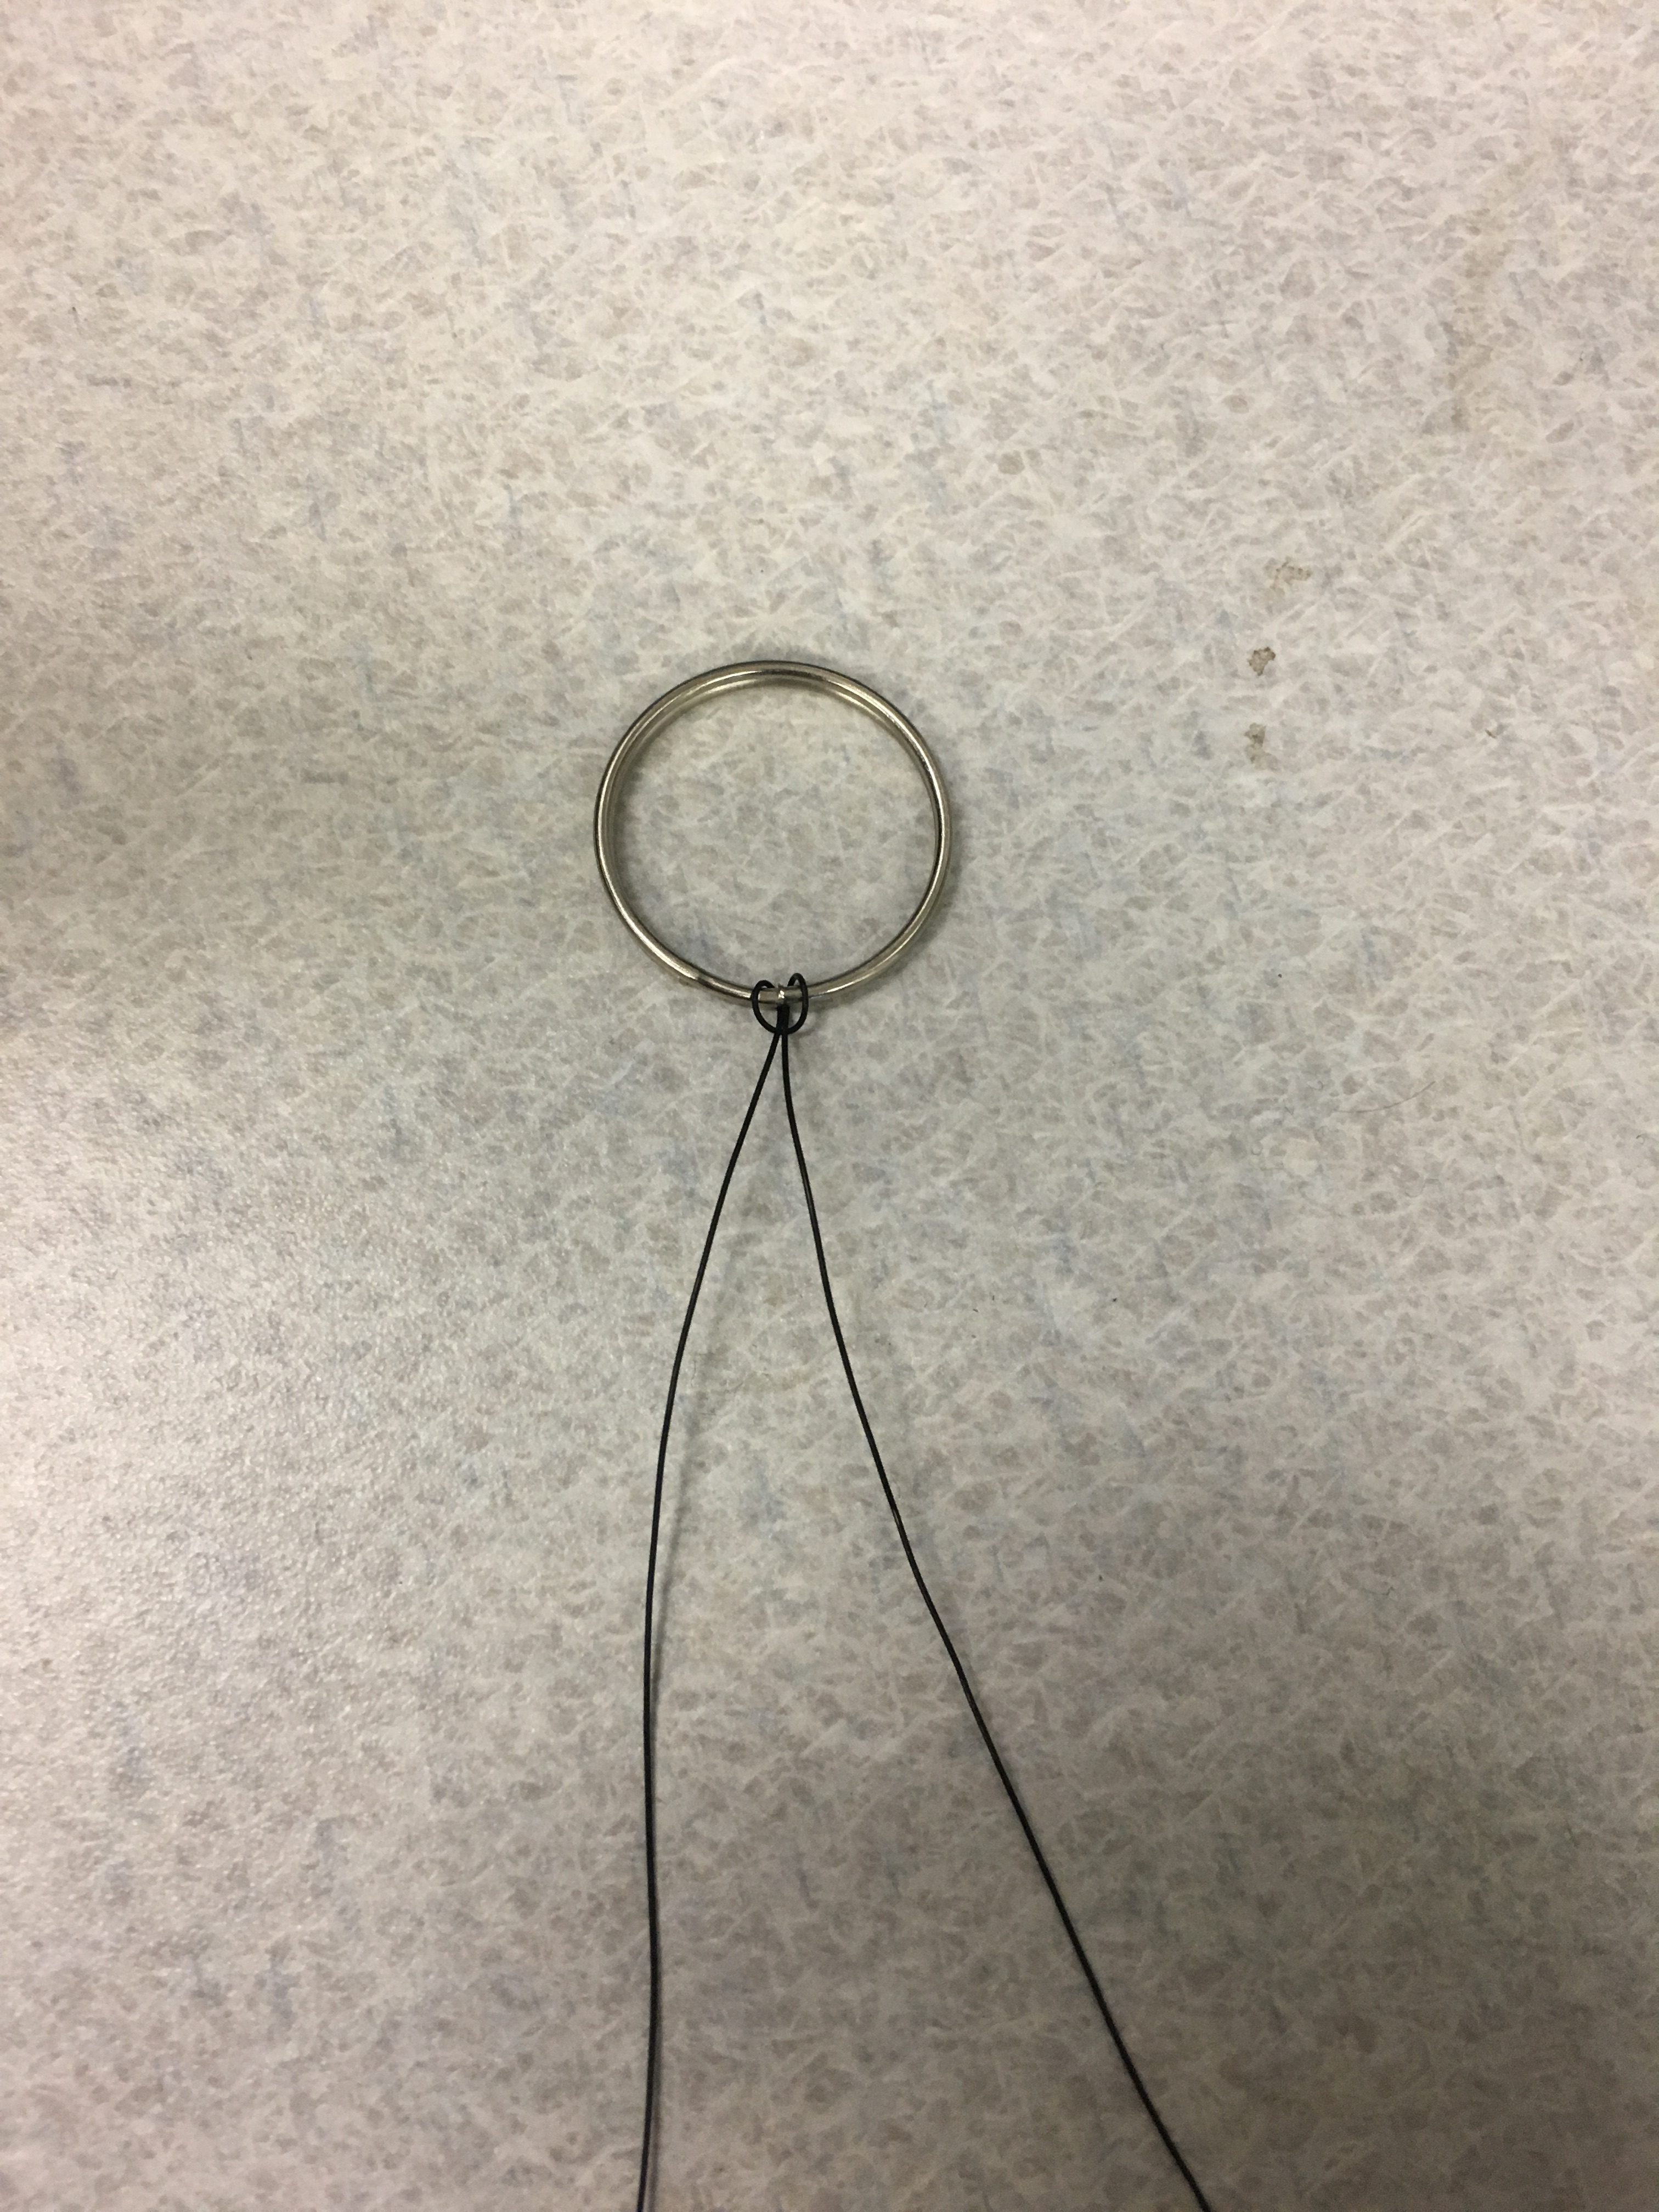
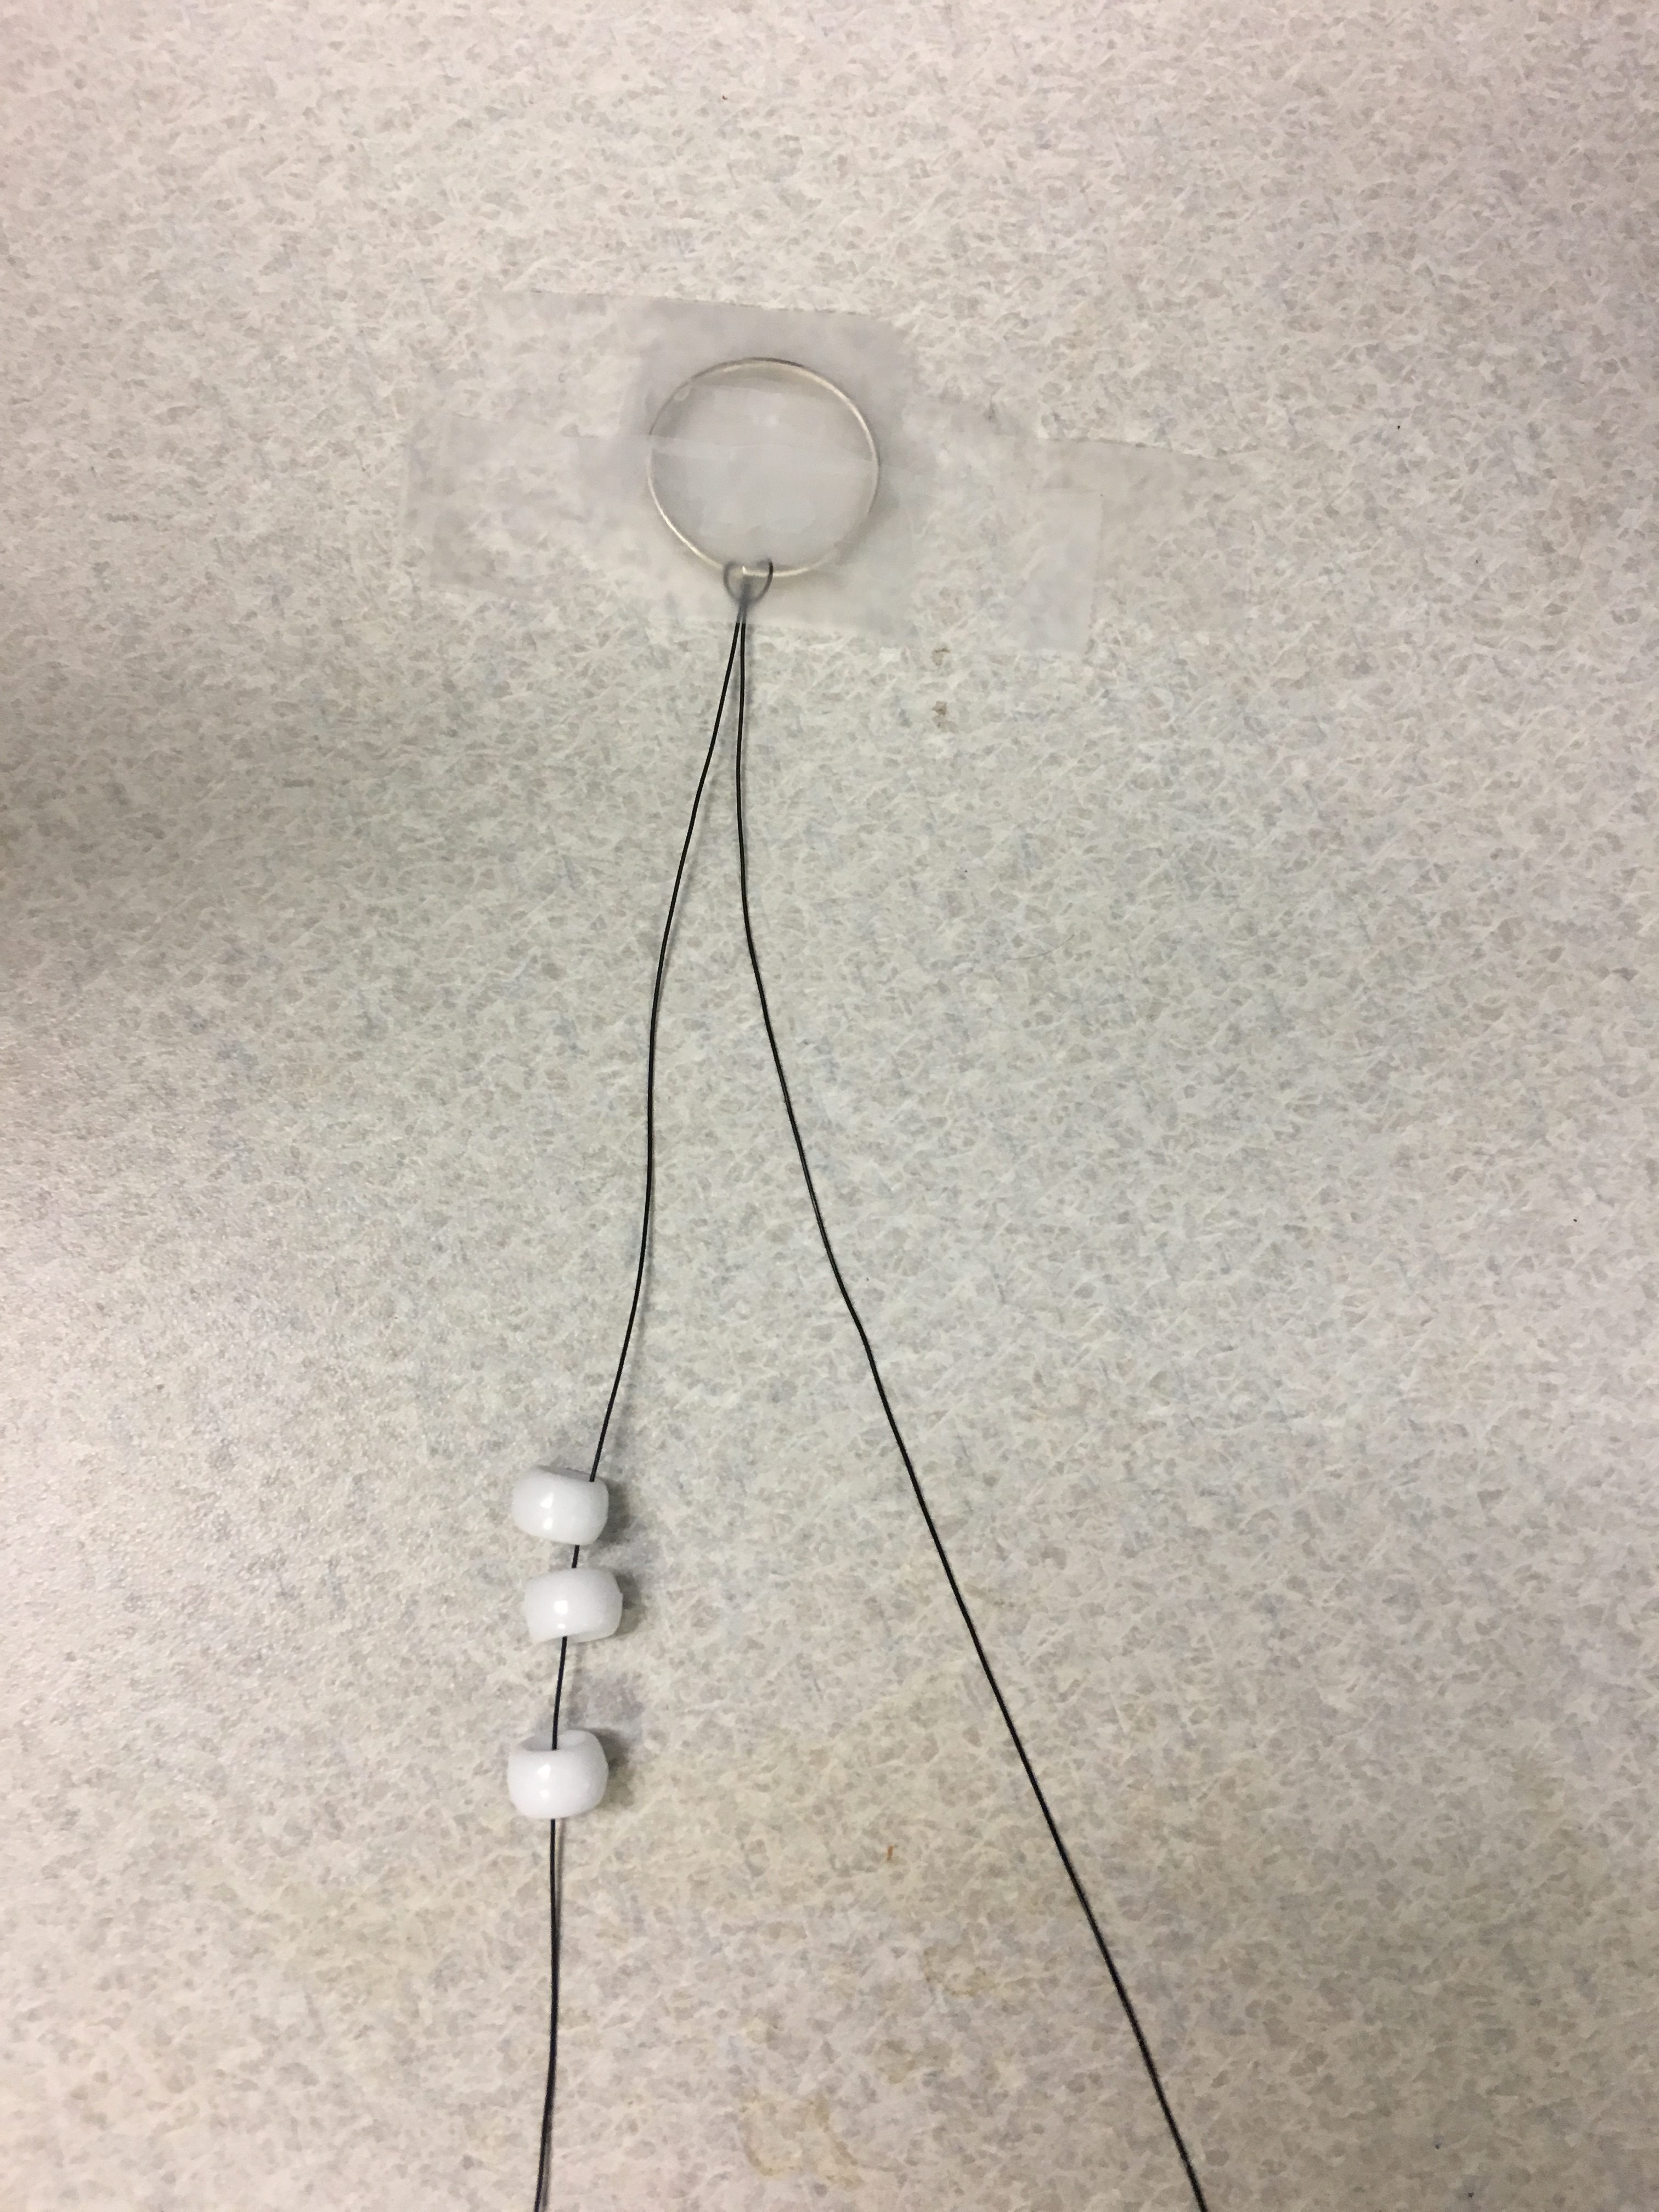
Step 1
- Using 2 yards of cord, find the 1/2 way point on the cord.
- Tie the hook on so that the two ends of the cord hang down.
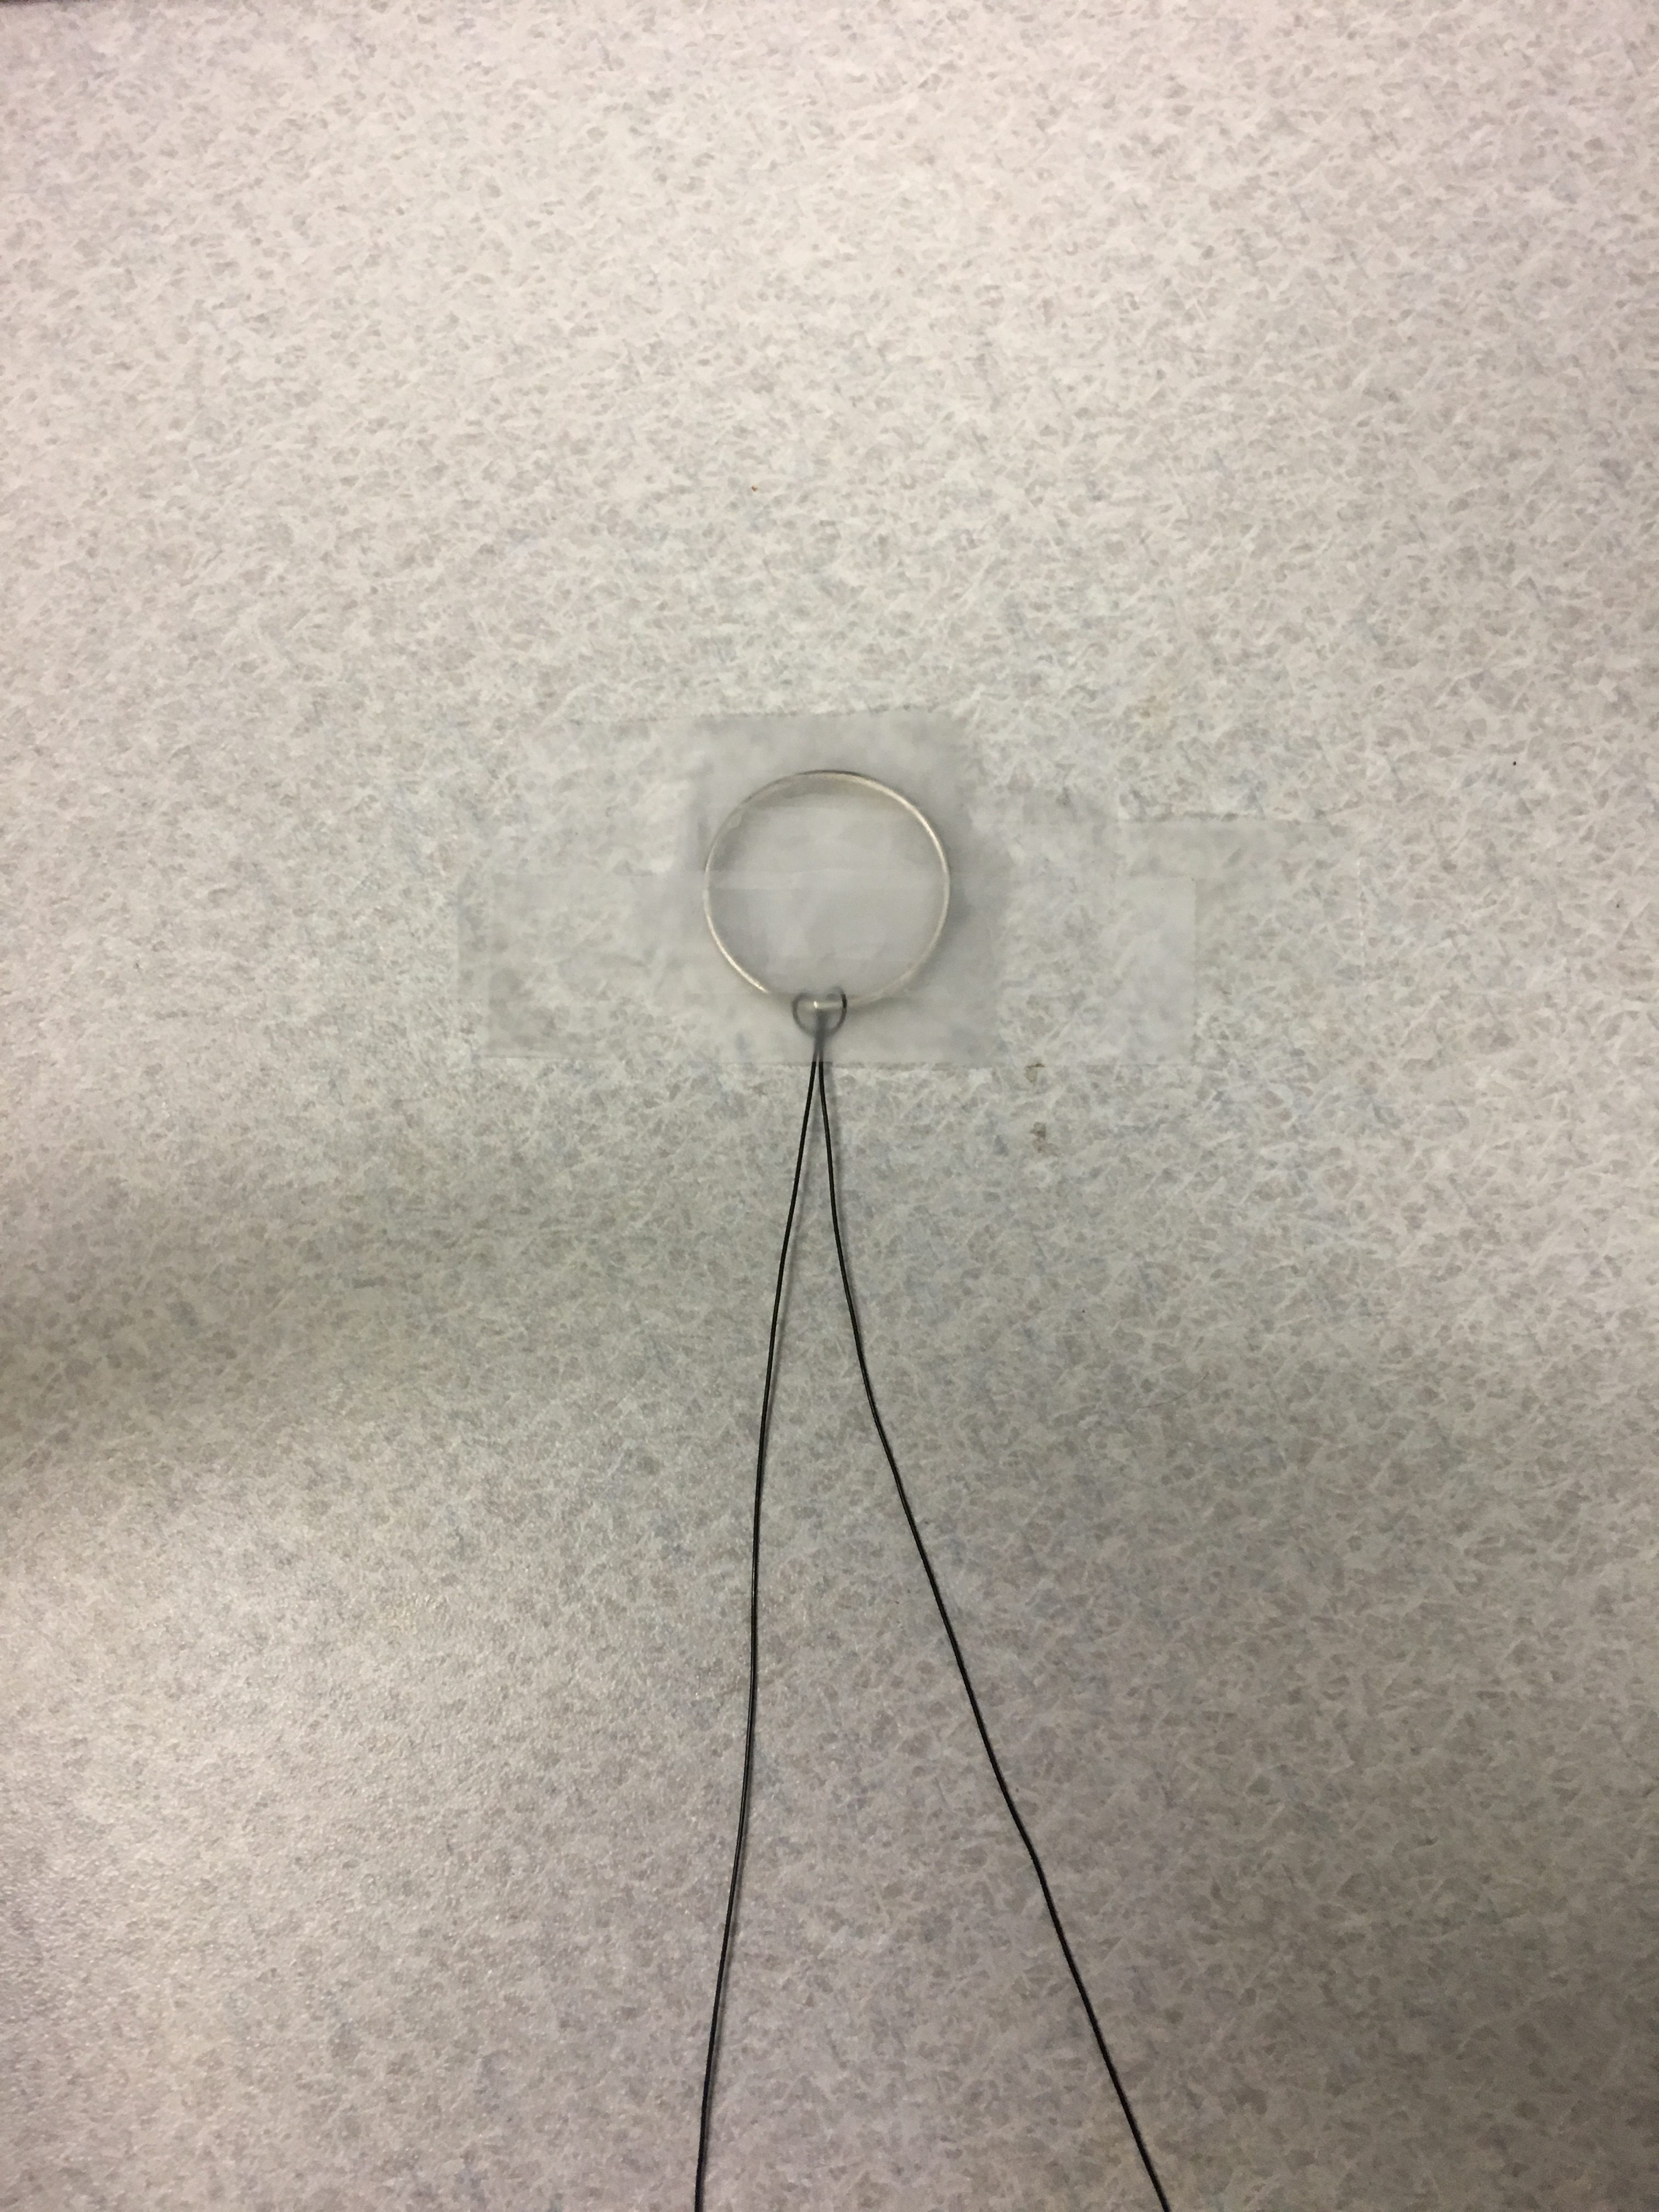
Step 2
- Tape the keychain down to a hard surface.
Step 3
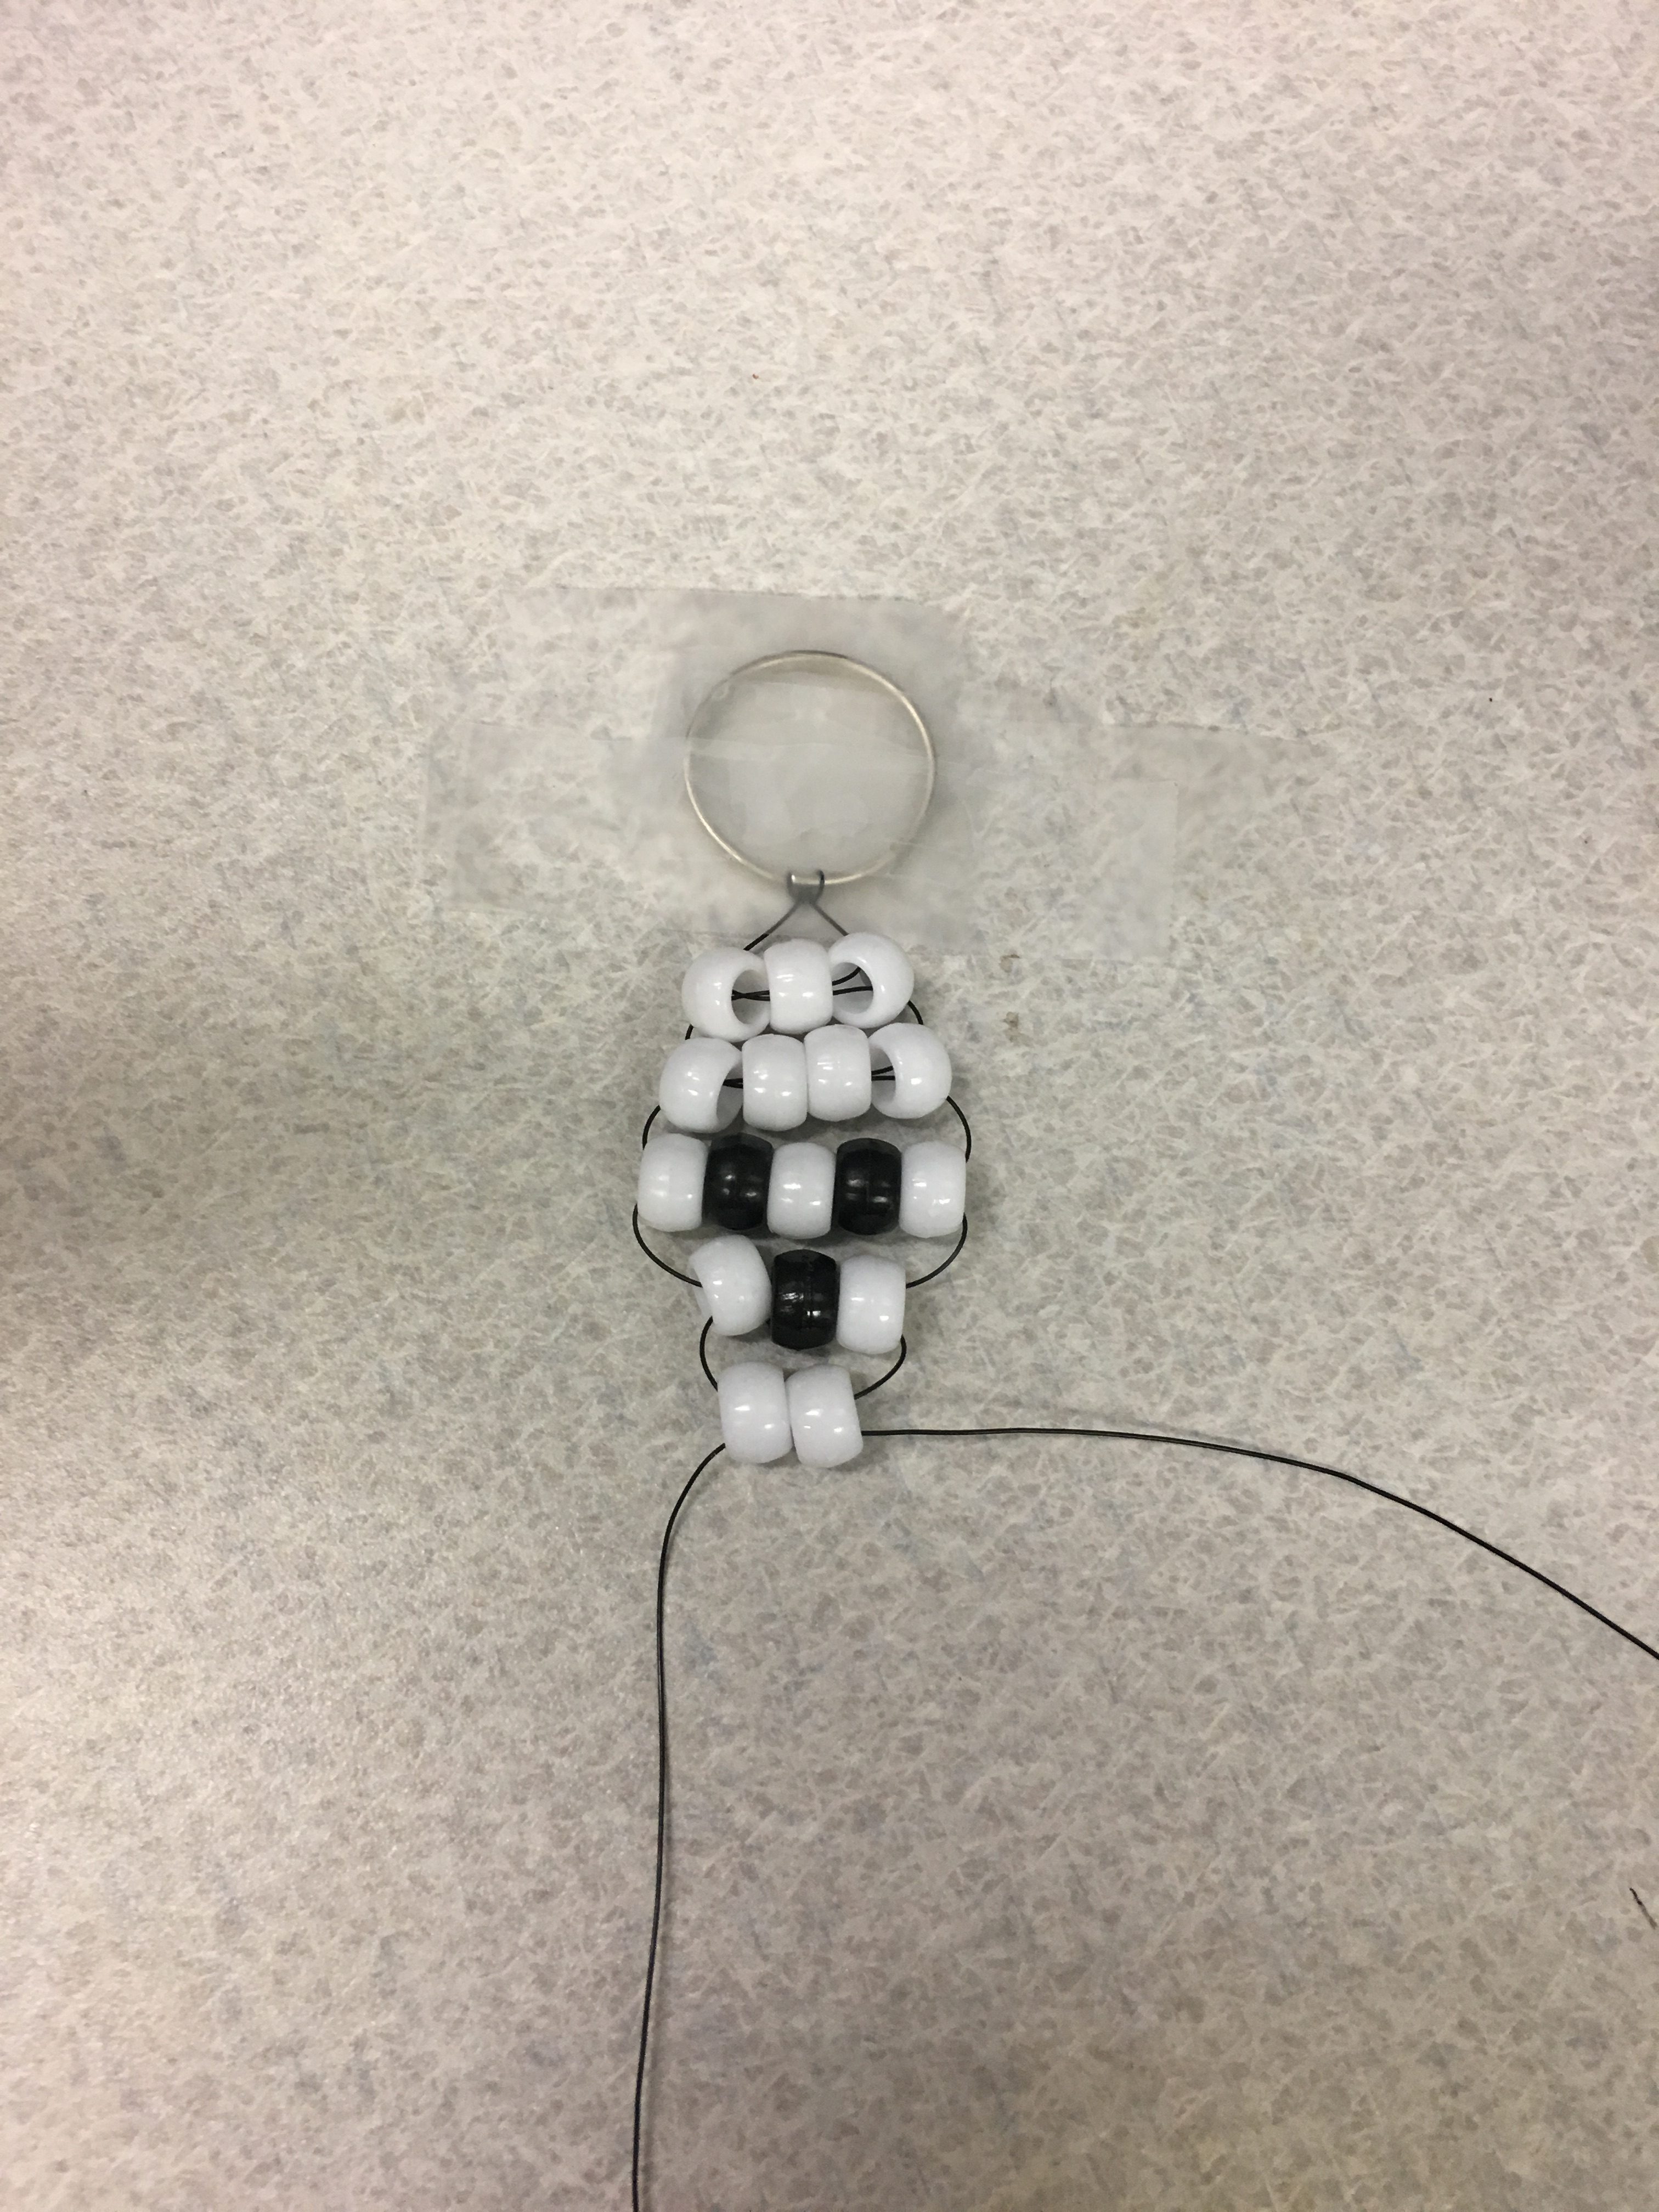
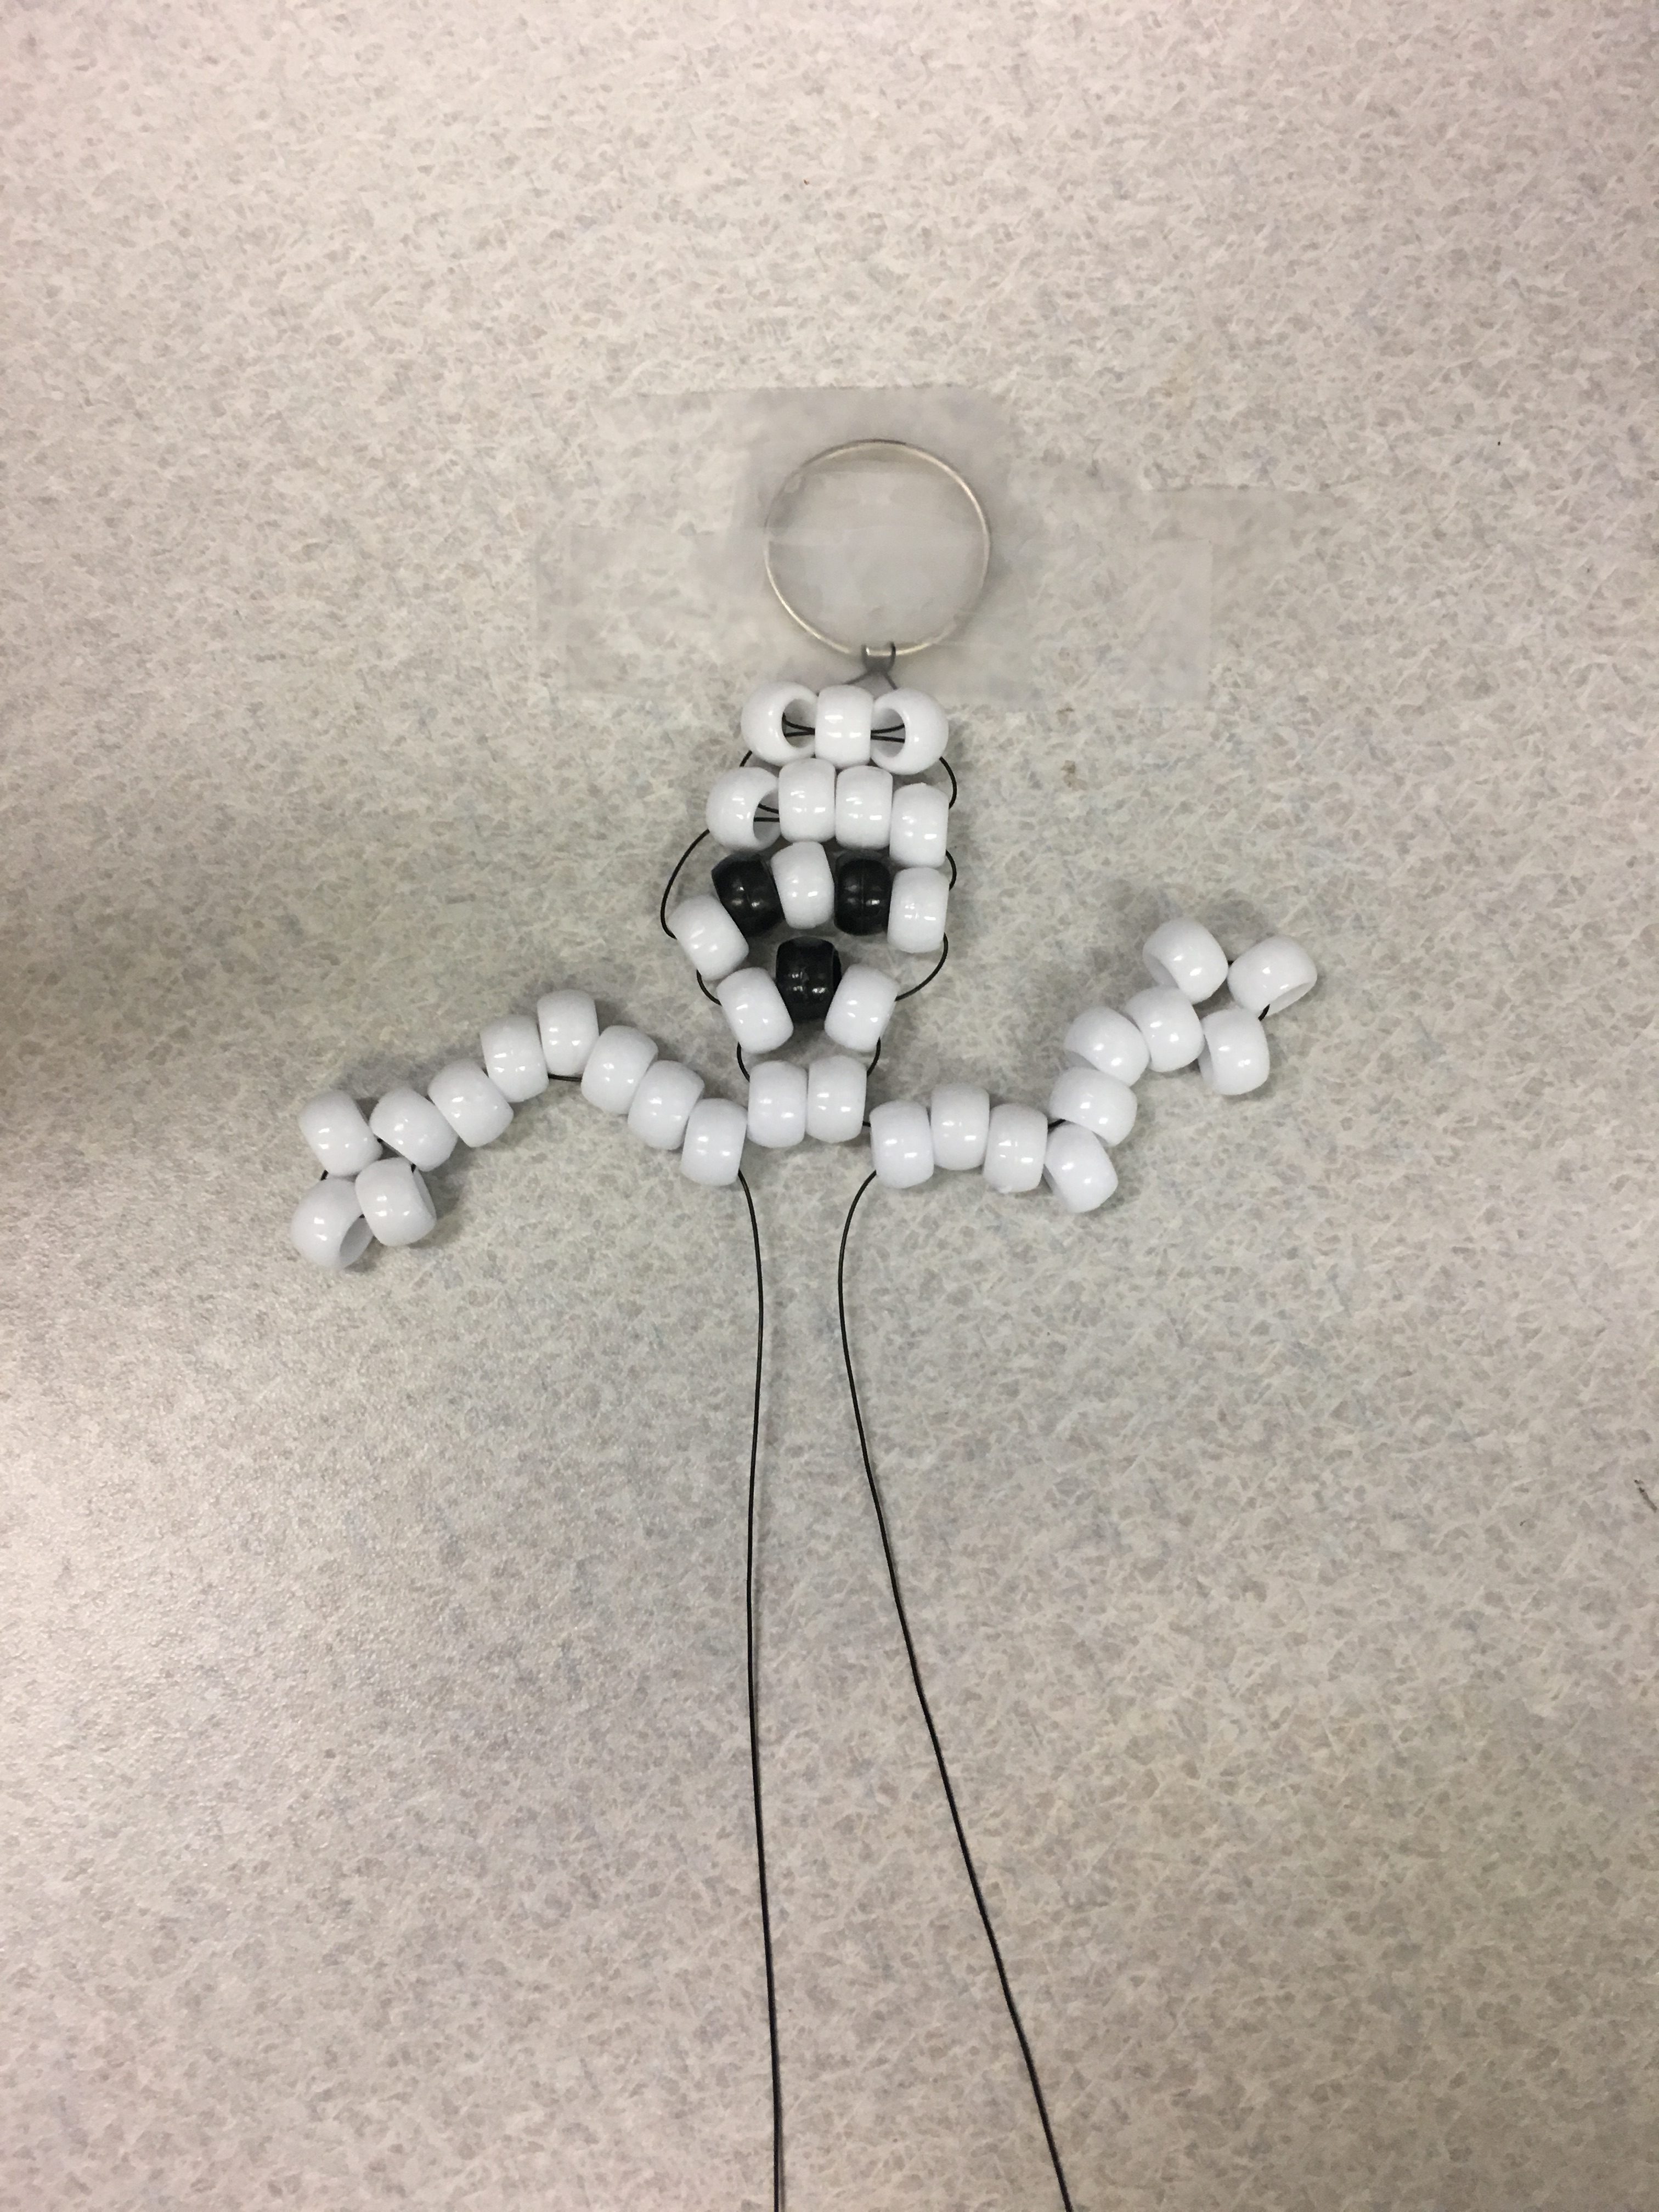
- Start at the top of the skeleton keychain pattern guide.
- The first line of the skeleton calls for three white pony beads.
- Starting with the cord on your left, string three white pony beads on.
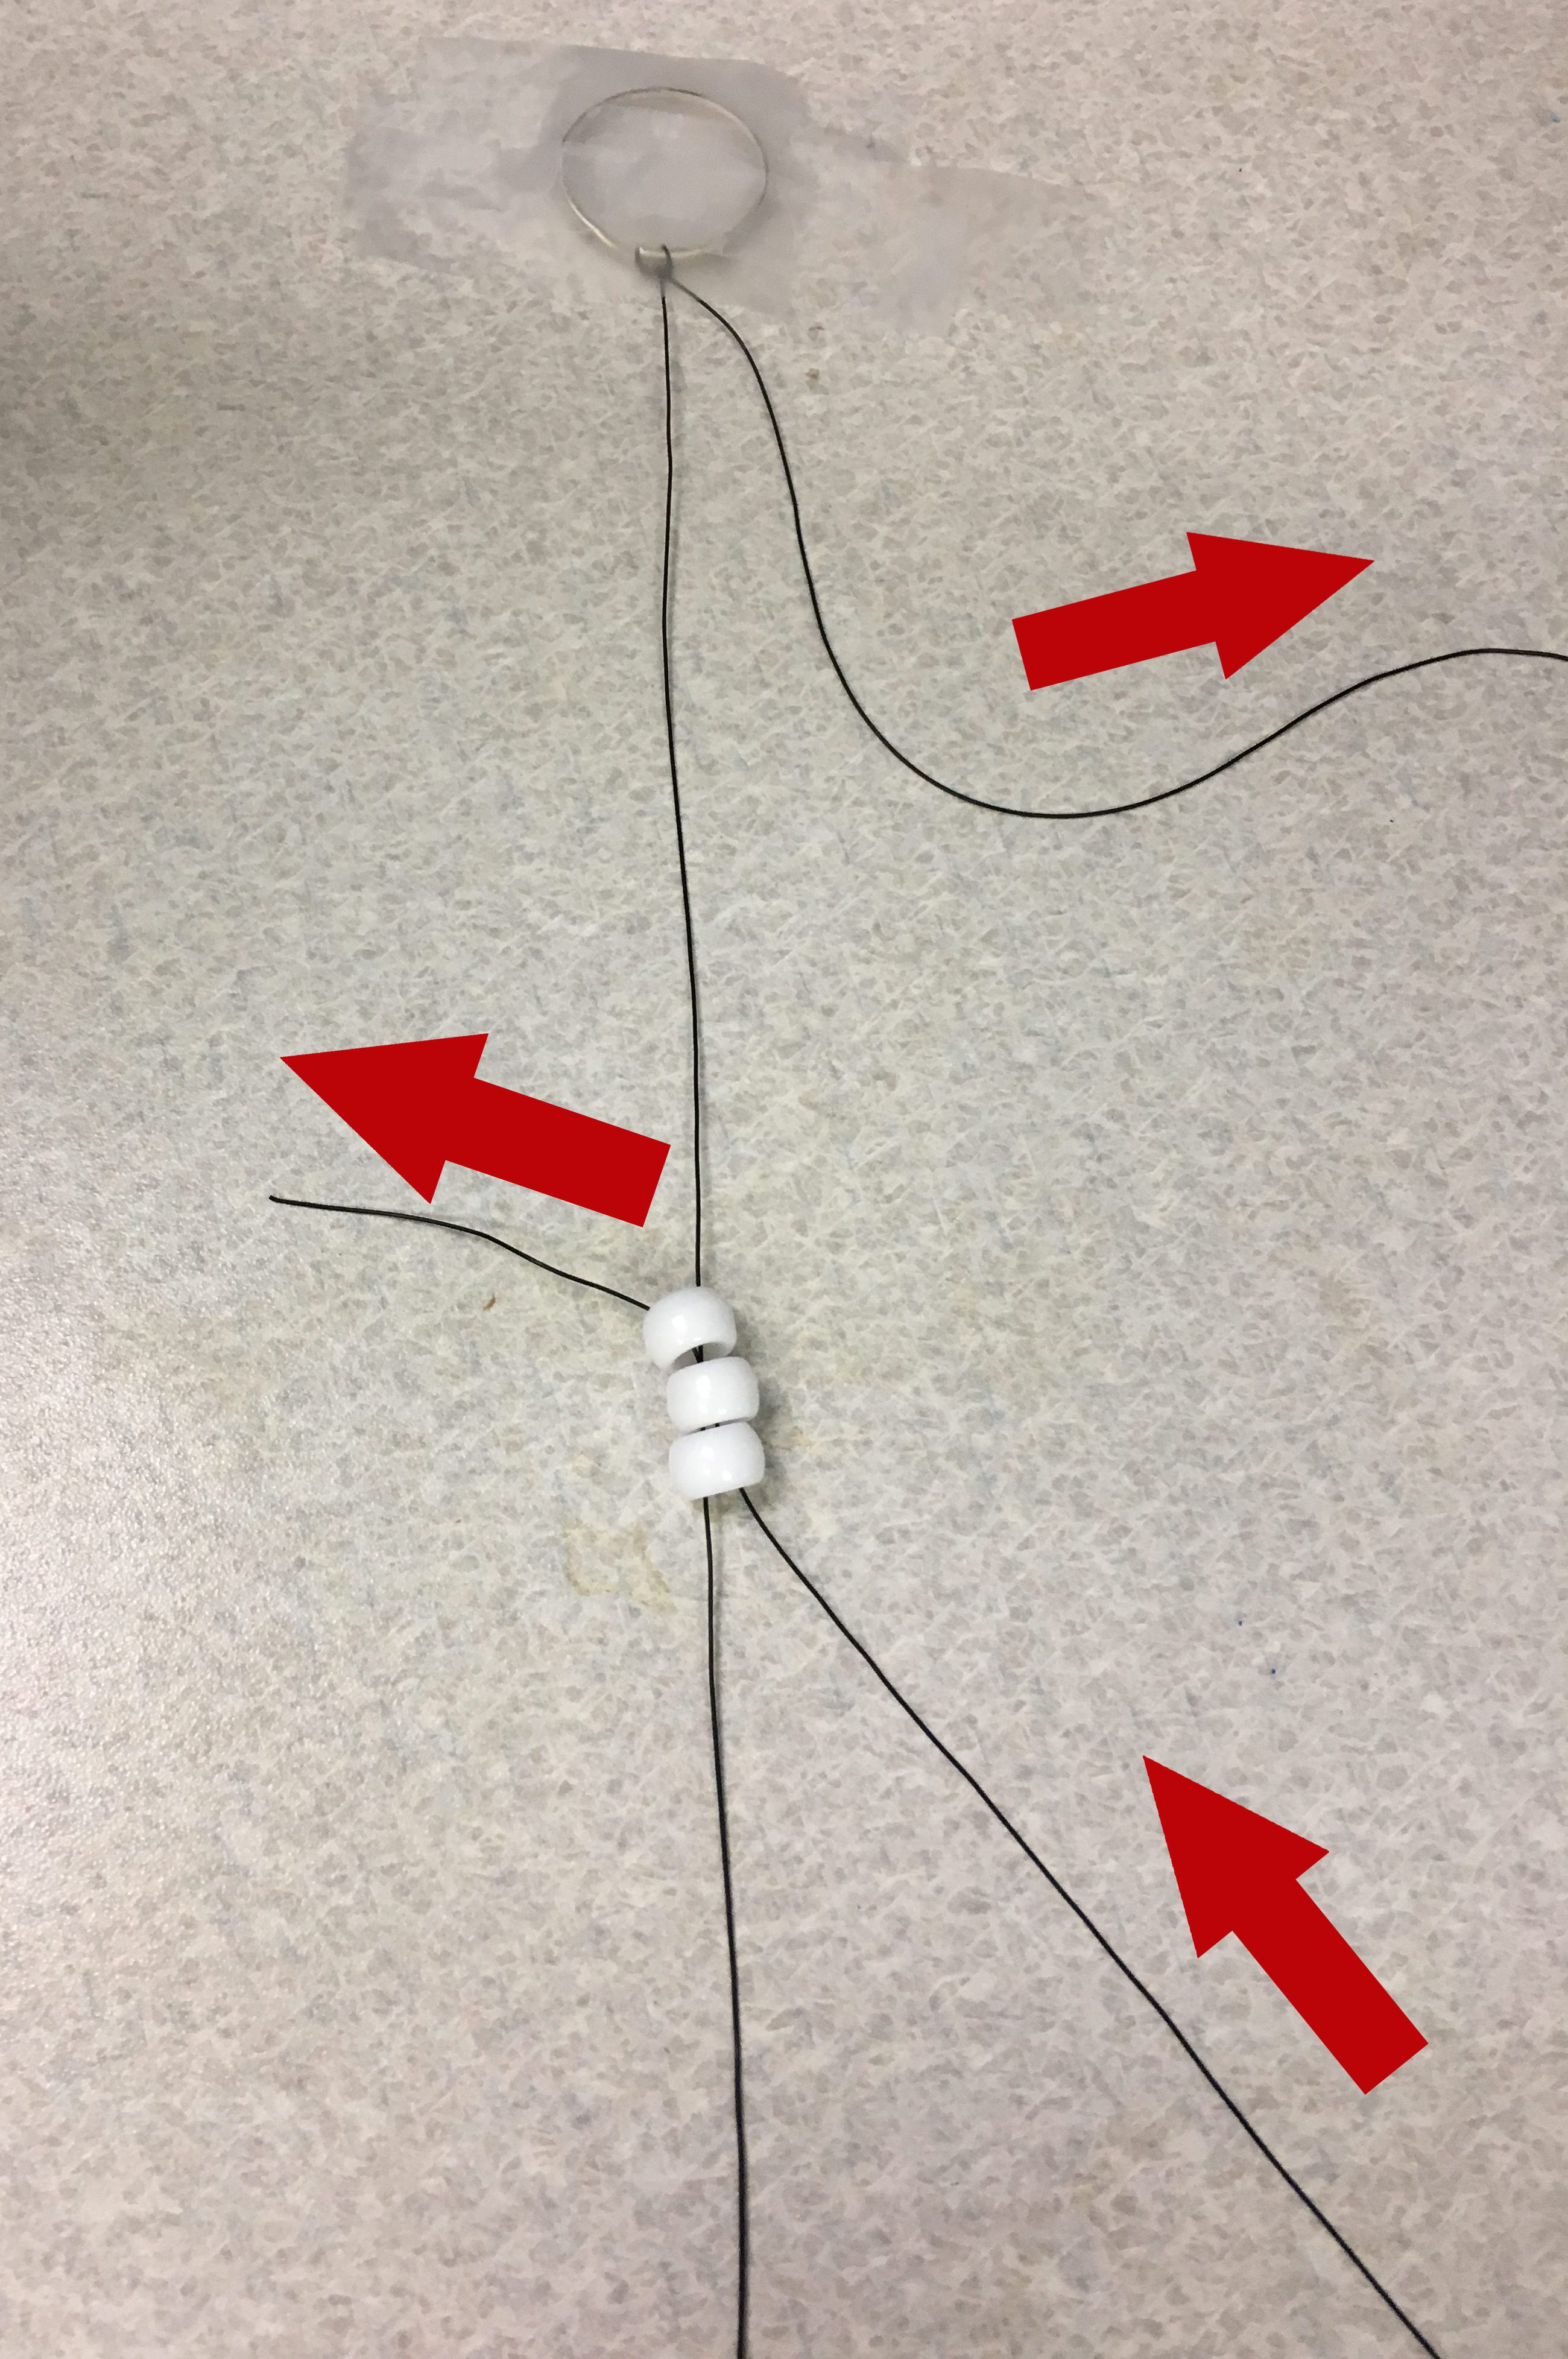
Step 4
- Take the end of the cord on your right and loop it up through the three beads.
- Repeat steps 3-4 for the next line of beads on the guide (four white ones).
- After finishing a line from the pattern guide, the cords will be on the opposite side from the side that the cord was on during the previous line of beads.
Step 5
- After you have finished the first two lines, some of the lines of beads require both black and white beads.
- Remember to follow the pattern guide to know how many beads of each color is needed for each line of beads.
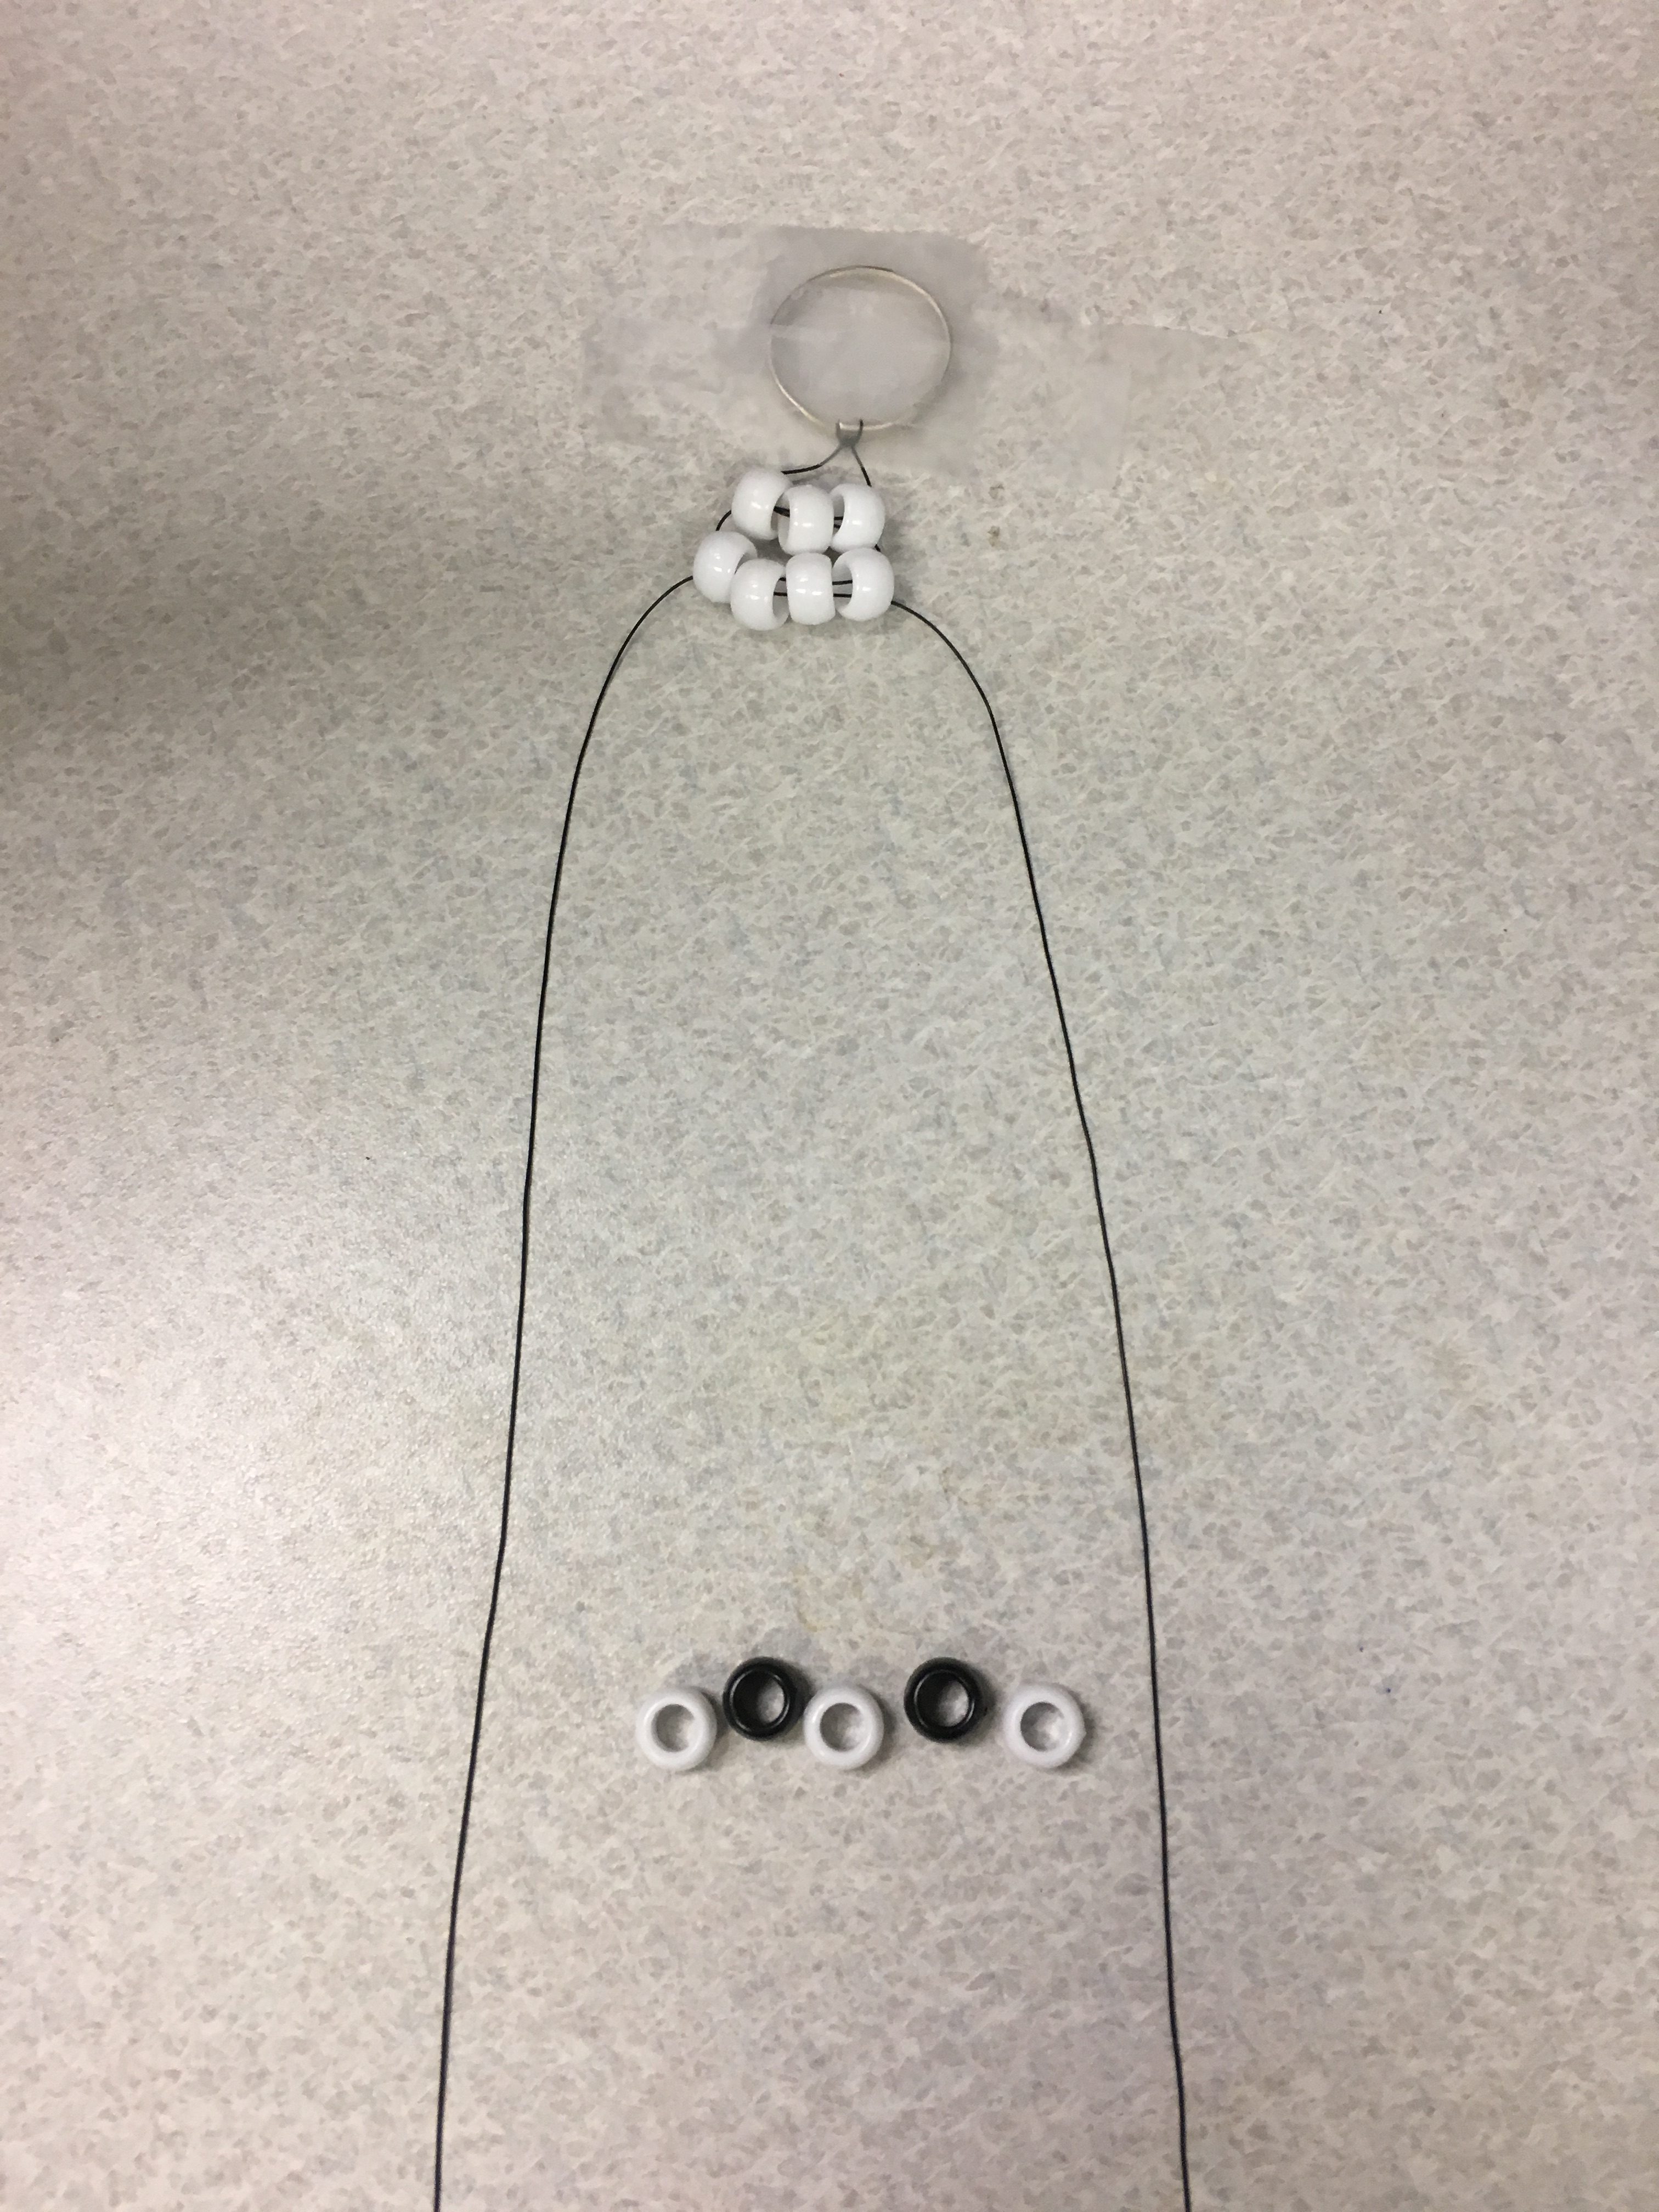
Step 6
- Continue working down the pattern guide until you finish the skeleton’s head.
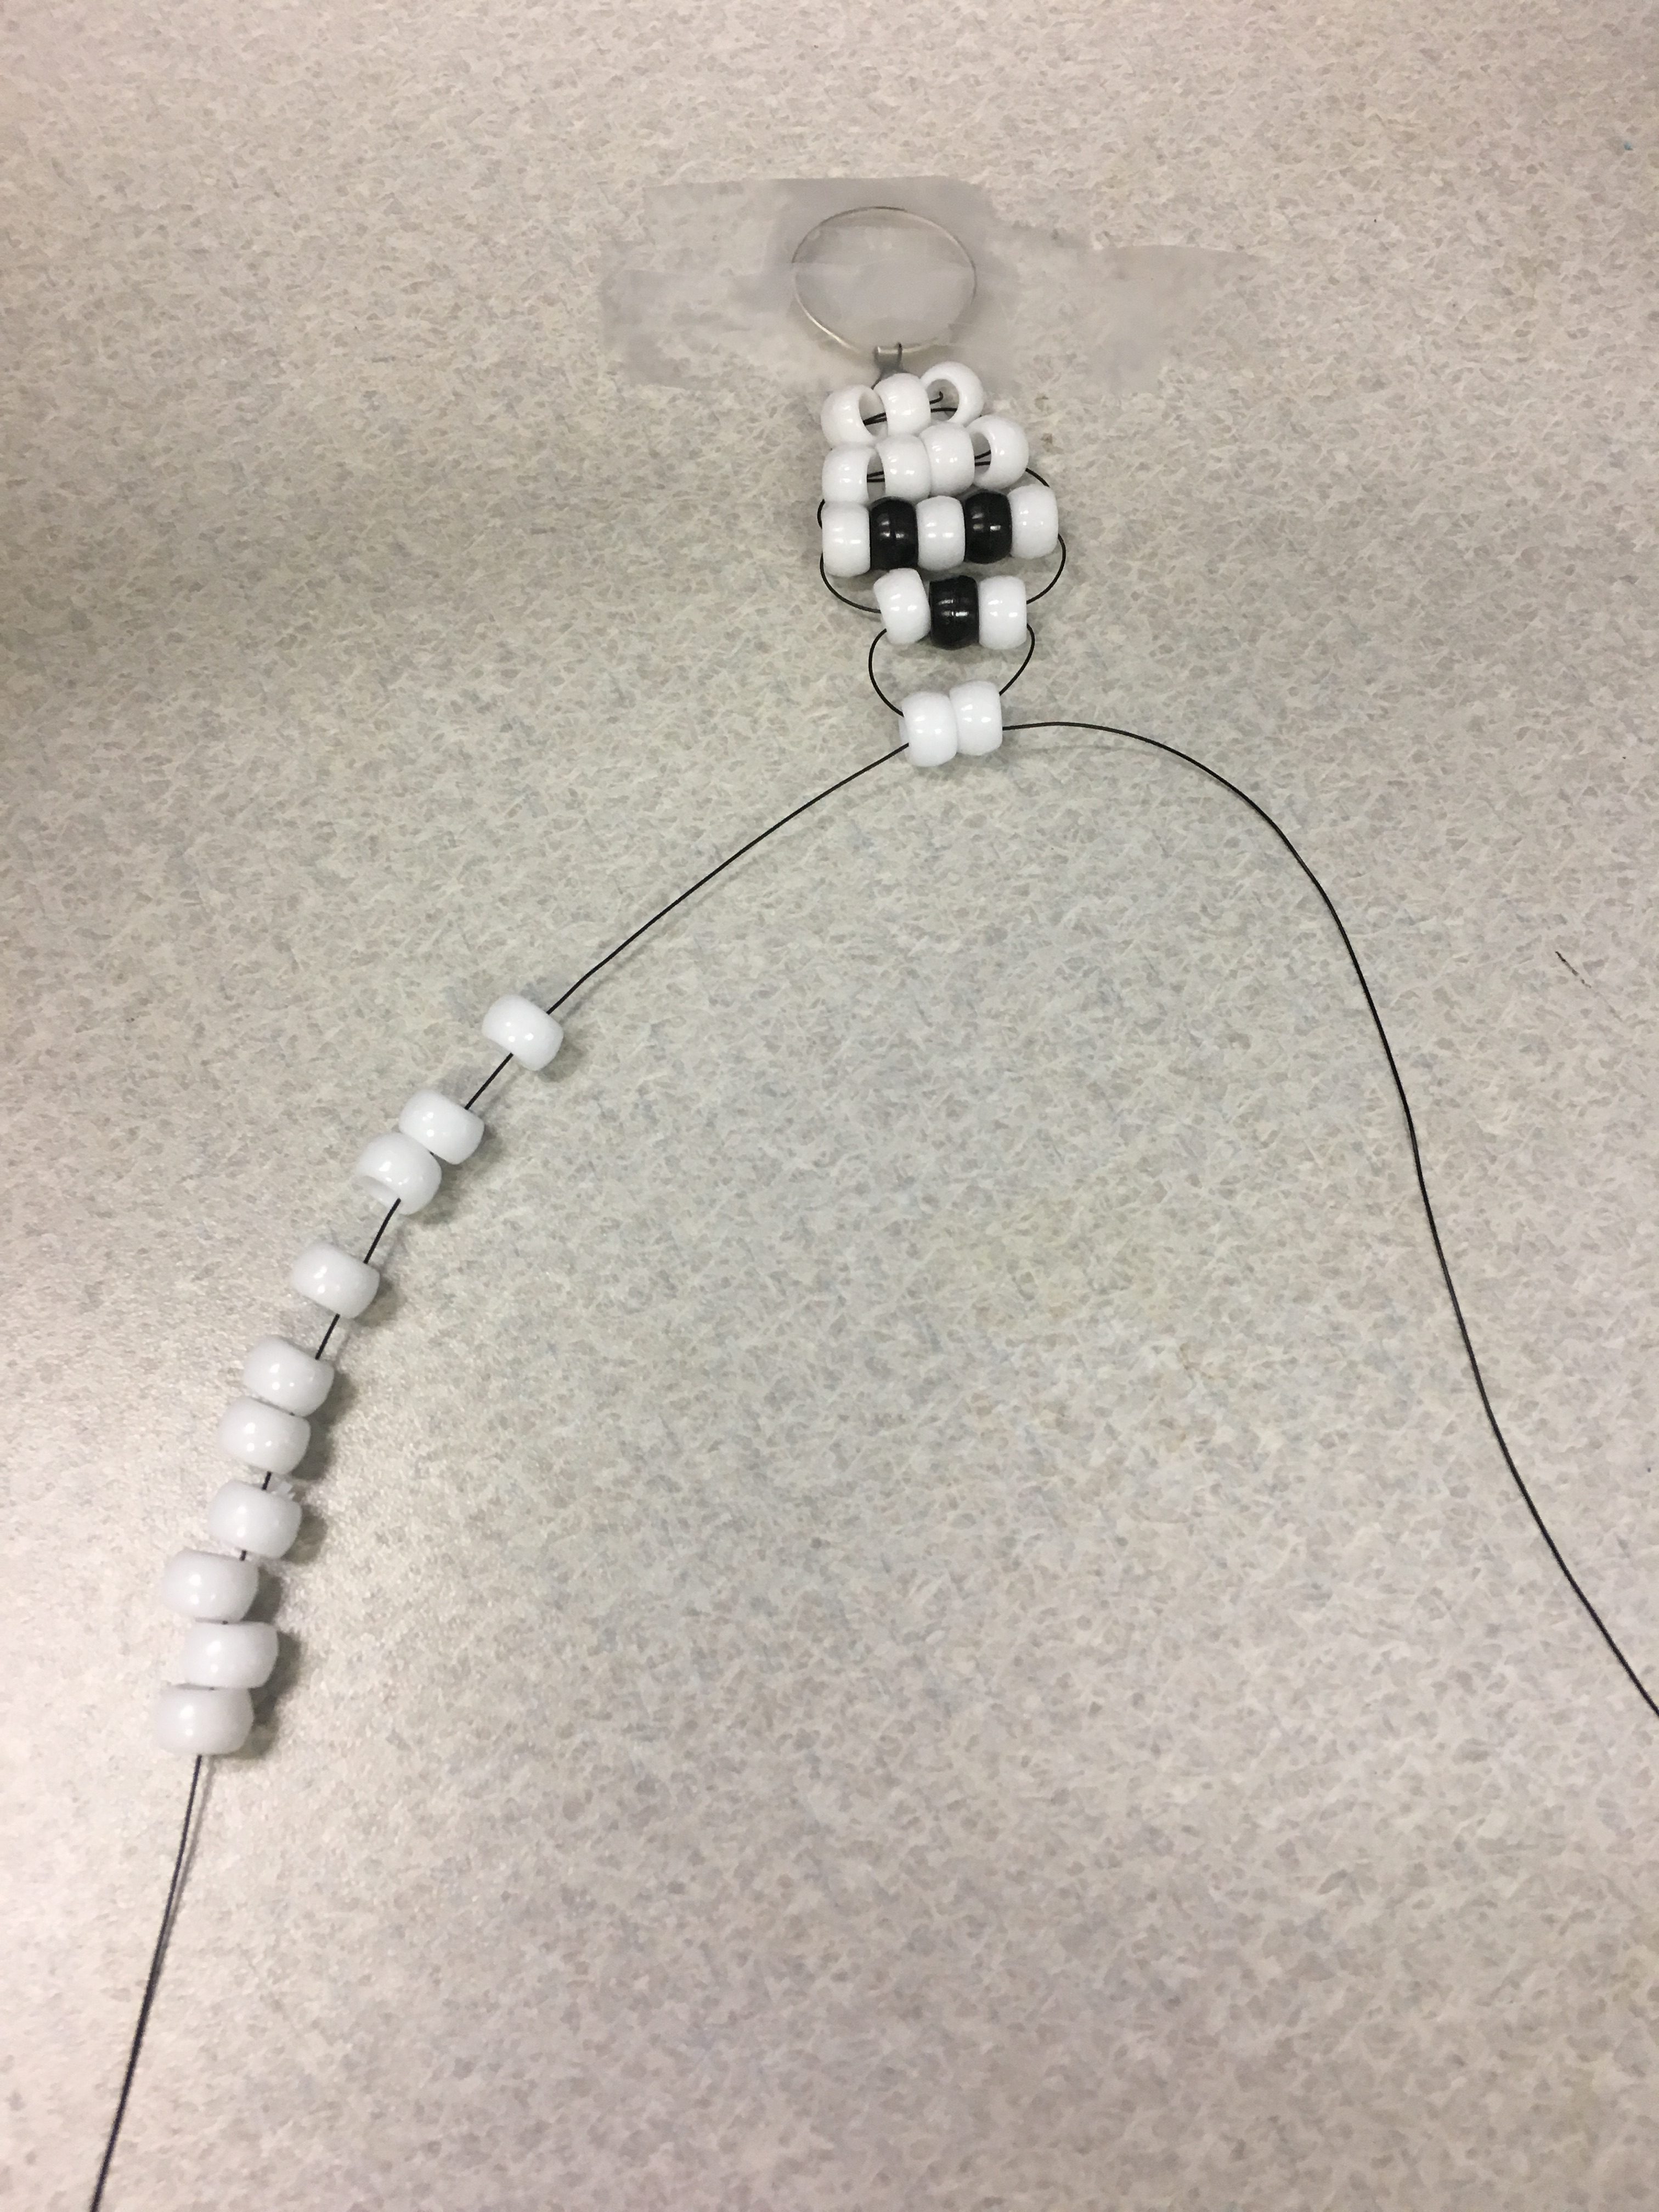
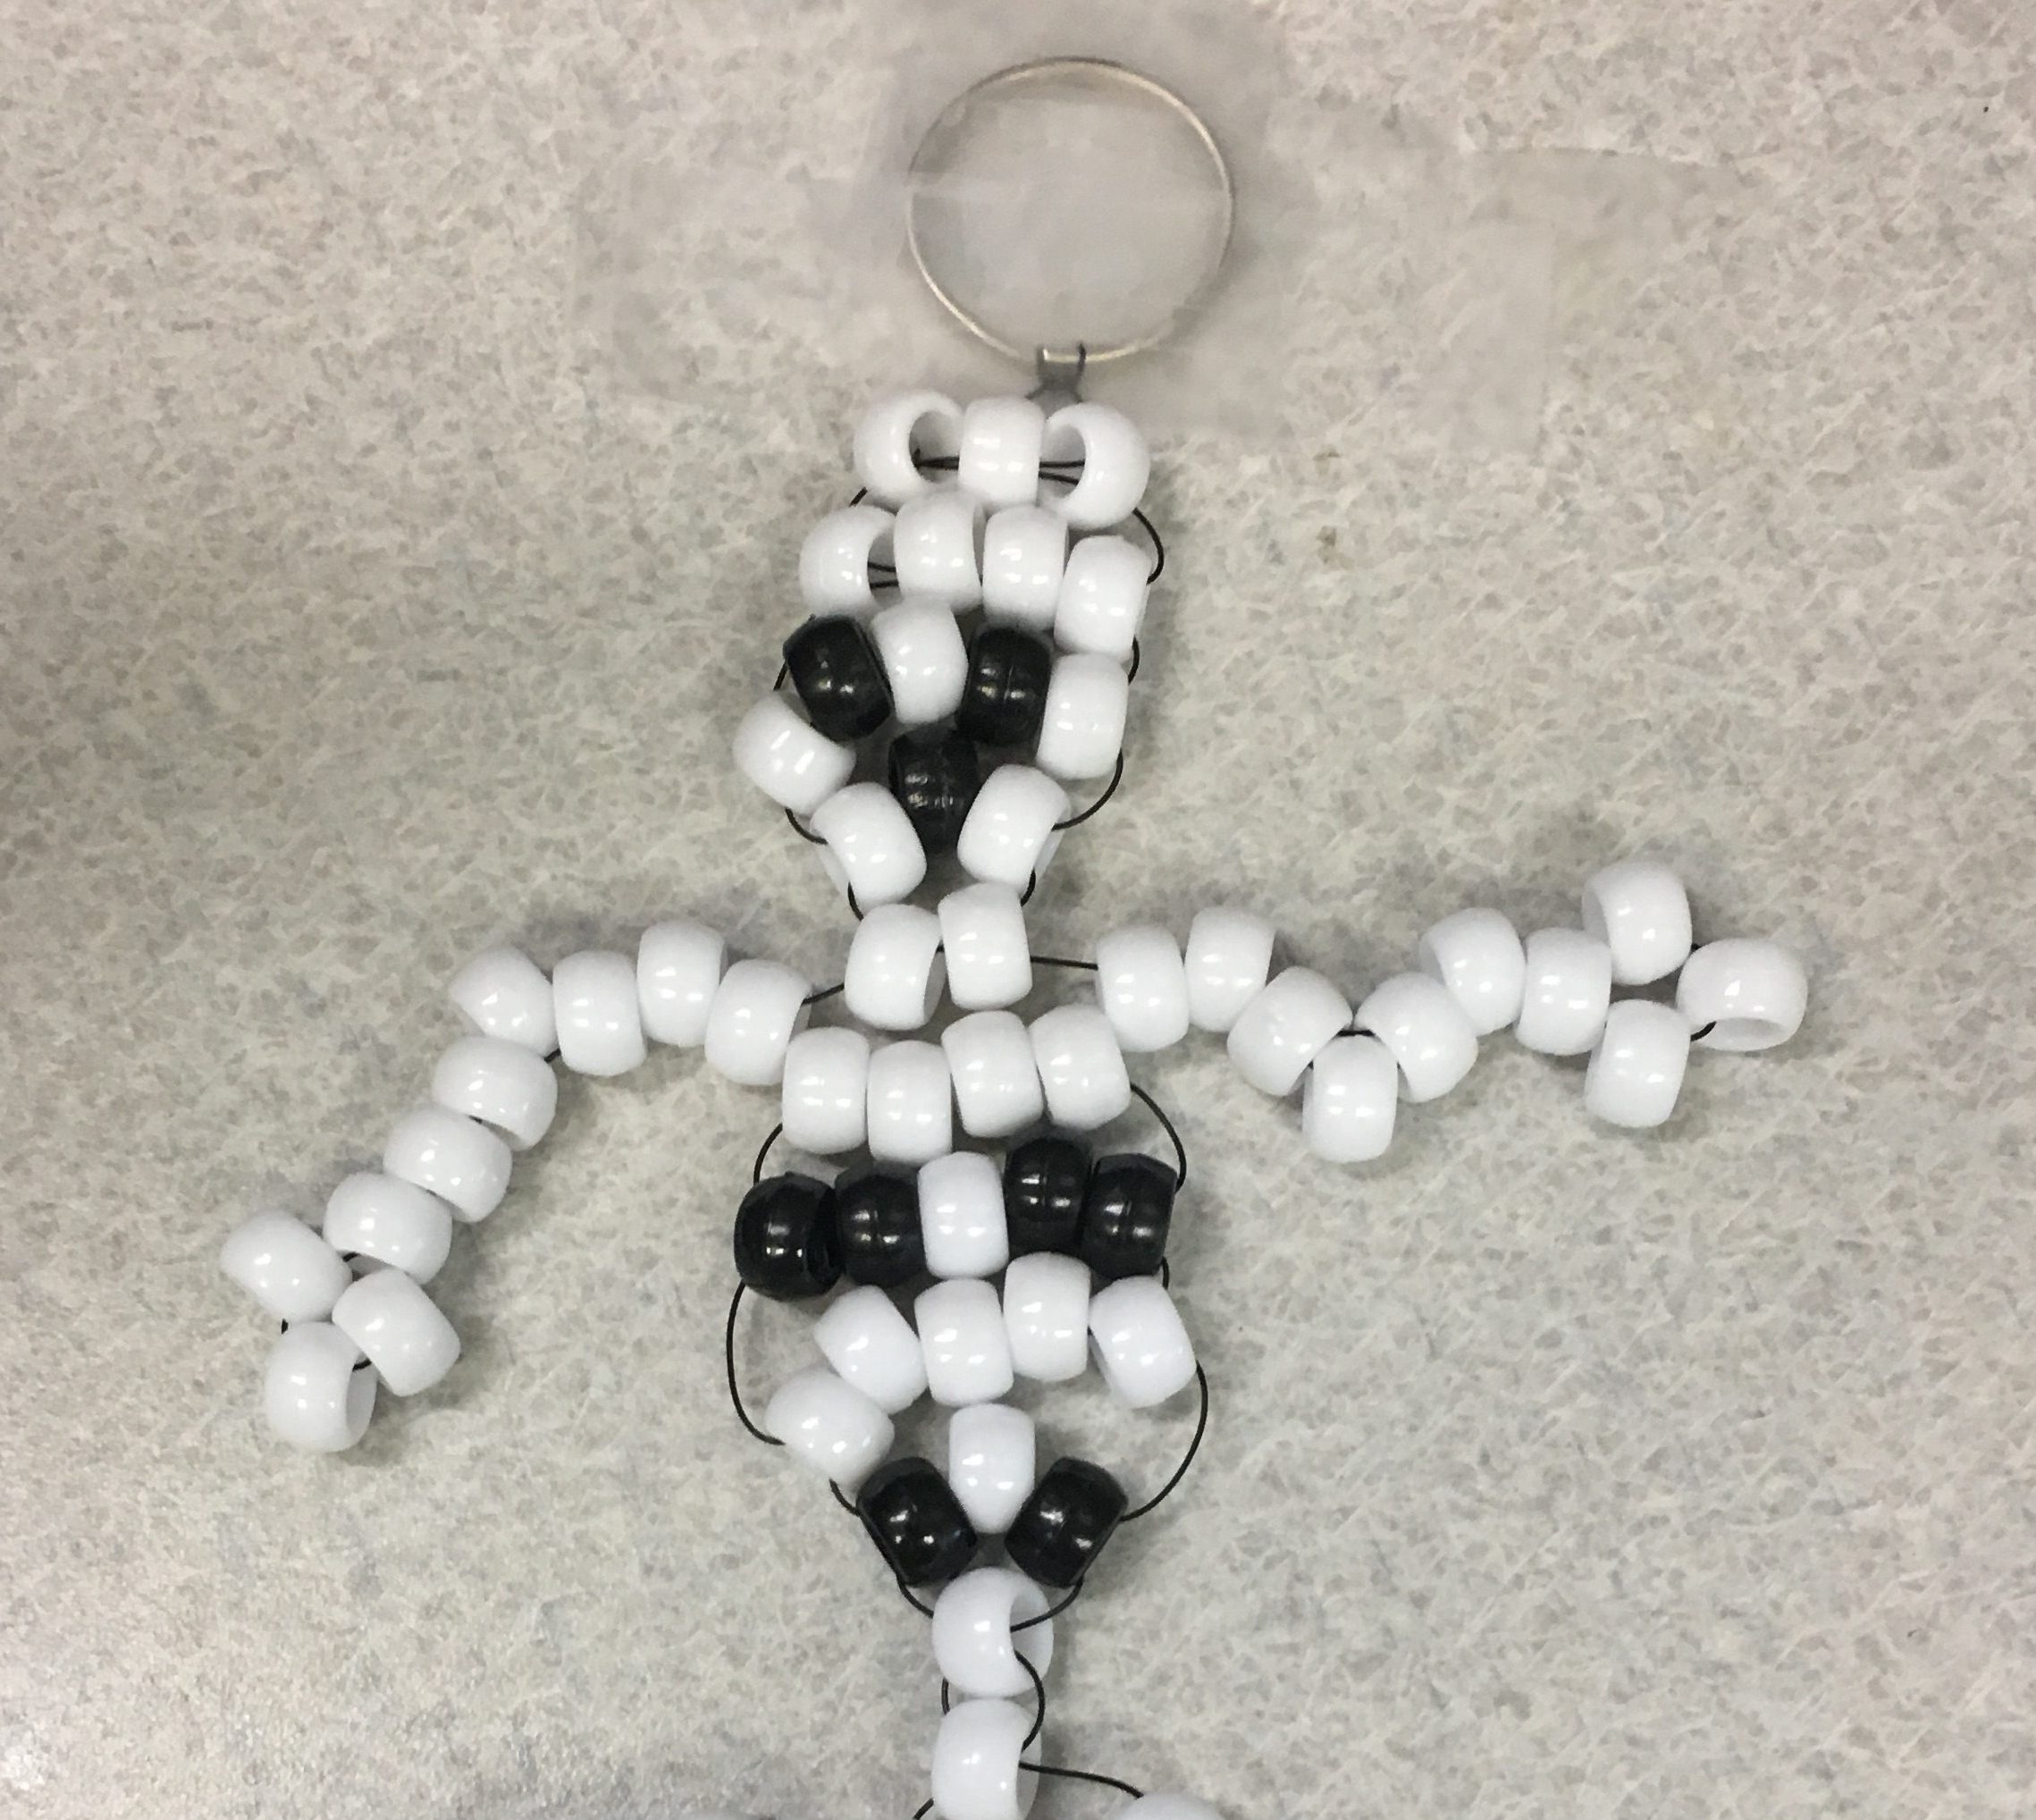
Step 7
- The arms and legs are a little trickier than the skeleton’s head and body.
- For each arm and leg, you will only be using one cord (the left cord for the left arm and leg).
- String 10 white beads on the left cord.
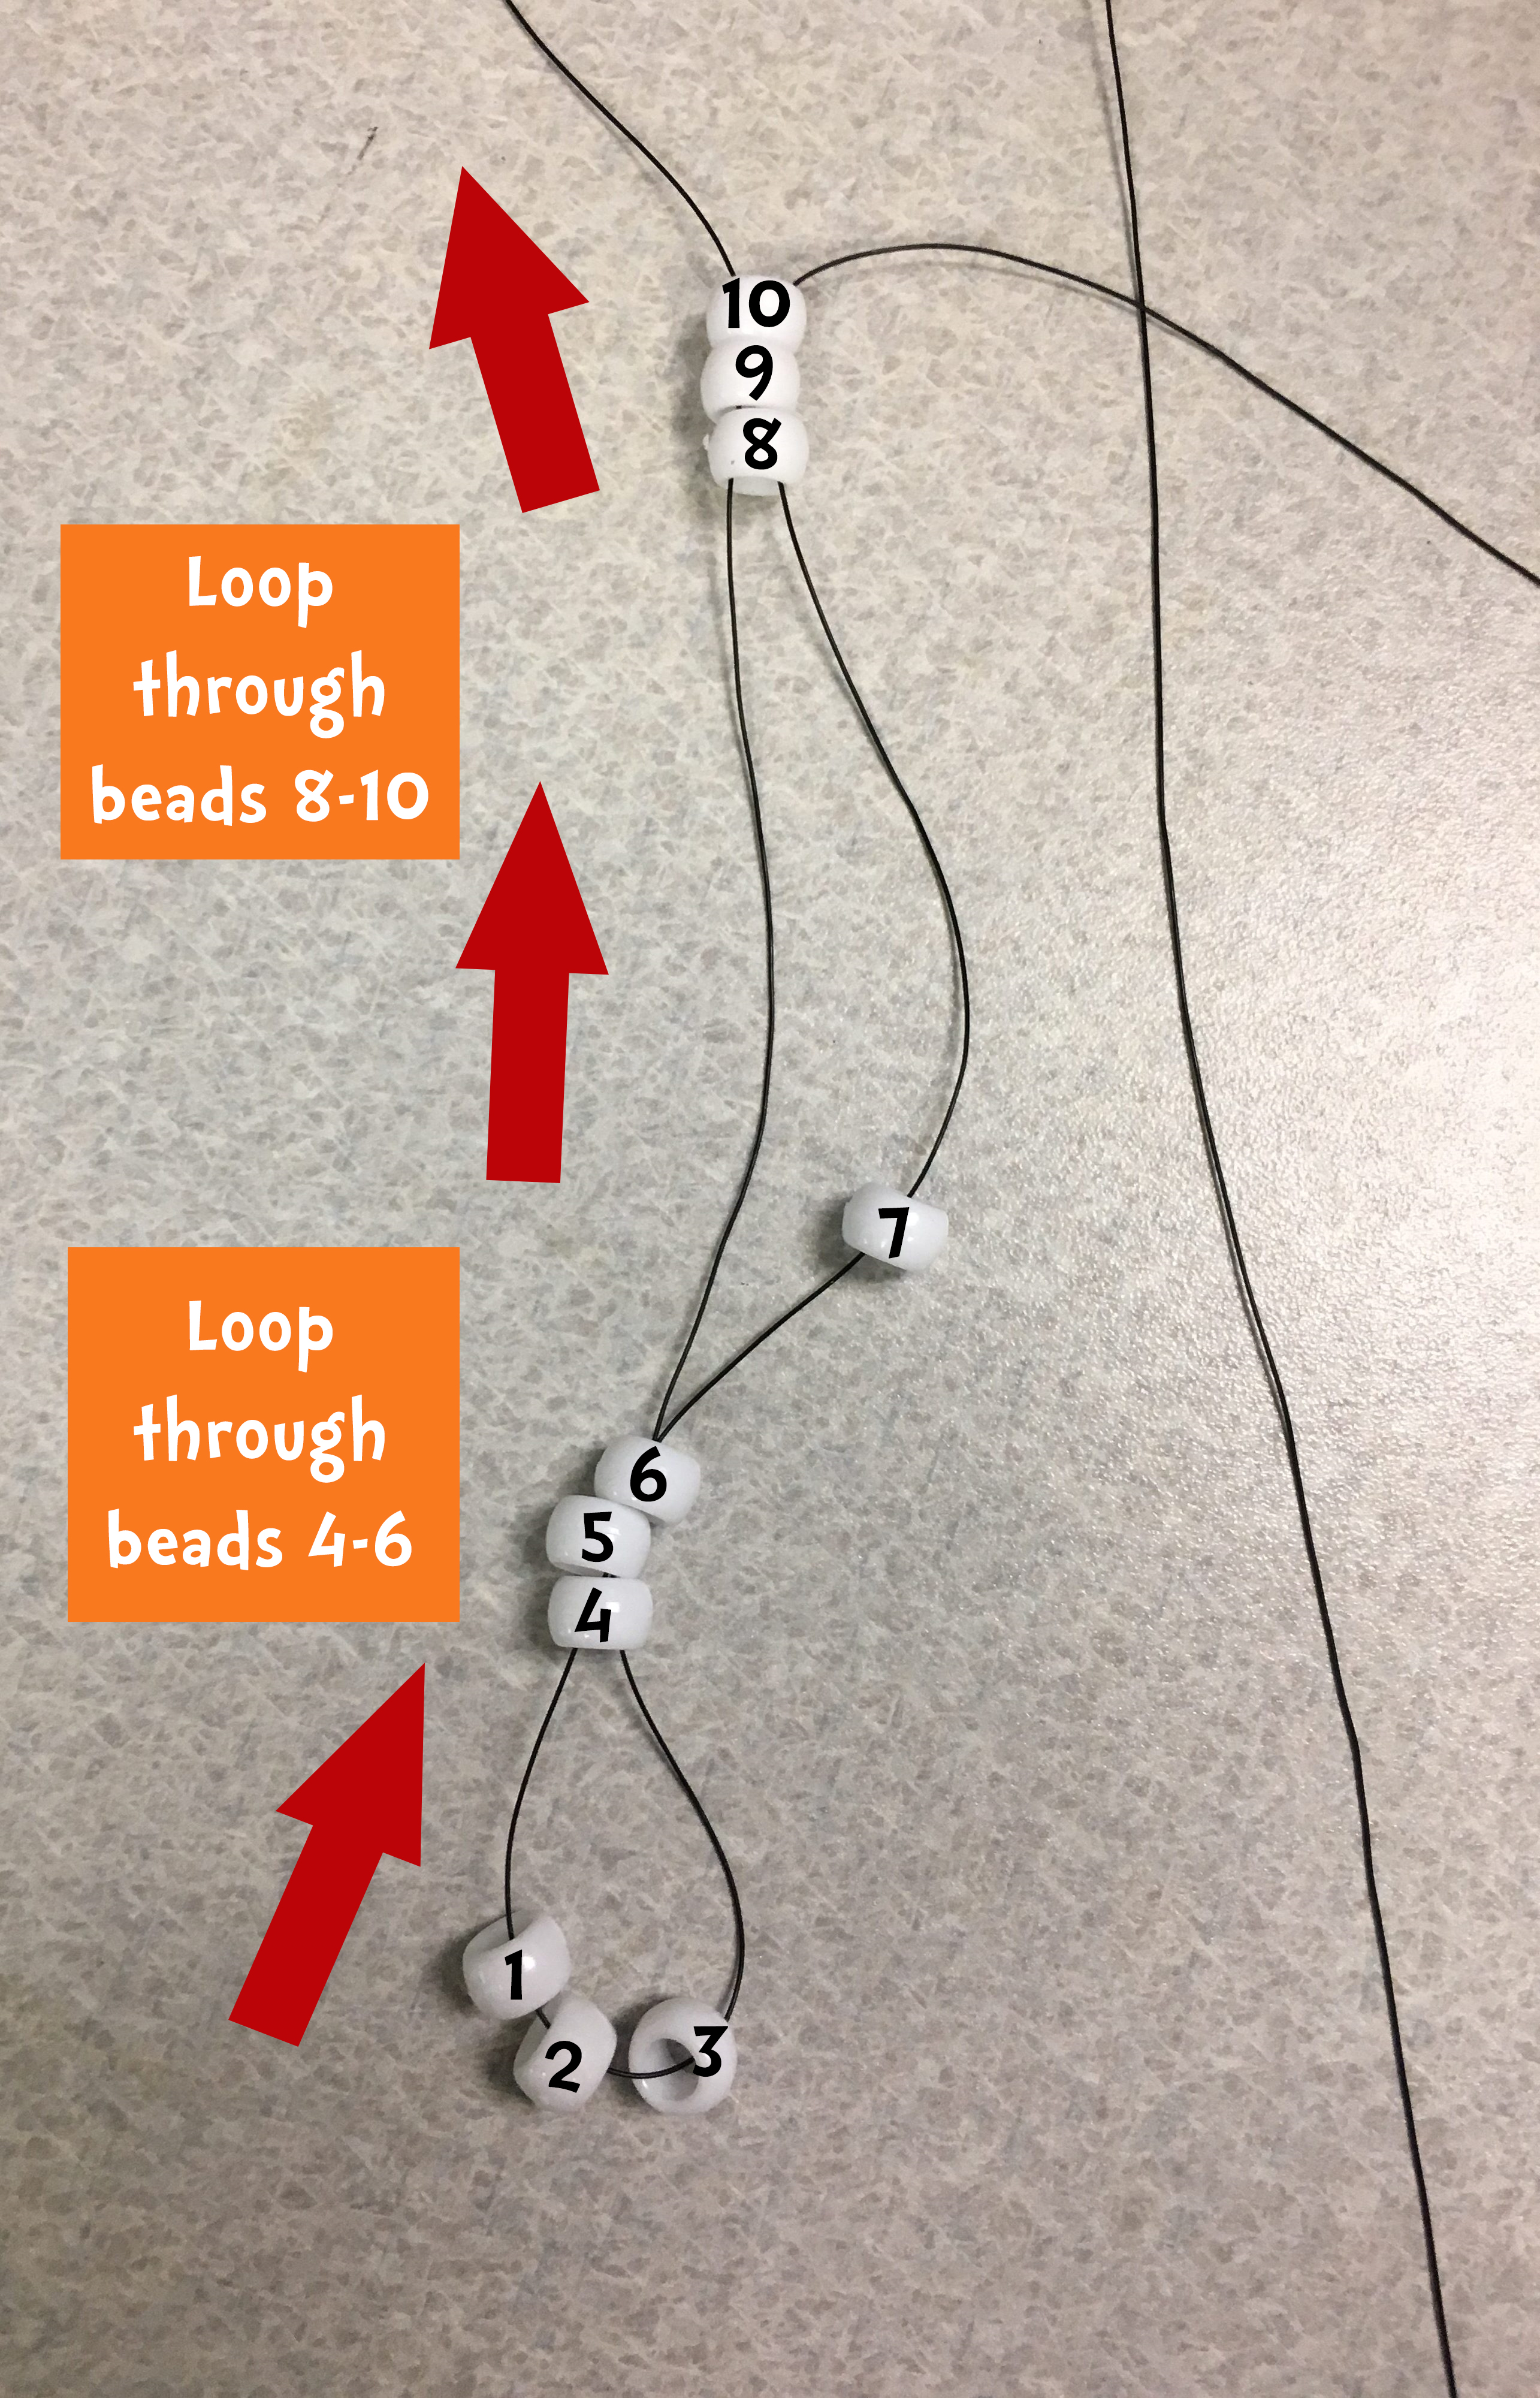
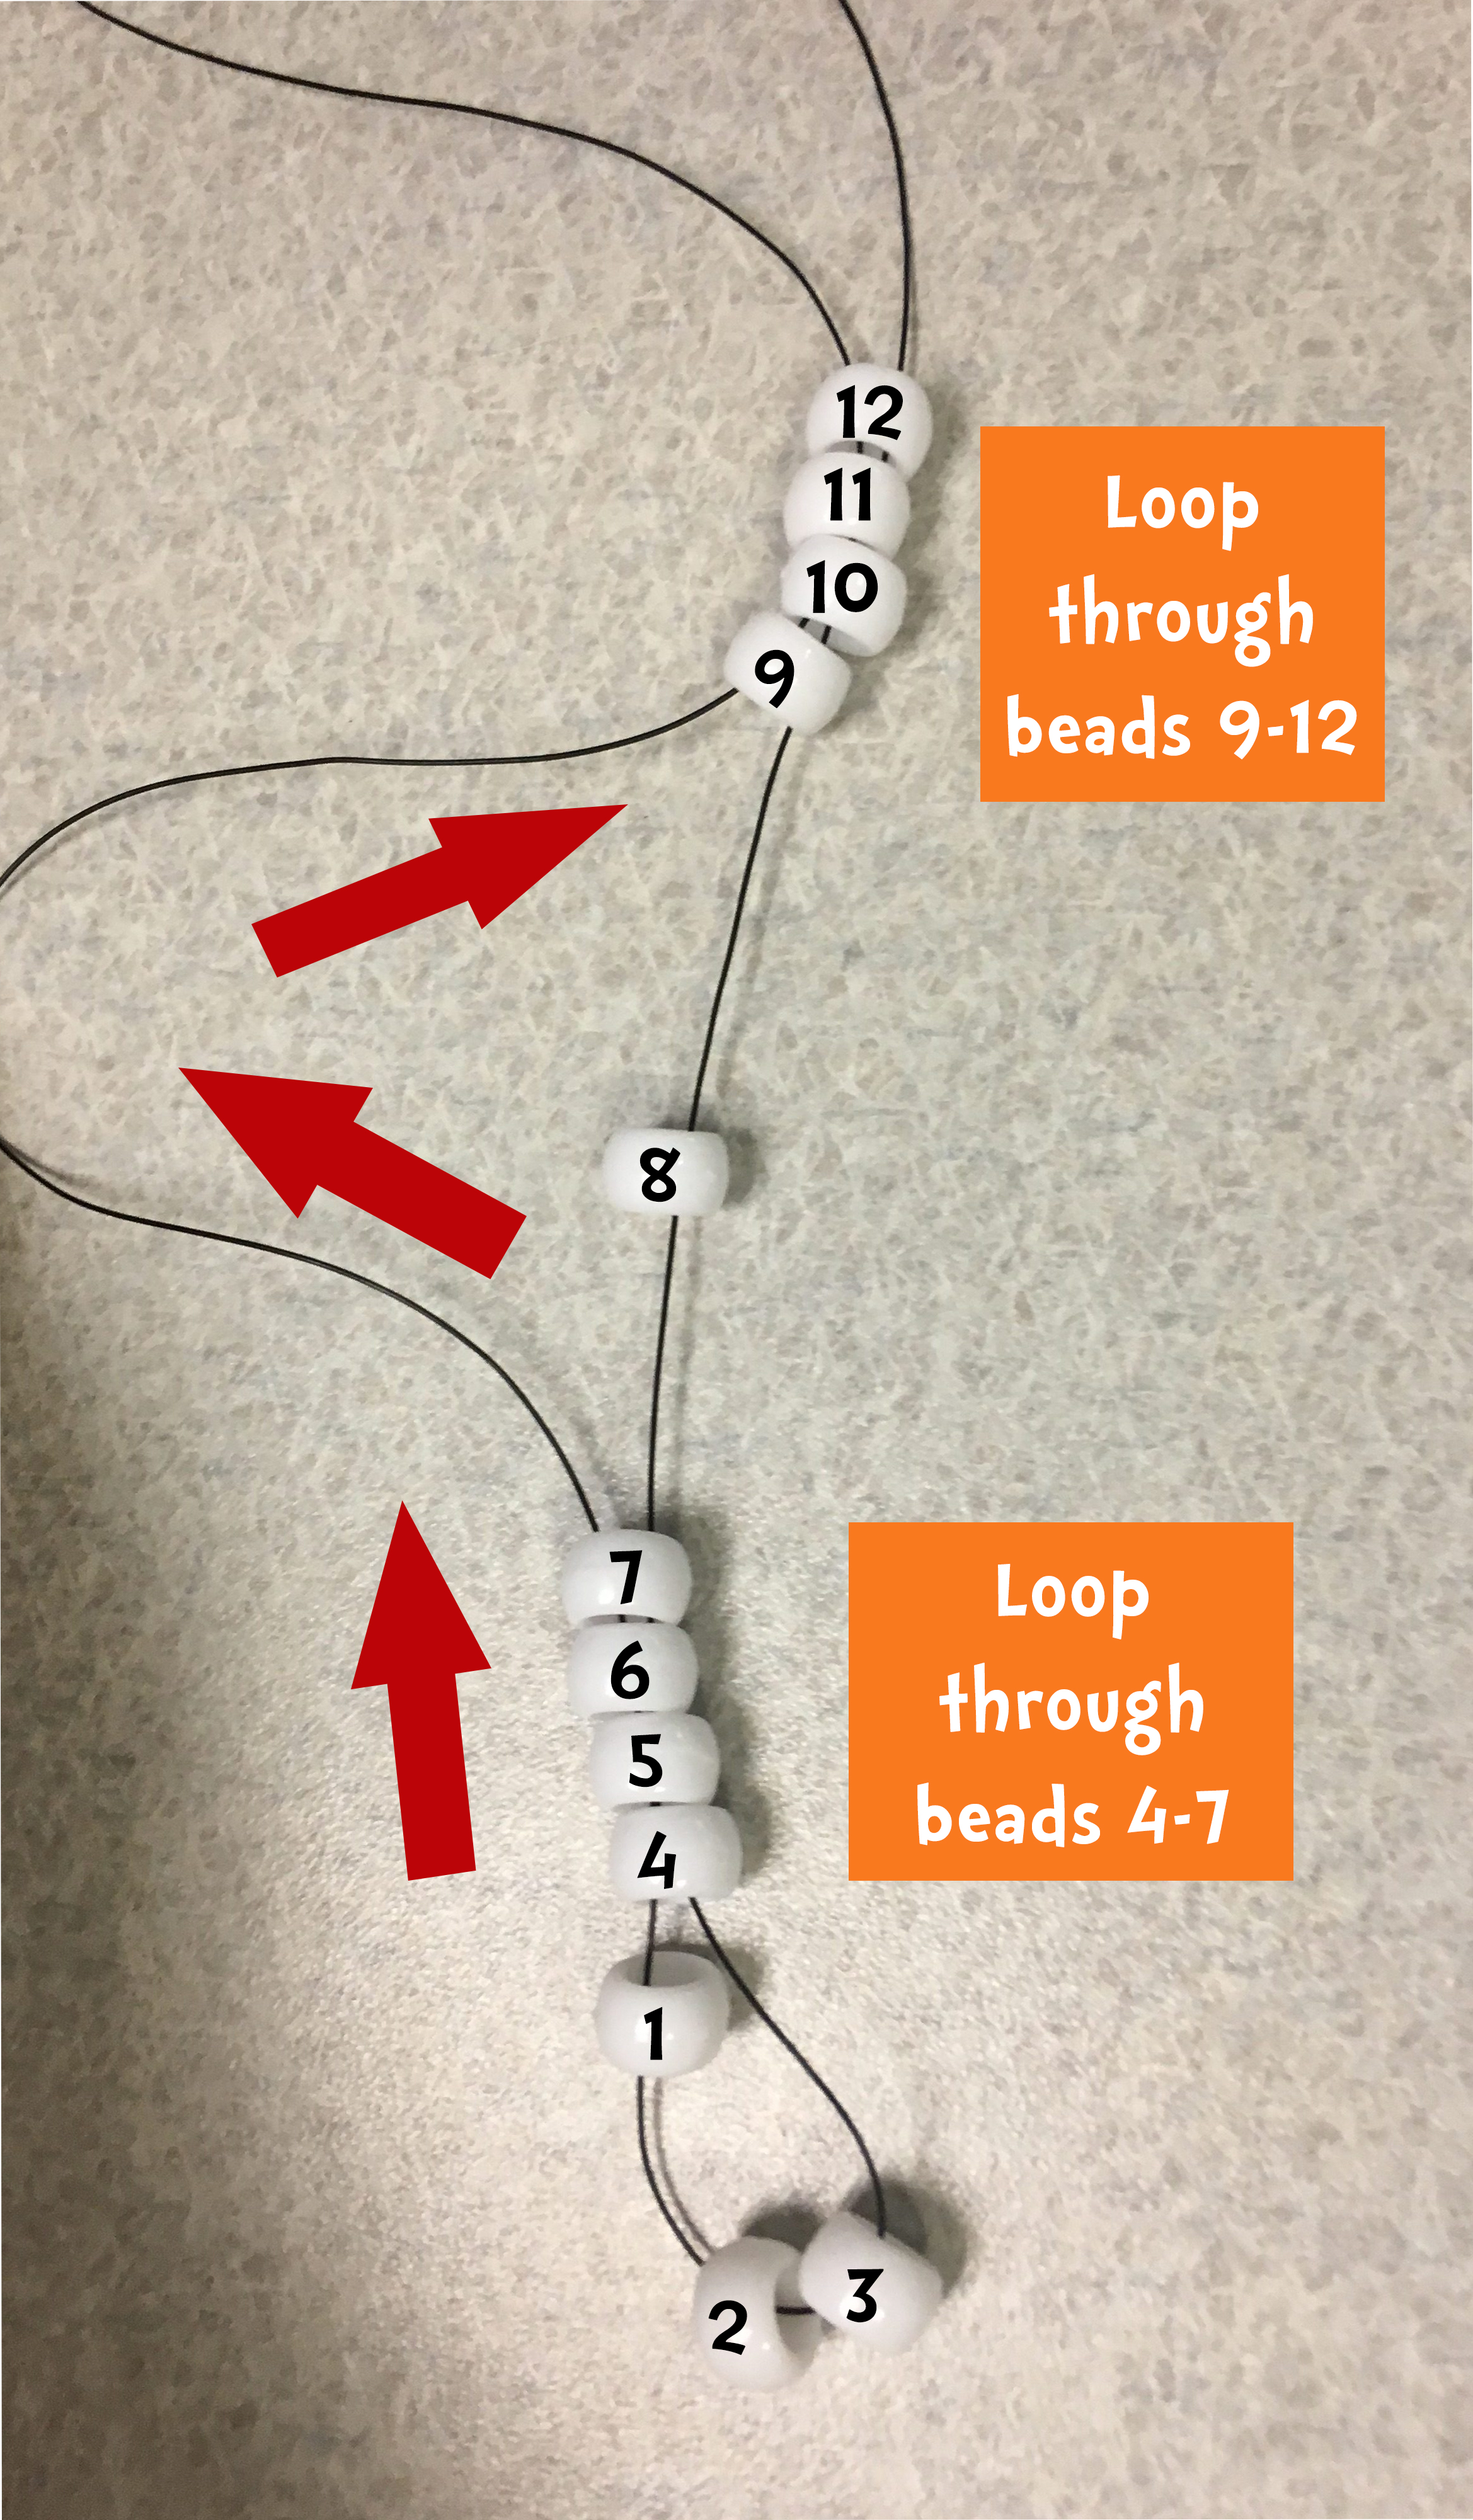
Step 8
- For the arms, loop back up the end of the cord that the beads are on and weave it back through beads 4-6.
- DO NOT weave it back through bead 7.
- Instead, skip 7 and weave it through 8-10.
Step 9
- After weaving the end of the cord through bead 10, pull the string down to tighten the arm.
Step 10
- Repeat steps 7 – 9 for the right arm (use only the cord on your right for this arm).
Step 11
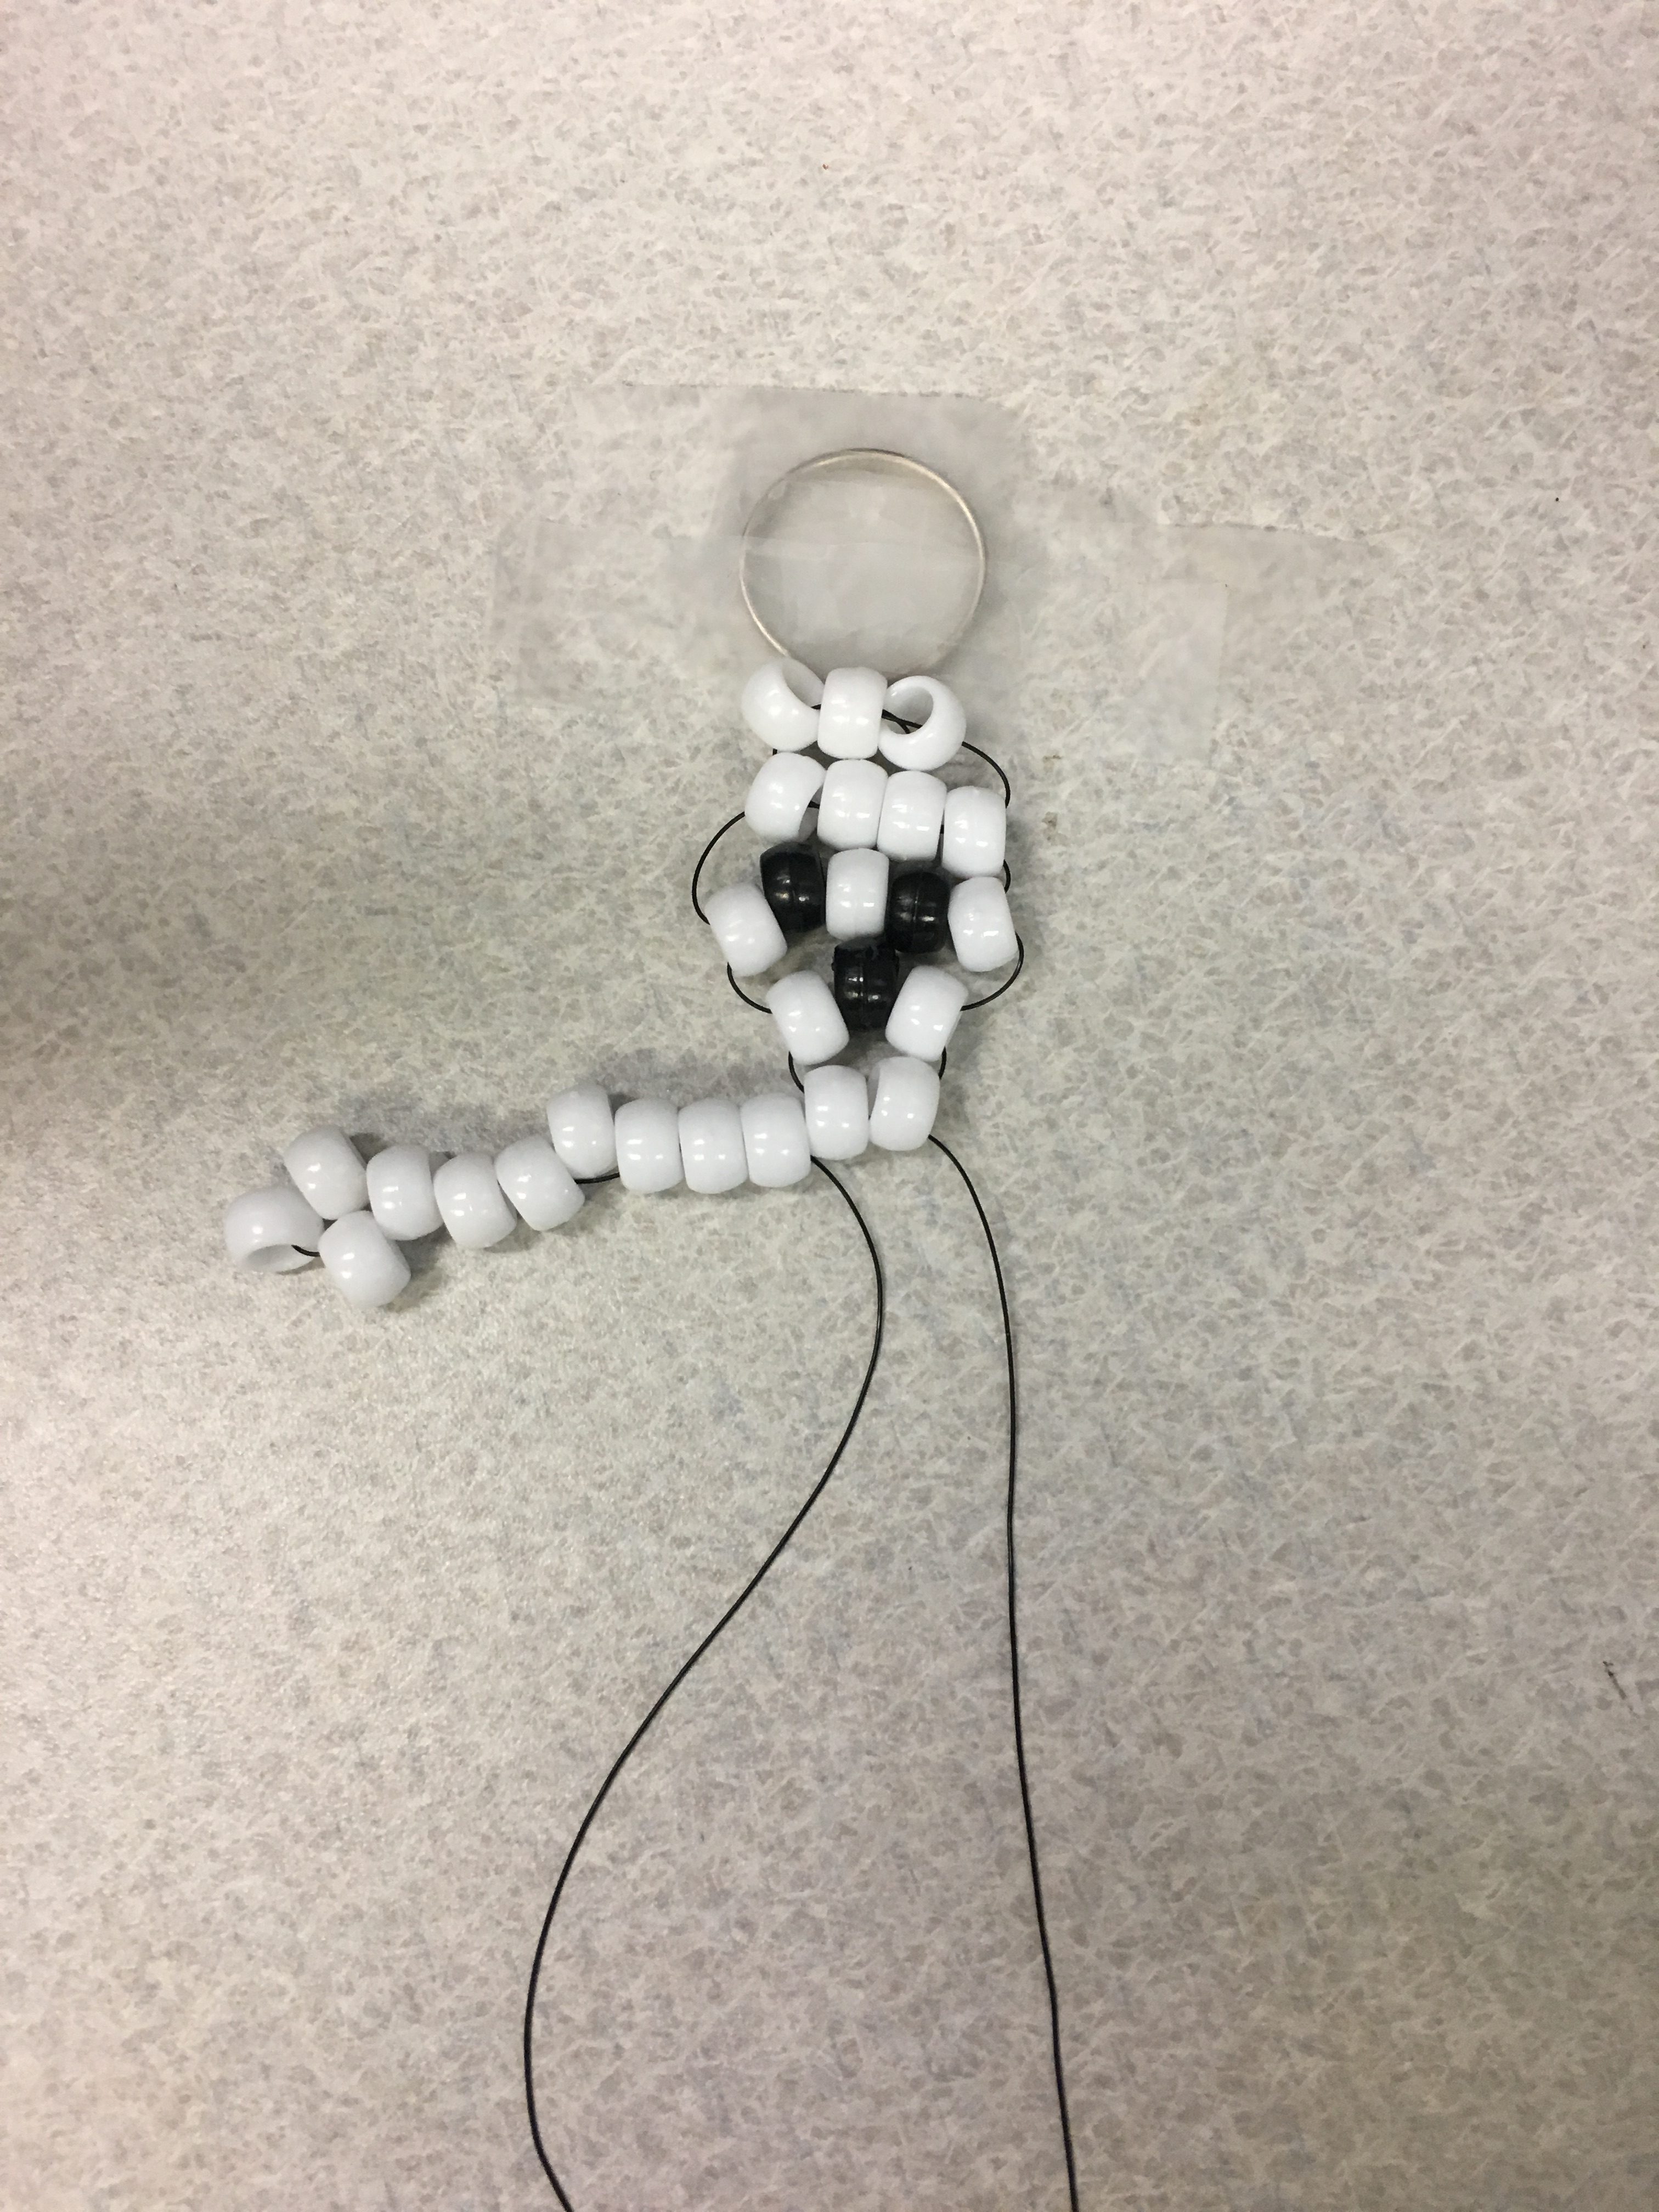
- Continue working down the pattern guide to complete the body.
- The body is created the same way as the head was.
- USE BOTH CORDS for each line of beads. Put the beads on the left cord and then weave the right cord back up through the beads.
Step 12
- After completing the body, all you have left is the legs.
- Like the arms, you only use one cord for each leg (left cord for left leg, right cord for right leg).
- String 12 beads on the left cord.
- For the legs, loop back up the end of the cord that the beads are on and weave it back through beads 4-7.
- DO NOT weave it back through bead 8.
- Instead, skip 8 and weave it through 9-12.

Step 13
- After weaving the end of the cord through bead 12, pull the cord down to tighten the leg.
- Tighten the cord and tie a knot with the cord between bead 12 and the previous row of 4 beads (where the leg meets the hip).
- Cut off the extra cord.
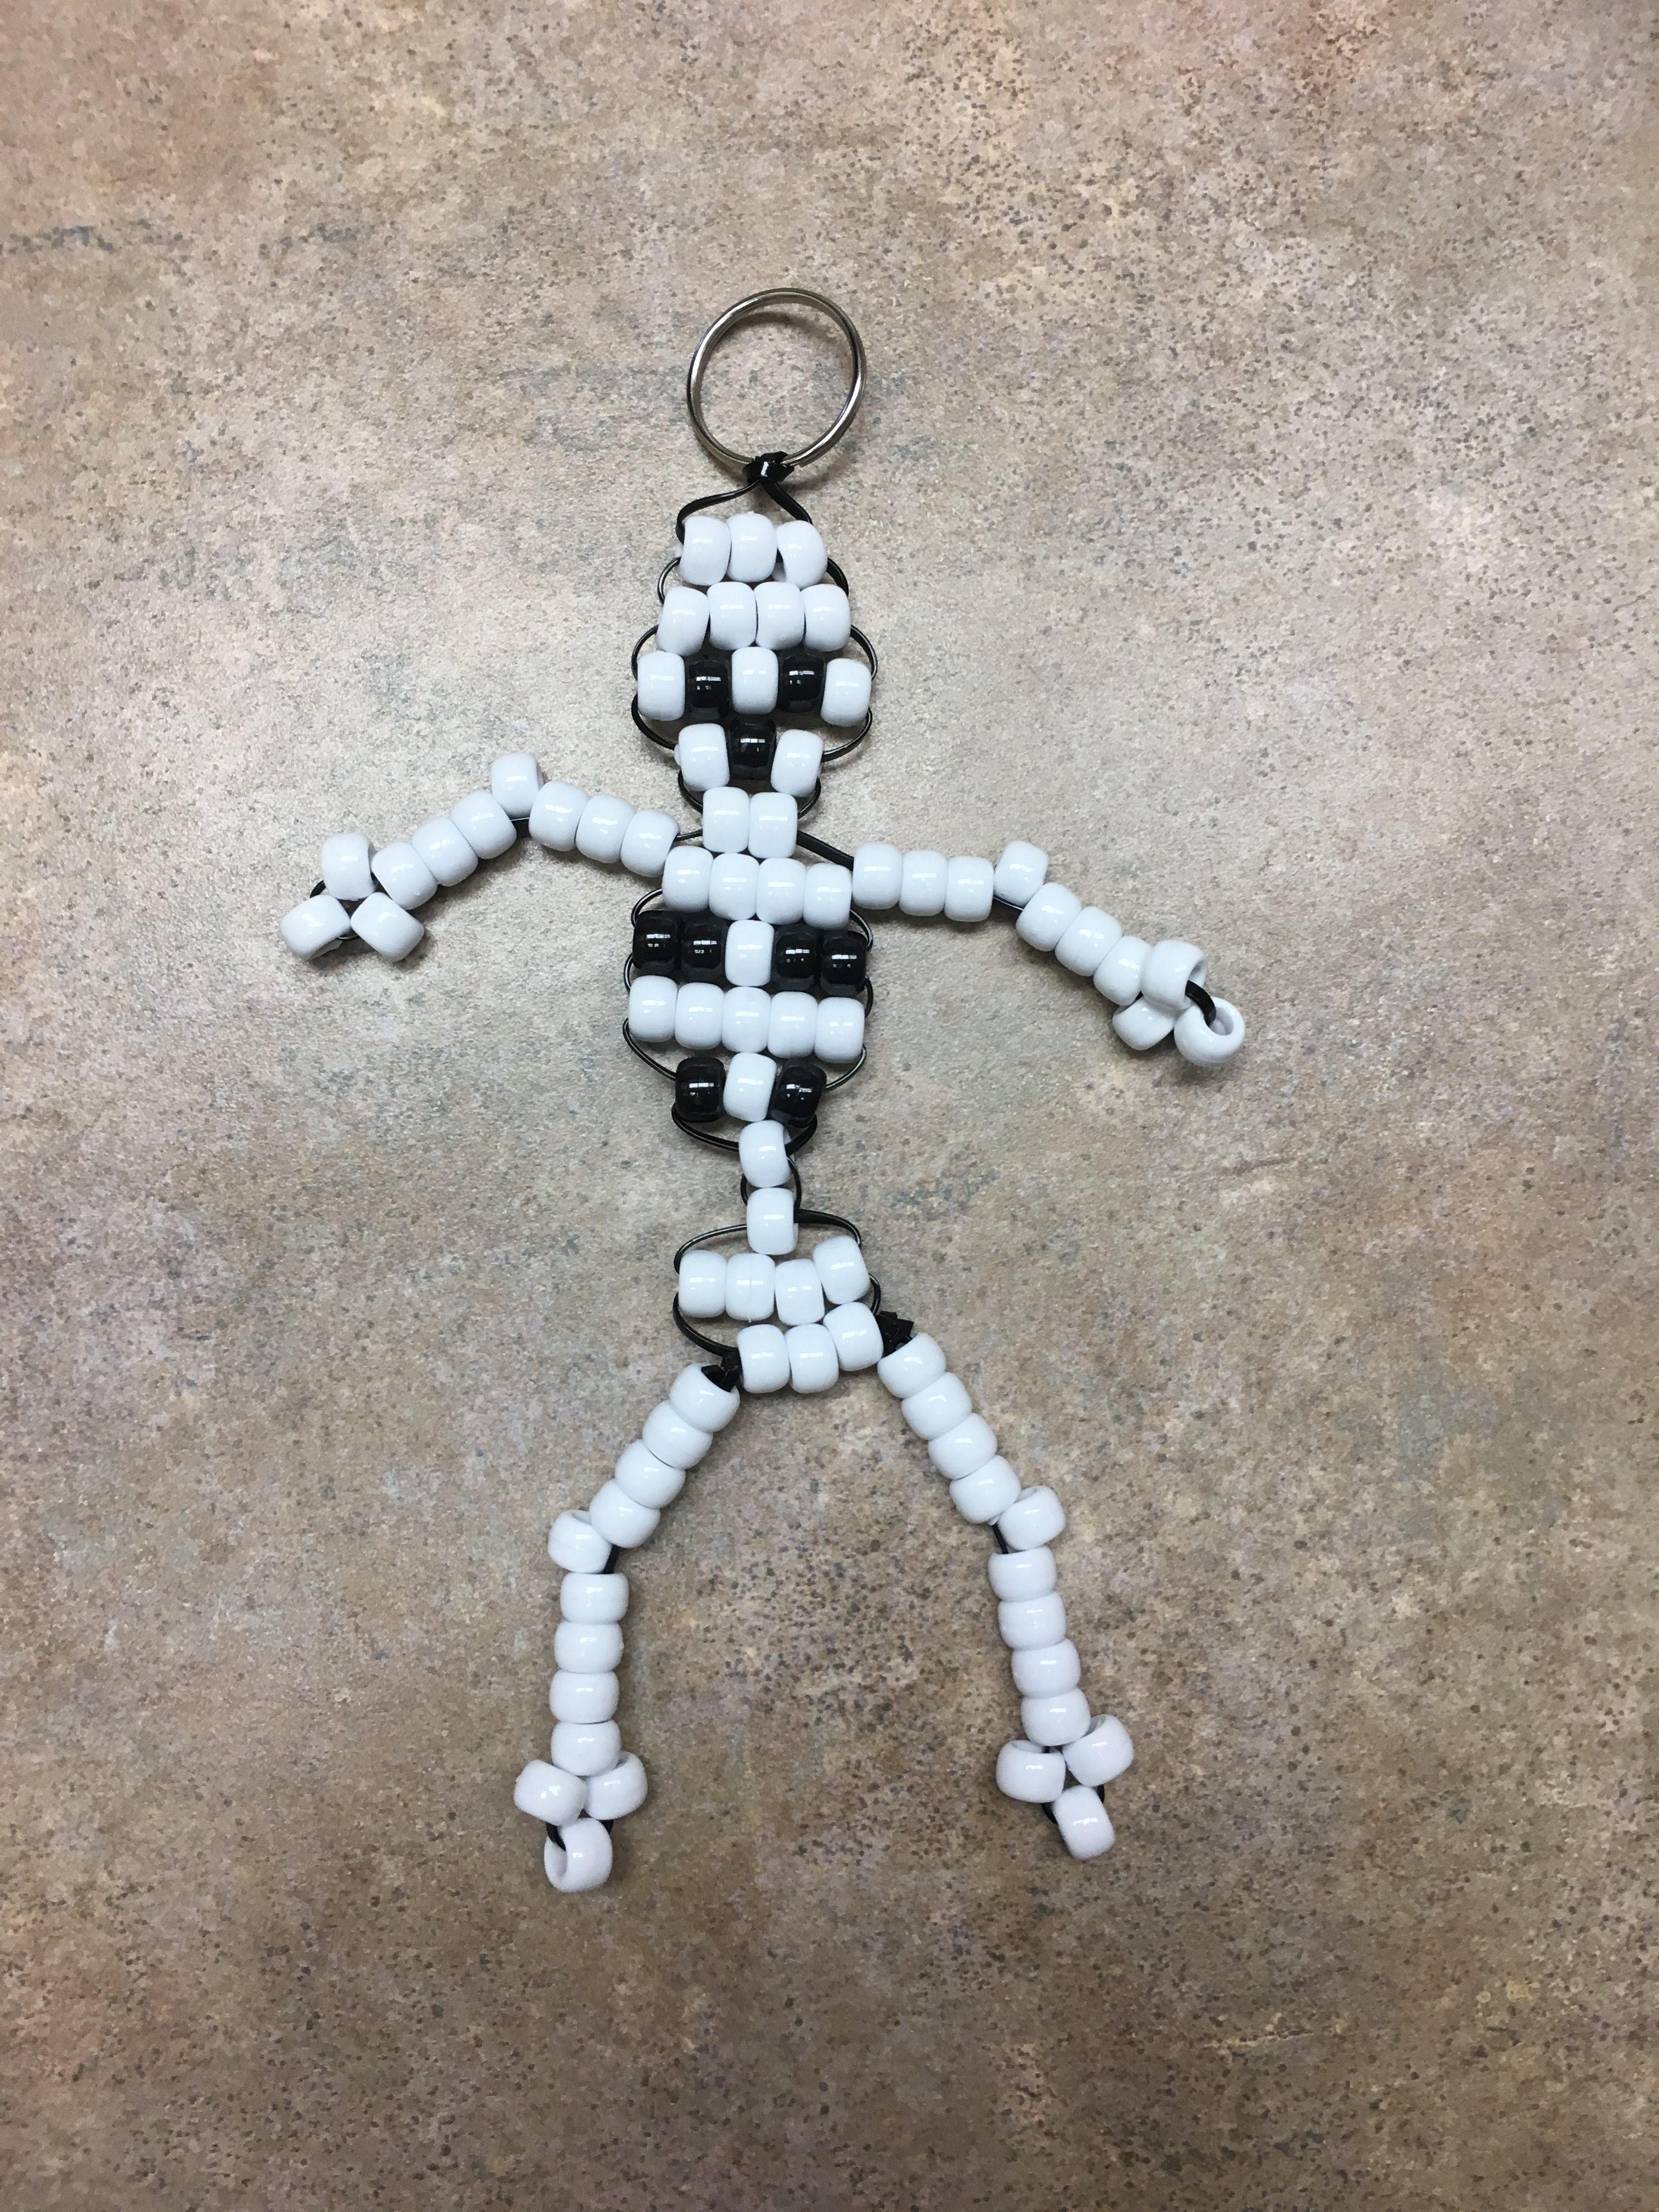
Step 14
- Repeat steps 12 – 13 for the right leg.
- After cutting off the extra cord, you’re finished!