
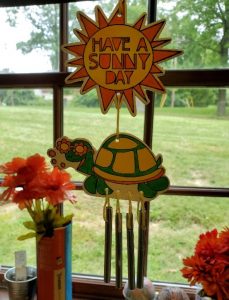
DIY Tutorial: Turtle Wind Chimes

Create your own unique sound with this fun DIY!
The tutorial was created by Sam Rouse, the Adult/Teen Programmer at our Carrico/Fort Thomas Branch. If you have any questions about the tutorial, please email her at SRouse@cc-pl.org.
Supplies Needed
- Wooden shapes from Take & Make kit
- Paint
- String
- Chimes
- Paint brush
- Scissors
Step 1
Decide what colors you want to paint your wooden turtle and sun, then begin painting. You may want to start with the smaller parts such as the words so you can paint over any mistakes you might make.
Step 2
Once you have finished painting both parts of the chime, you are ready to begin measuring and cutting string to attach the chimes to the wooden pieces. You will need one 7 inch piece of string and five, 5 inch pieces of string.
Step 3
Use the longest string to create a hanger for the top shape, the sun, and attach the sun to the turtle. Once you have done that you will use the remaining string to attach the chimes to your wooden pieces.
Tips
- You may want to try to use the side of your brush to paint the very fine lines on certain parts of the chimes.
- Be careful not to put too much paint on your brush, it is very easy to paint over something you may not have wanted to.
More News